(This is a rough draft. If there is interest and I have the time. I’d like to add pictures and my project)
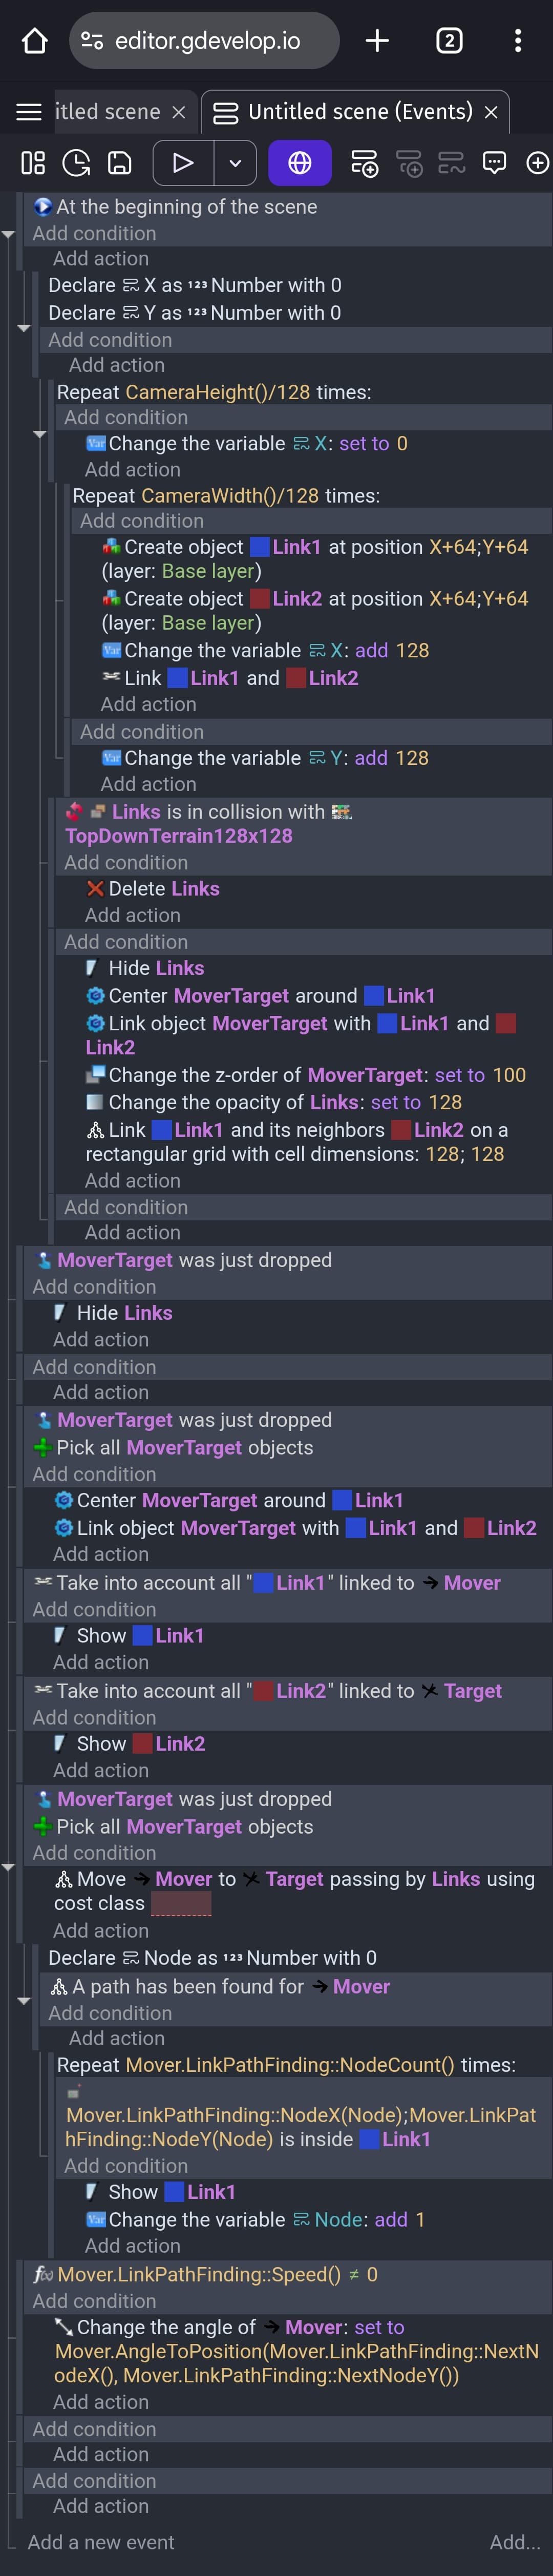
Edit: I decided to add screenshots of the events at the end of this post. I “hid” the images to shrink the post a little.
I wanted to see if I could use the Linked Object Tools with the builtin Tile Map object. I was a bit surprised that I was able to get it to work.
My scene:

Try me: You can drag the Mover and Target objects. The arrow object will move to the target as soon as either the Mover or Target is dropped.
https://gd.games/keith_13579/link-tools-tilemap
The Linked objects Tool behavior.
https://wiki.gdevelop.io/gdevelop5/extensions/link-tools/
A little intro to the Linked Object Tools behavior. The behavior moves an object between linked objects. It’s similar to the Pathfinder but it uses objects. It uses 2 objects because you can’t link instances of the same object together. Instead, you use a visual object like tiles of a road and a 2nd linking object that links the neighboring objects.Tile to Link to Tile and so on.
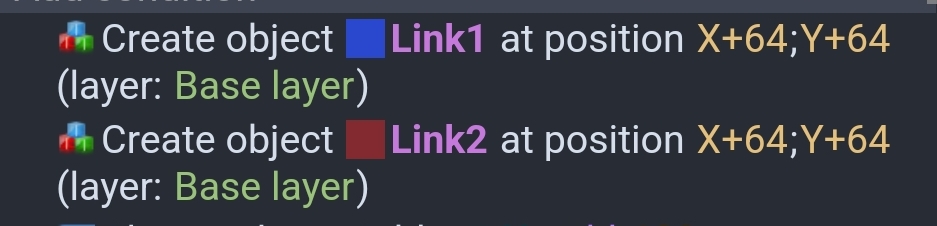
Since the Tile Map is 1 object, you can’t use it directly with the Linked Object Tools behavior. What I did was I created 2 linking objects where there was a road tile on the Tile. Map. I named them Link1 and Link2.
This is just my proof of concept. So, I made it as simple as I could. Instead of scanning the tile map, I decided to take a shortcut. I added a road tile with the collision enabled to a tile map.
I created a grid in the size of the tile map using the Link1 and Link2 objects. I then picked and deleted the objects not in collision with the tile map. This left 2 linking objects in the position of each road tile. I hid both objects so only the tile map was visible.
I then used the Linked Object Tools function to link the linking objects. When I added the linking objects to the scene, I also linked them to each other.
I added a mover object with the Linked Object Tools behavior and a target object. For testing, both objects also have the drag behavior.
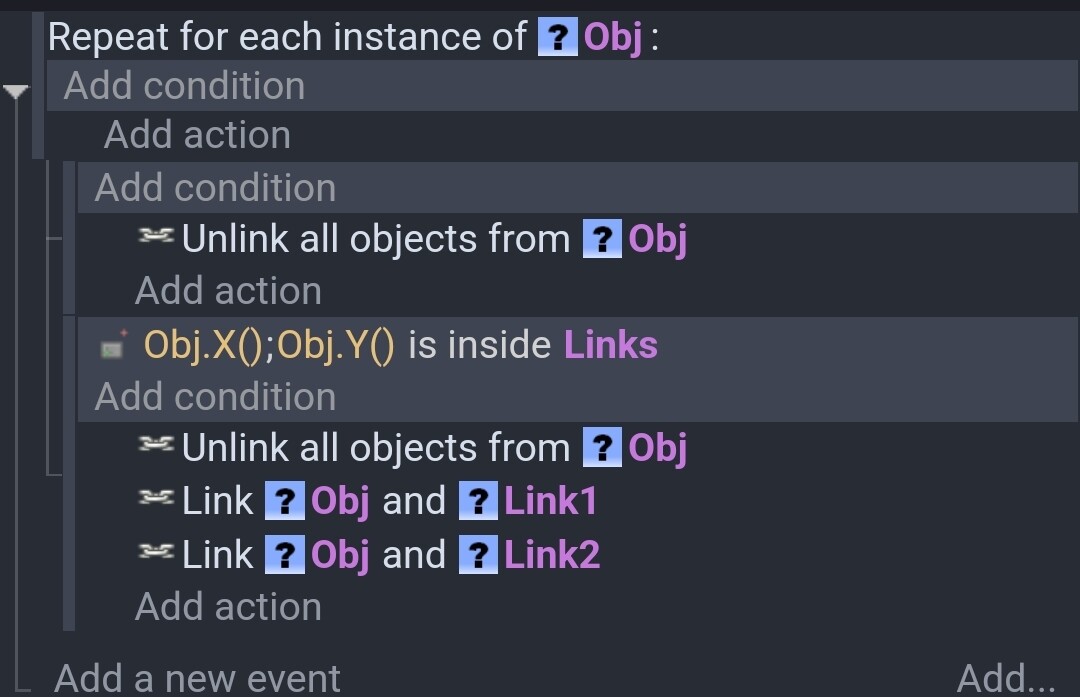
The mover and the target objects get linked to Link1 and Link2 using the object’s center points and the is inside condition.
The Linked Object Tools behavior will then move the mover object to the tile that Target object is linked to.
A more advanced way would be to scan the tile map, create an object at each tile location and then you could set an object variable that identifies what type of surface the tiles represent. That would allow a boat object to only travel on tiles flagged as water and vehicles only on roads.
Because each surface would probably have several different tiles you could either check a list maybe as a structure or give each surface type their own range of tiles. Like the first 10 or 50 tiles are all water tiles.
I hope you enjoyed this intro. I’m sure I skipped steps and left out context. I would like to add more details at a later time.
You can “draw” the path in a similar way that you draw a pathfinder path. You go through the nodes. Instead of drawing lines, you use the node’s X and Y to show or even add objects. Keeping my desire for simplicity, I used one of the linking objects, hiding and showing them as needed.
Anytime the Mover or Target objects are dropped, the links are removed from them and linked to the Link1 and Link2 objects in the new position.
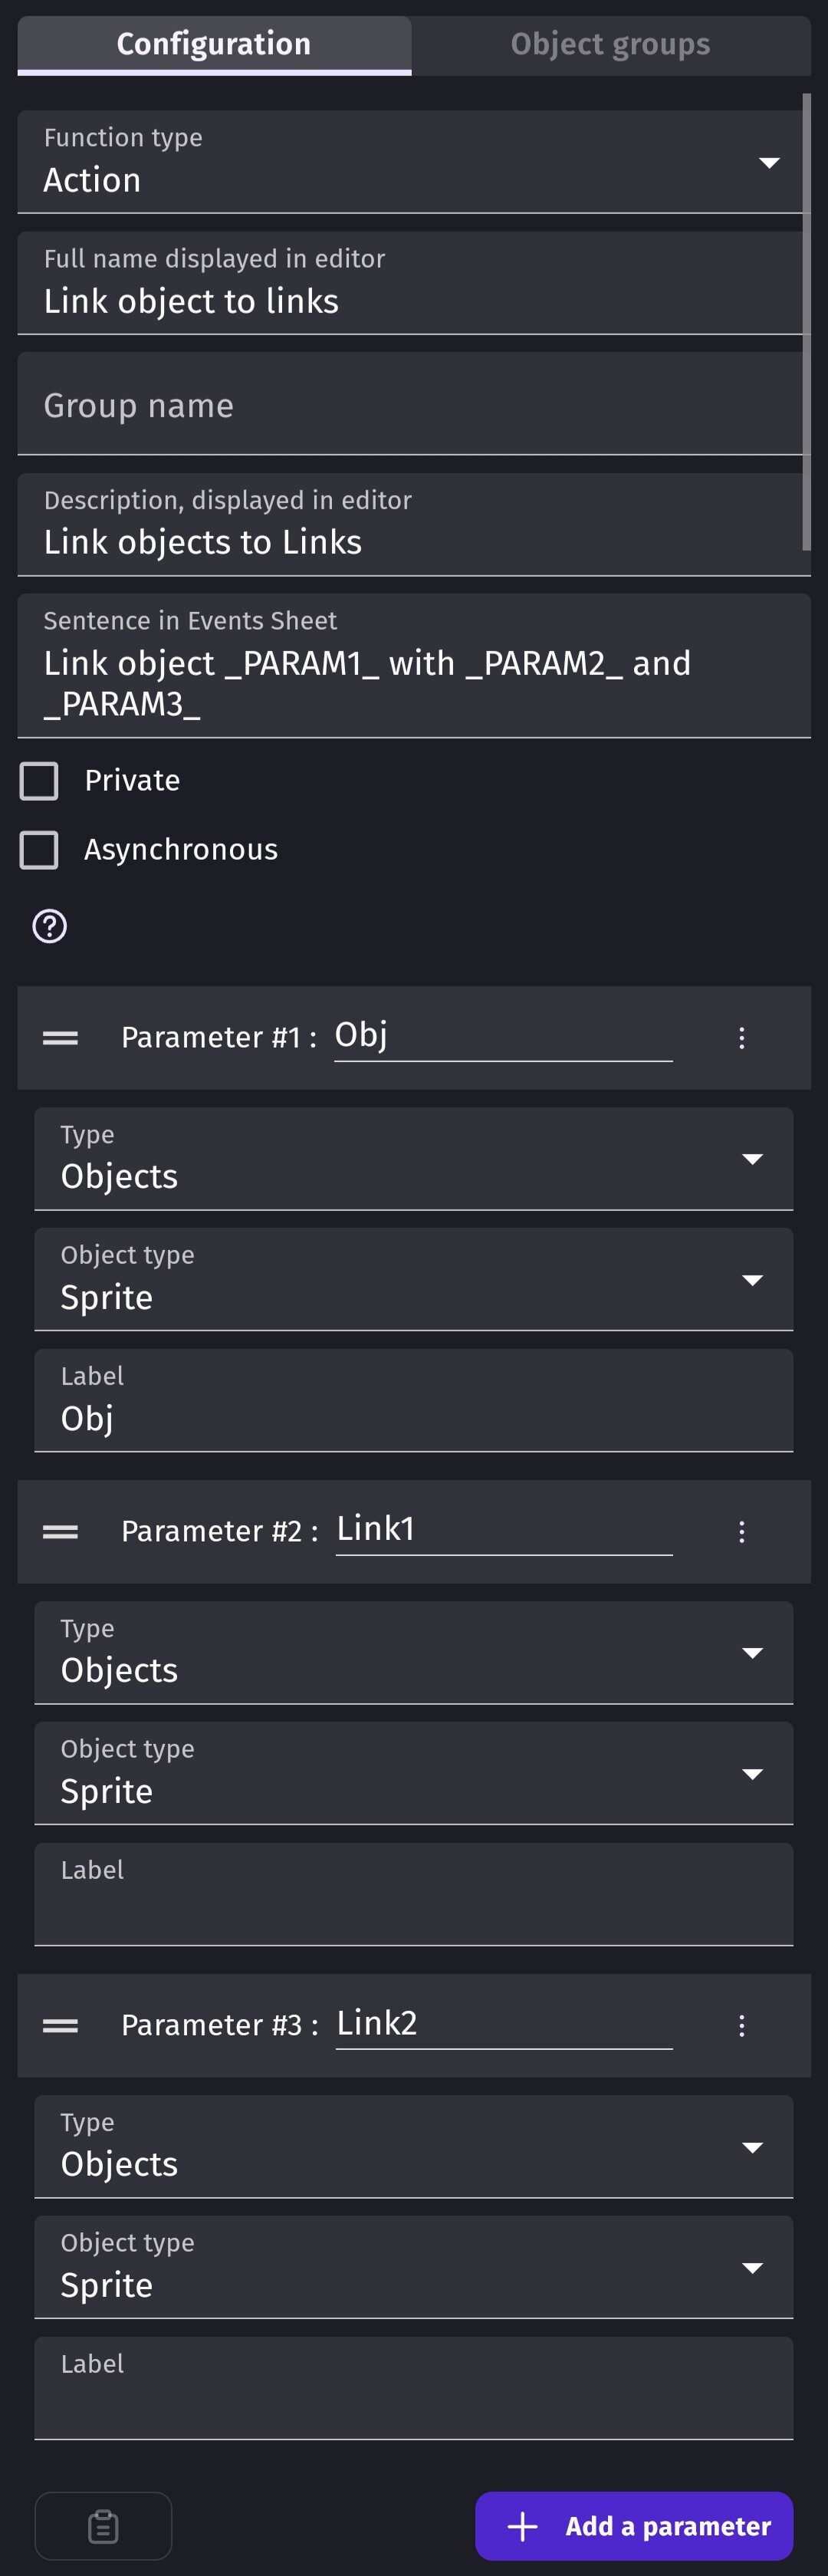
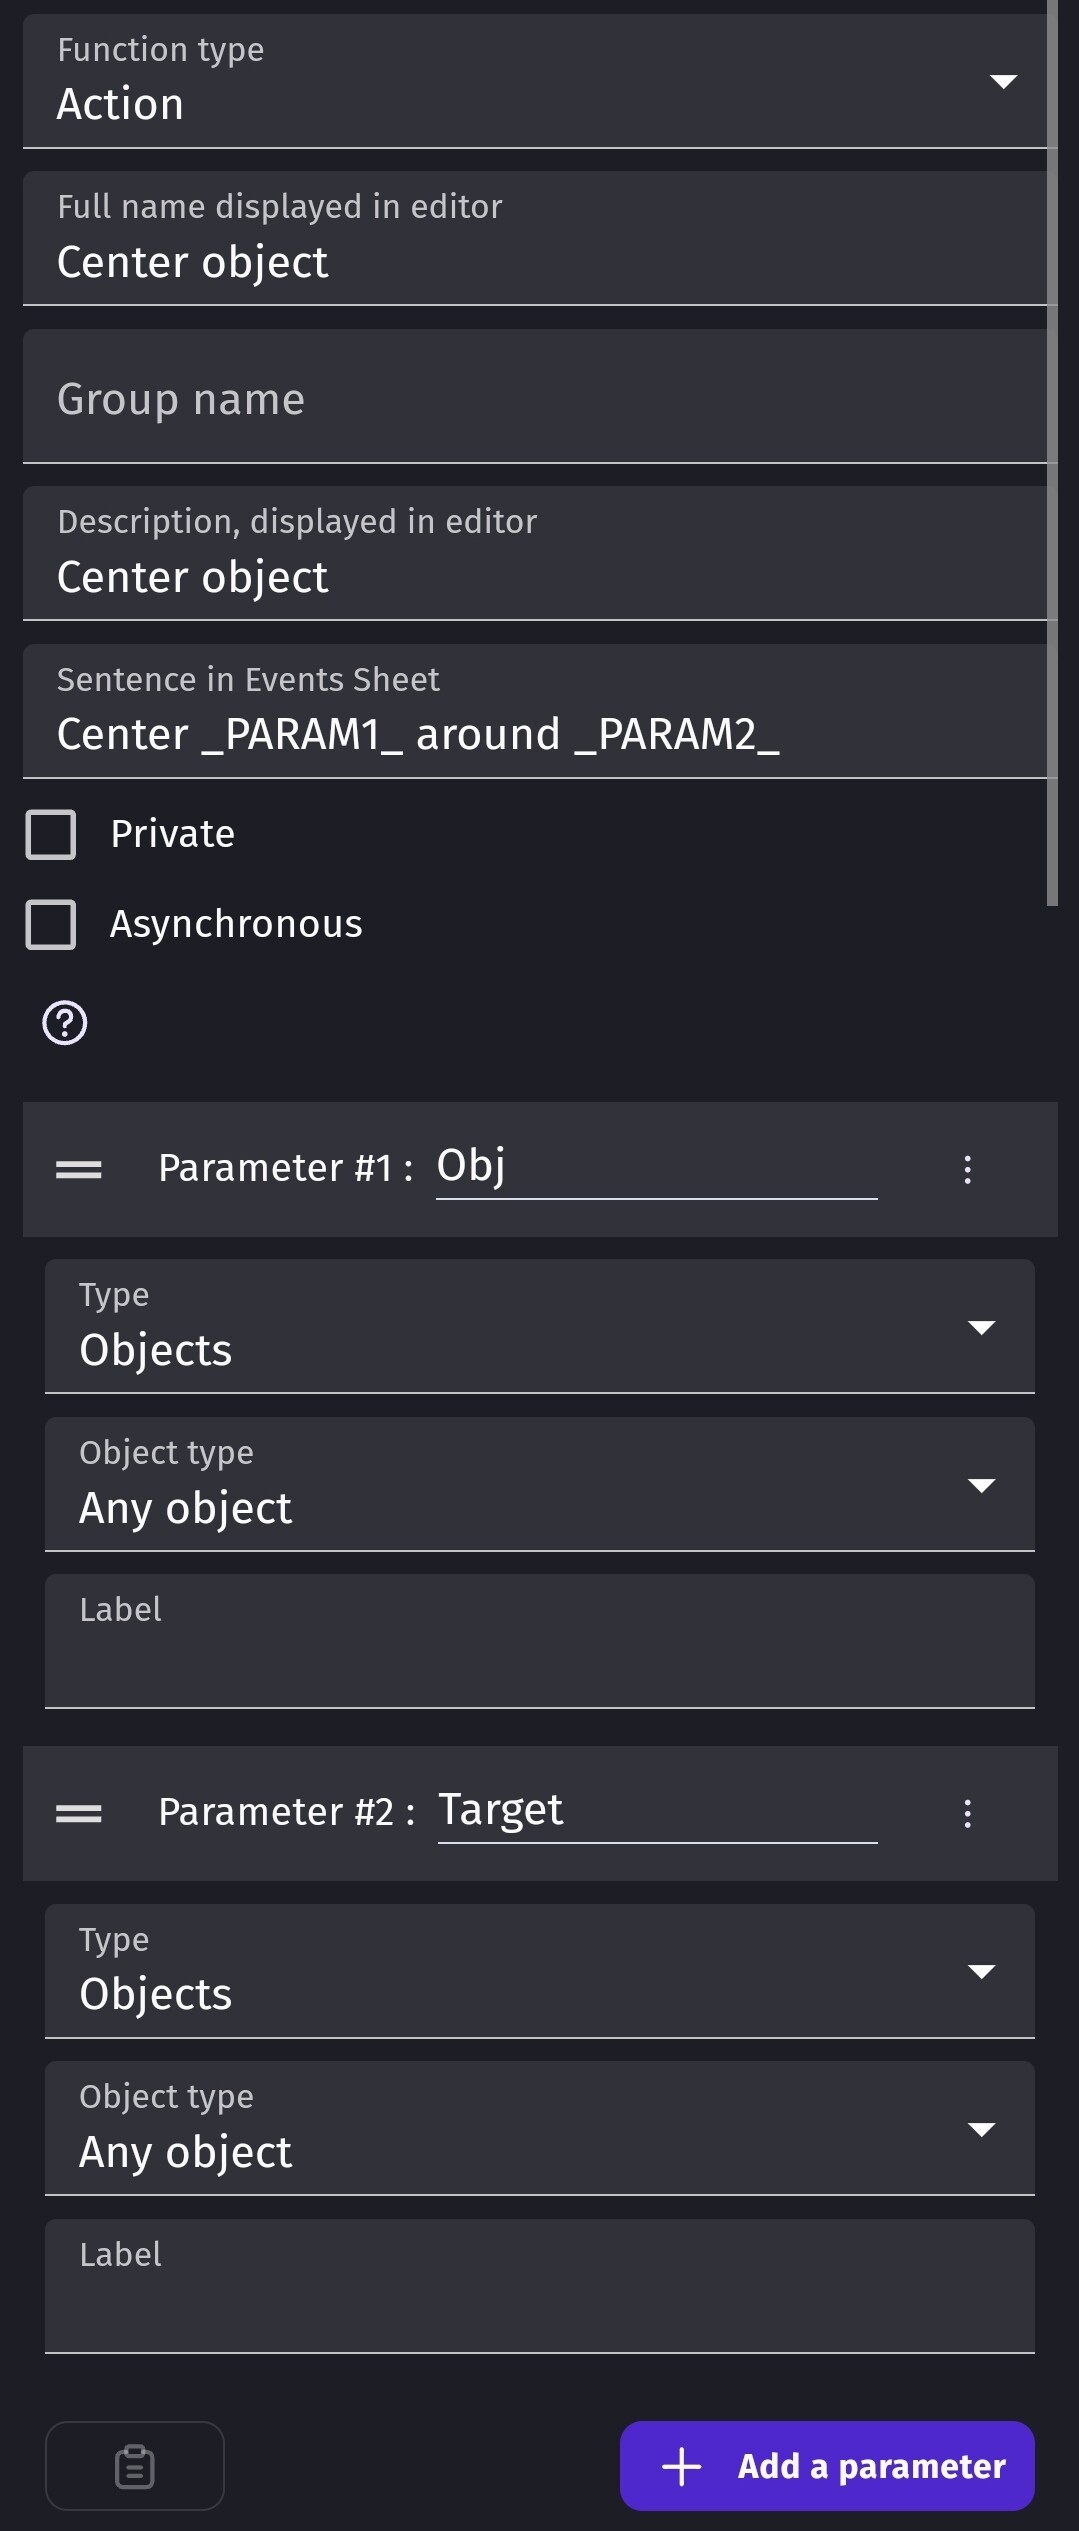
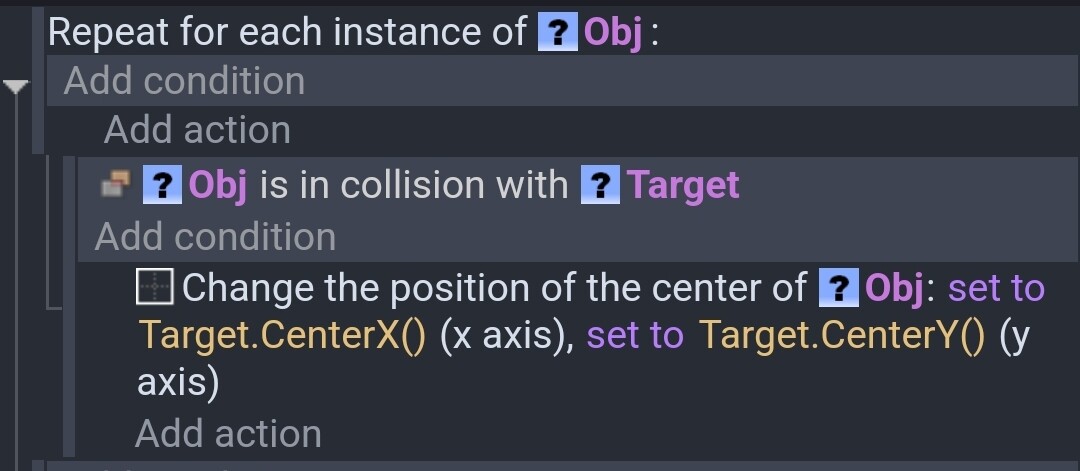
I created an extension to simplify the events a little. One function links the Mover or Target objects. The other function centers the Mover or Target objects within a link tile.
I only used local variables. So, there aren’t any variables to setup.
The tile map size is 128. I used the mapPack_tilesheet_2X.png preset from the store when you add a tile map.
The mover and target objects are 64 x 64.
The Link1 and Link2 objects are 120x120. I made them slightly smaller because when they were the same size, there was an issue with the collision even with the option to ignore adjacent tile collisions.
When I added the linking objects I added 64 to the X and Y just to center the objects within the grid cells.
Looking back. I think I could’ve just used the rotate object option of the Linked Object Tools instead of adding my own events. I didn’t like the way the object rotated. I guess I could’ve just increased the rotation speed.
I don’t like how the object rotates while it’s moving. I’d like the object to pause and turn at each node before continuing.