Hi everyone! Firebase is great, but its free plan is limited. For growing games, you’ll need a better solution.
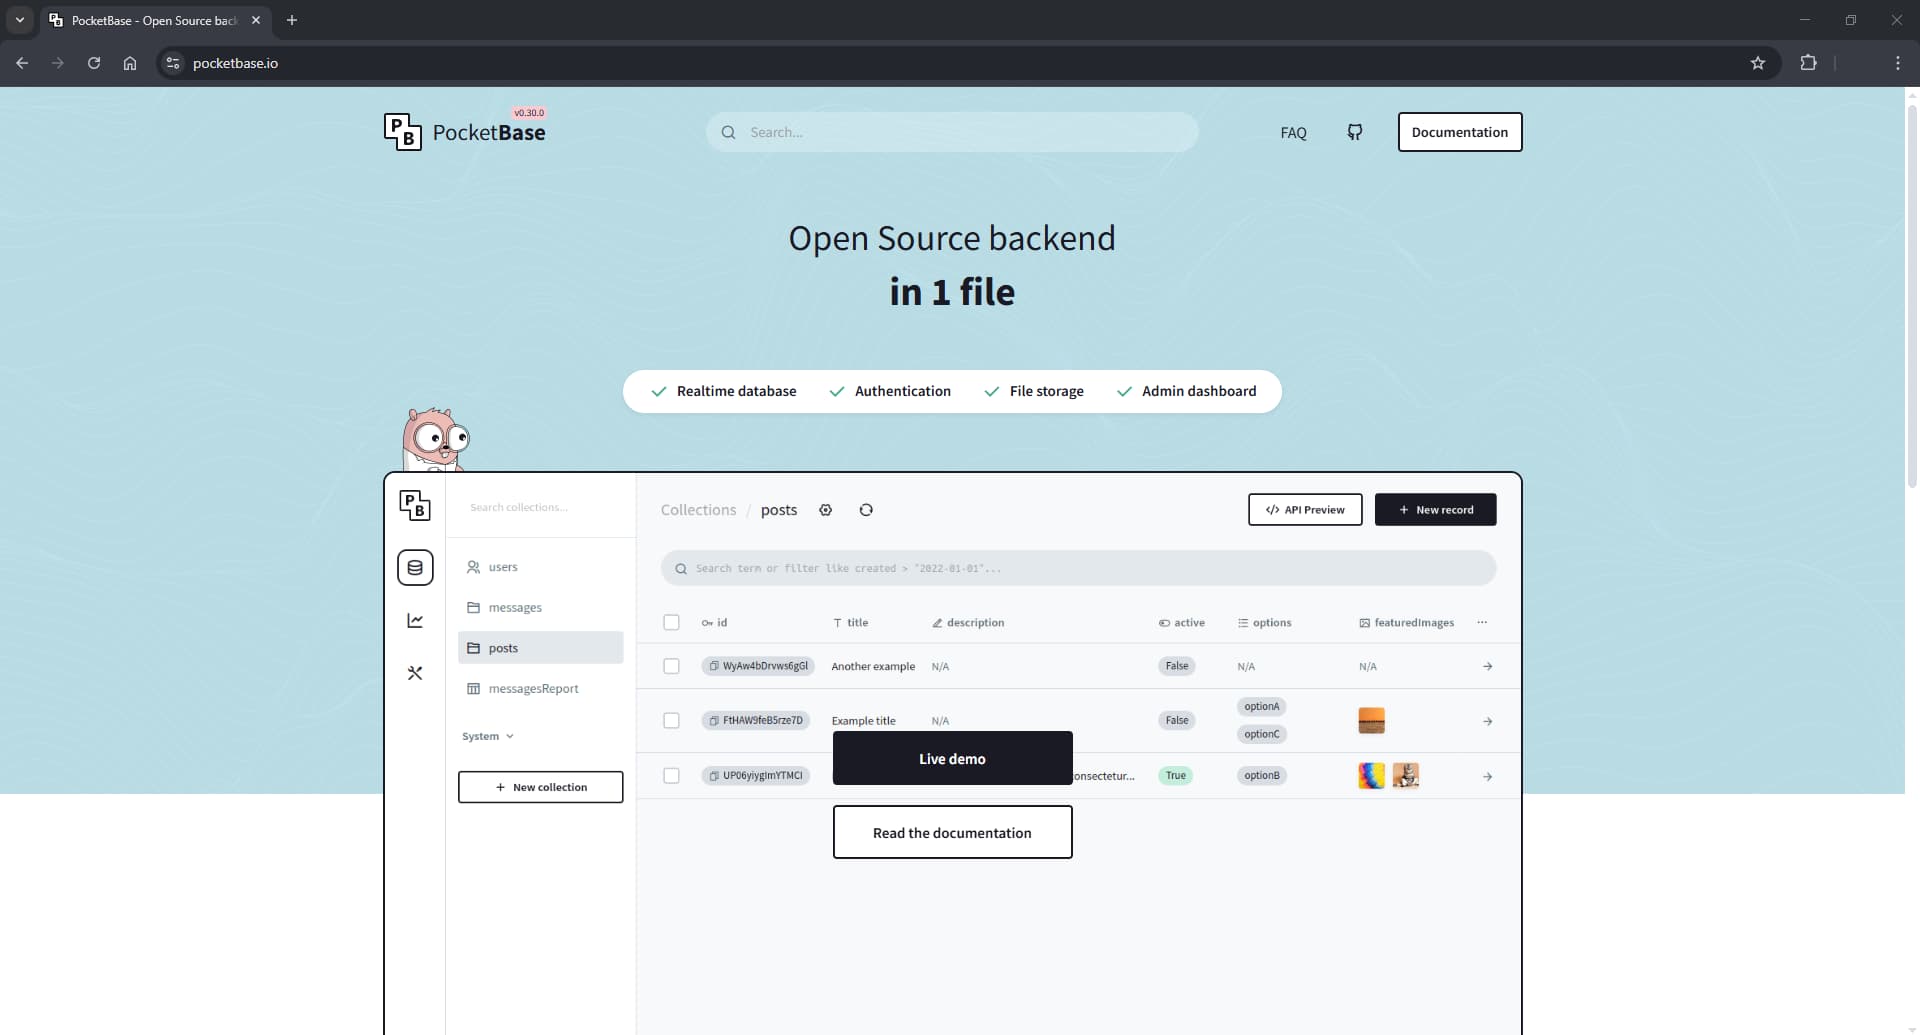
Enter Pocketbase — a self-hosted, open-source, lightweight server in a single file. It includes:
- Realtime database
- Authentication
- File storage
- Admin dashboard
Pocketbase works on both Windows and Linux.
Ready to try it? (Windows)
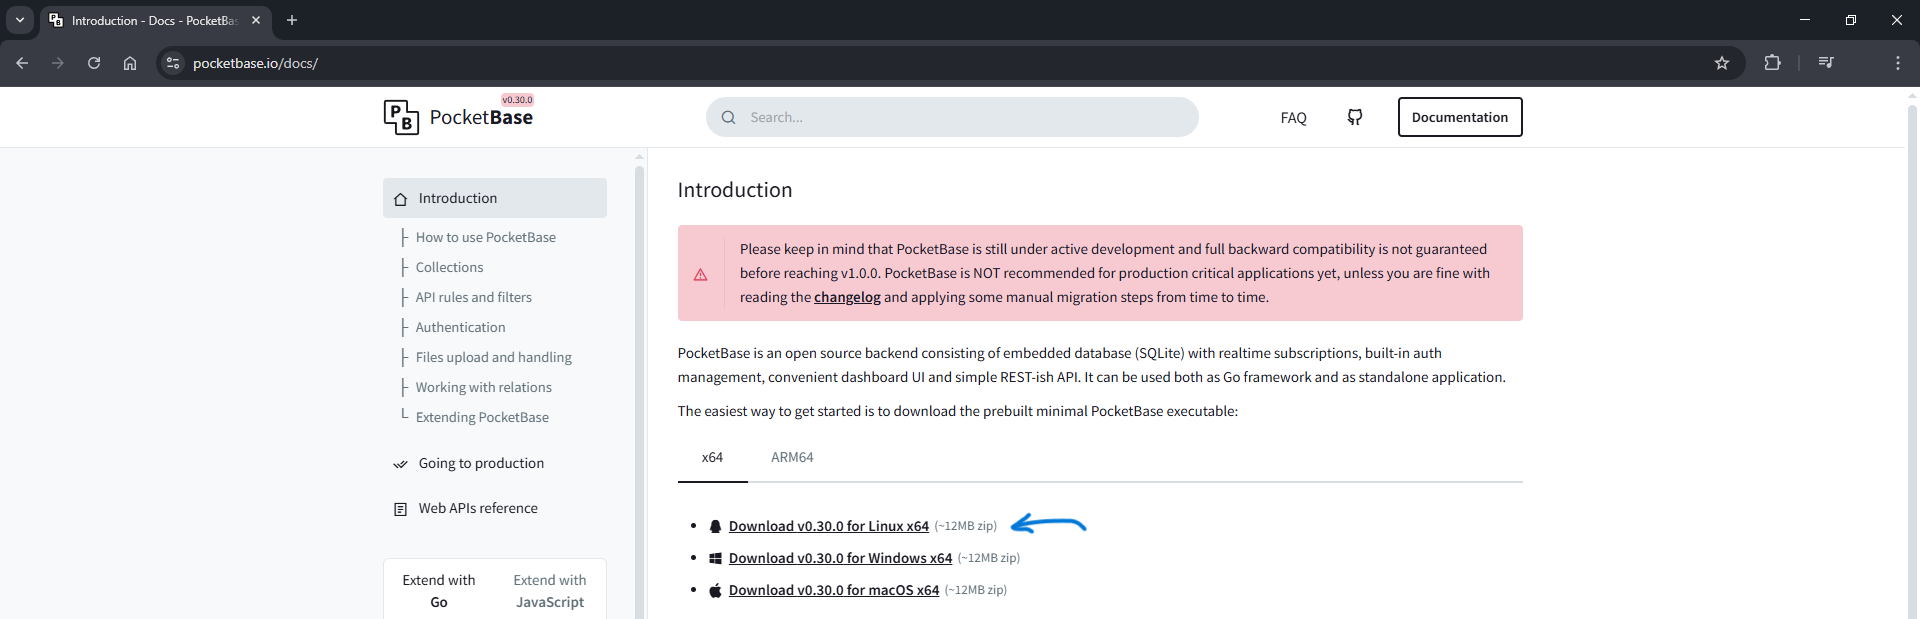
1: Go to the official Pocketbase website and download it from there https://pocketbase.io
2: Go to file explorer, make new folder and call it what you like it
3: Download the windows version and put the zip file inside that folder

4: Extract it inside the folder and afterwards delete that zip file only
5: Go to the file path and type in CMD and hit enter
( File path is the search bar, that look like this. This PC > Server Disk (E:) > Pocketbase )

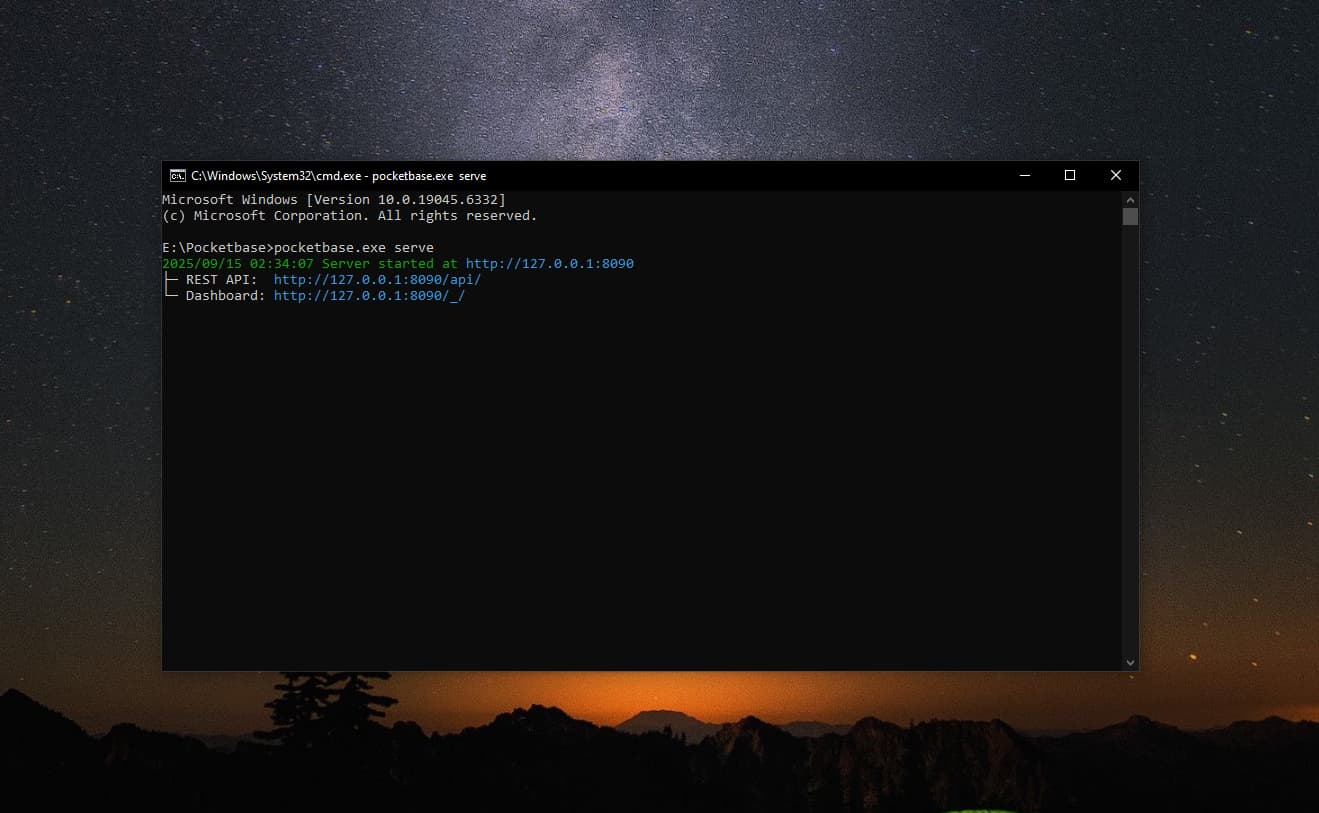
6: Type in
pocketbase.exe serve
and hit enter
![]() (You will see this CMD open and make sure it stays open while we’ll goin with this process)
(You will see this CMD open and make sure it stays open while we’ll goin with this process)![]()
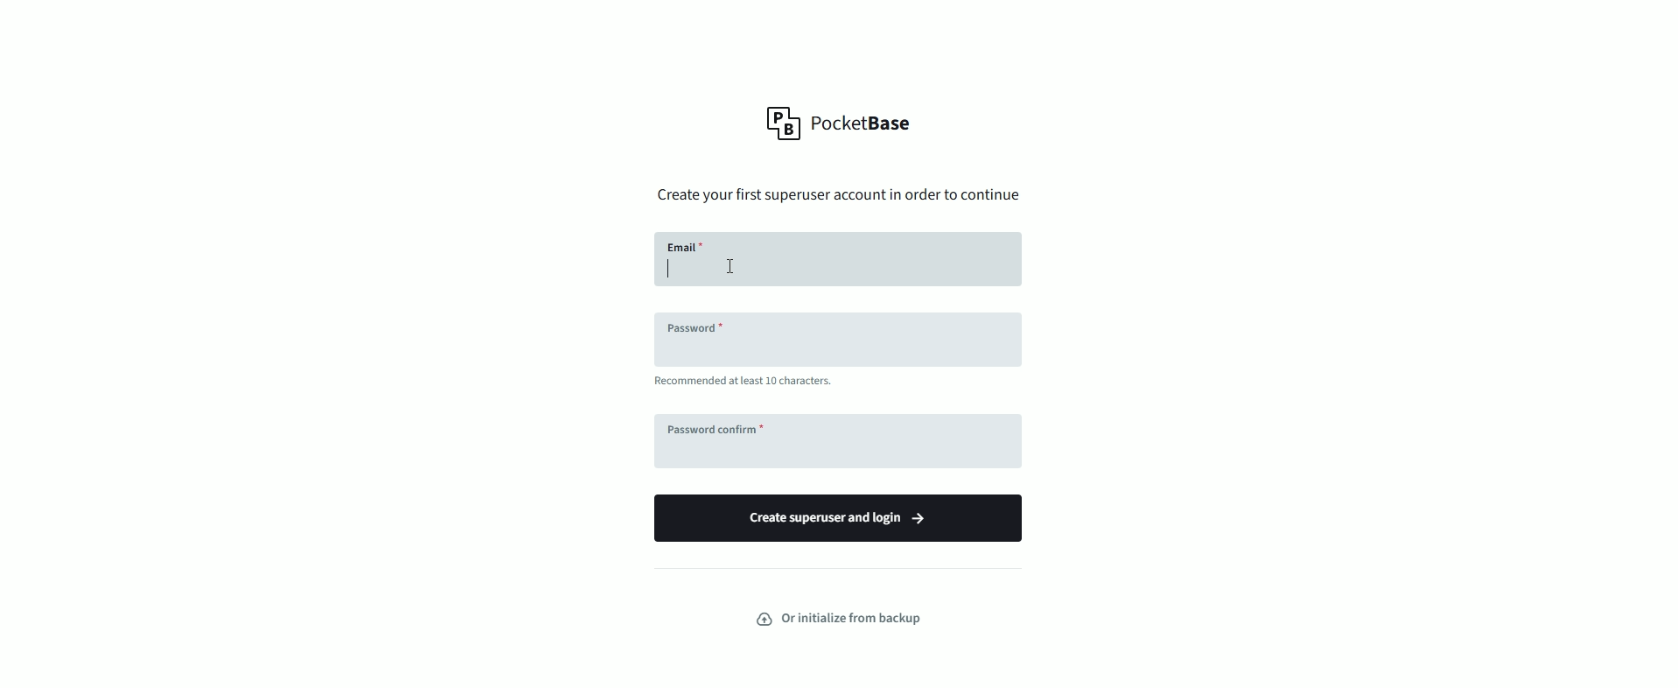
7: You’ll be taken to a new browser page asking for your email and password. Use an email you can access easily, so you can recover your server if you forget the password
8: Look around your server and see how it looks ![]()

That's it for the windows version let's move to Linux version
Note: I used a Chromebook to install Pocketbase, so some steps may differ on other Linux systems or operating systems
1: Open Settings → Advanced → Developers
2: Turn on Linux development environment
3: Wait for it to install; a terminal will open automatically
Okay now we get to installing Pocketbase here
1: Make a new folder and call it whatever you like
2: Go to the official Pocketbase website and download it from there https://pocketbase.io
3: Download the Linux version and put the zip file inside that folder
4: Open the Linux terminal and type in
cd ~/the folder you made it’s name
5: Now we extract the file we downloaded type in
Note: replace the pocketbase_0.30.2_linux_amd64.zip to whatever version Pocketbase is on
sudo apt install unzip -y
unzip pocketbase_0.30.2_linux_amd64.zip
7: Run pocketbase server now type in
./pocketbase serve
8: You’ll be taken to a new browser page asking for your email and password. Use an email you can access easily, so you can recover your server if you forget the password.
9: Look around your server and see how it looks ![]()
    Do you want to make the server public so anyone can access it outside your Wi-Fi?
            Again there's 2 versions one for Windows and the other Linux
Let’s start with Windows
1: You need a domain (or multiple domains) and add them to Cloudflare.
2: Download Cloudflare through the terminal while running as administrator. Type in
winget install --id Cloudflare.cloudflared
3: Log in to Cloudflare type in
cloudflared tunnel login
4: A browser window will open — log in to your Cloudflare account, and choose the domain you want to use.
This creates a certificate that allows your PC to connect to your Cloudflare account.
5: Create a Cloudflared tunnel type in
Note: replace the mytunnel to whatever name you like, also copy that tunnel id and write it down somewhere
cloudflared tunnel create mytunnel
6: Download Notepad++ Downloads | Notepad++
7: Open Notepad++ — we’ll configure the tunnel by creating a config file
8: Inside it, paste this in
tunnel: YOUR-TUNNEL-ID
credentials-file: C:\Users\YourName\.cloudflared\YOUR-TUNNEL-ID.json

ingress:
  - hostname: exampledomain.com
    service: http://127.0.0.1:8090
  - service: http_status:404
See some examples below showing where to find the details
tunnel id looks something like this
tunnel: 12345678-90fz-128b-h91n-v31gal0blo1m
Hostname: change it to whatever your domain is
like this exampledomain.com and not https://exampledomain.com
Service: If you plan to run more than one server, change the ports in each config file (for example, 8090, 8085, or 8080) to avoid conflicts.
9: Save the file as config.yml in C:\Users\YourName\.cloudflared\. If you plan to run more than one server, name the files config-1.yml, config-2.yml, etc., to avoid conflicts and errors.
10: Route DNS type in the terminal
Note: replace mytunnel with the name you gave the tunnel, and use the same domain (or subdomain) that’s listed in your config file
cloudflared tunnel route dns mytunnelname exampledomain.com
11: Run the server locally
pocketbase serve --http 127.0.0.1:8090
12: Then run the tunnel
cloudflared tunnel run mytunnelname
13: Go to the browser and put your domain in, Congrats your server is public ![]()
![]()
Note: Do not close any terminals while it’s running, else the server will stop or won’t be accessible
If you want, you can close the terminals and restart them later. Here’s how to turn it back on
1: Run the server locally
pocketbase serve --http 127.0.0.1:8090
2: Then run the tunnel
cloudflared tunnel run mytunnelname
Here's the Linux version to make your server public
1: You need a domain (or multiple domains) and add them to Cloudflare.
2: Open the linux terminal and type in
wget https://github.com/cloudflare/cloudflared/releases/latest/download/cloudflared-linux-amd64.deb
3: Extract that cloudflare file we downloaded type in
sudo apt install unzip -y
unzip cloudflared-linux-amd64.deb
4: Log in to Cloudflare type in
cloudflared tunnel login
5: A browser window will open — log in to your Cloudflare account, and choose the domain you want to use.
This creates a certificate that allows your PC to connect to your Cloudflare account.
6: Create a Cloudflared tunnel type in
Note: replace the mytunnel to whatever name you like, also copy that tunnel id and write it down somewhere
cloudflared tunnel create mytunnel
7: Create a config.yml file. If you plan to run more than one server, name the files config-1.yml, config-2.yml, etc., to avoid conflicts and errors. type in
cat > /home/Yourname/.cloudflared/config-1.yml <<'EOL'
tunnel: 12345678-90fz-128b-h91n-v31gal0blo1m
credentials-file: /home/Yourname/.cloudflared/12345678-90fz-128b-h91n-v31gal0blo1m.json

ingress:
  - hostname: exampledomain.com
    service: http://127.0.0.1:8090
  - service: http_status:404
EOL
See some examples below showing where to find the details
tunnel id looks something like this
tunnel: 12345678-90fz-128b-h91n-v31gal0blo1m
Hostname: change it to whatever your domain is
like this exampledomain.com and not https://exampledomain.com
Service: If you plan to run more than one server, change the ports in each config file (for example, 8090, 8085, or 8080) to avoid conflicts.
8: Route DNS type in the terminal
Note: replace mytunnel with the name you gave the tunnel, and use the same domain (or subdomain) that’s listed in your config file
cloudflared tunnel route dns mytunnelname exampledomain.com
9: Go to the folder you made and type in
Cd ~/the folder you made it’s name
10: Run the server locally
./pocketbase serve --http 127.0.0.1:8090
11: Then run the tunnel
cloudflared tunnel run mytunnelname
If you want, you can close the terminals and restart them later. Here’s how to turn it back on
1: Run the server locally
pocketbase serve --http 127.0.0.1:8090
2: Then run the tunnel
cloudflared tunnel run mytunnelname
Your server (or servers) are now live and publicly accessible
Get the Pocketbase extension: Go to https://github.com/GDevelopApp/GDevelop-extensions/issues/1862 to check the example project