Easiest way to make bitmap font which you can use in gdevelop is by converting it from .TTF .OTF .WOFF font file
So let’s start with that
But for me real gold here is ability to create your own fancy font like one you see below

1st for sake of argument let’s learn how to even add bitmap font to your project
Add bitmap font to your project
Click to expand
Go to scene editor and Add a new object
Then select Bitmap text
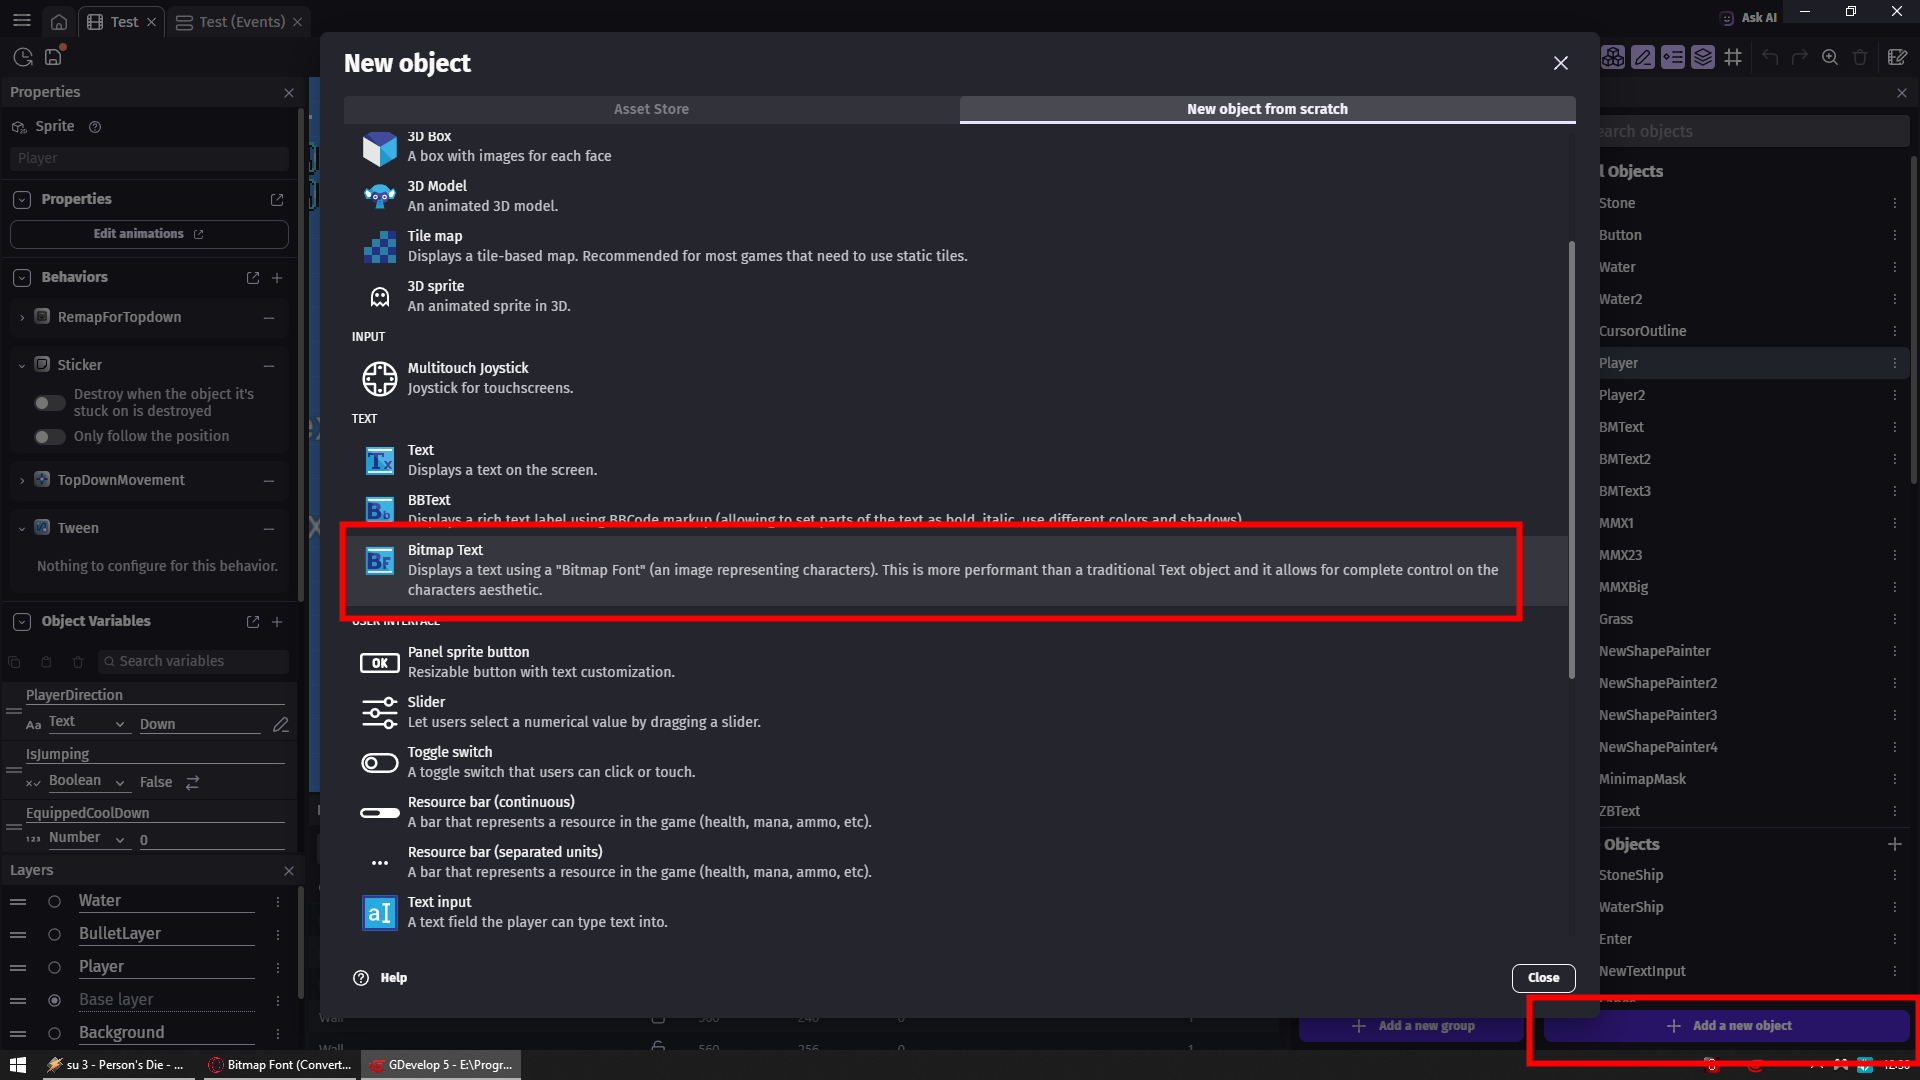
Next
RED
Click on Choose a file button in Bitmap Font section and here select .FNT file
YELLOW
Click on Choose a file button in Bitmap Atlas section and here select .PNG file
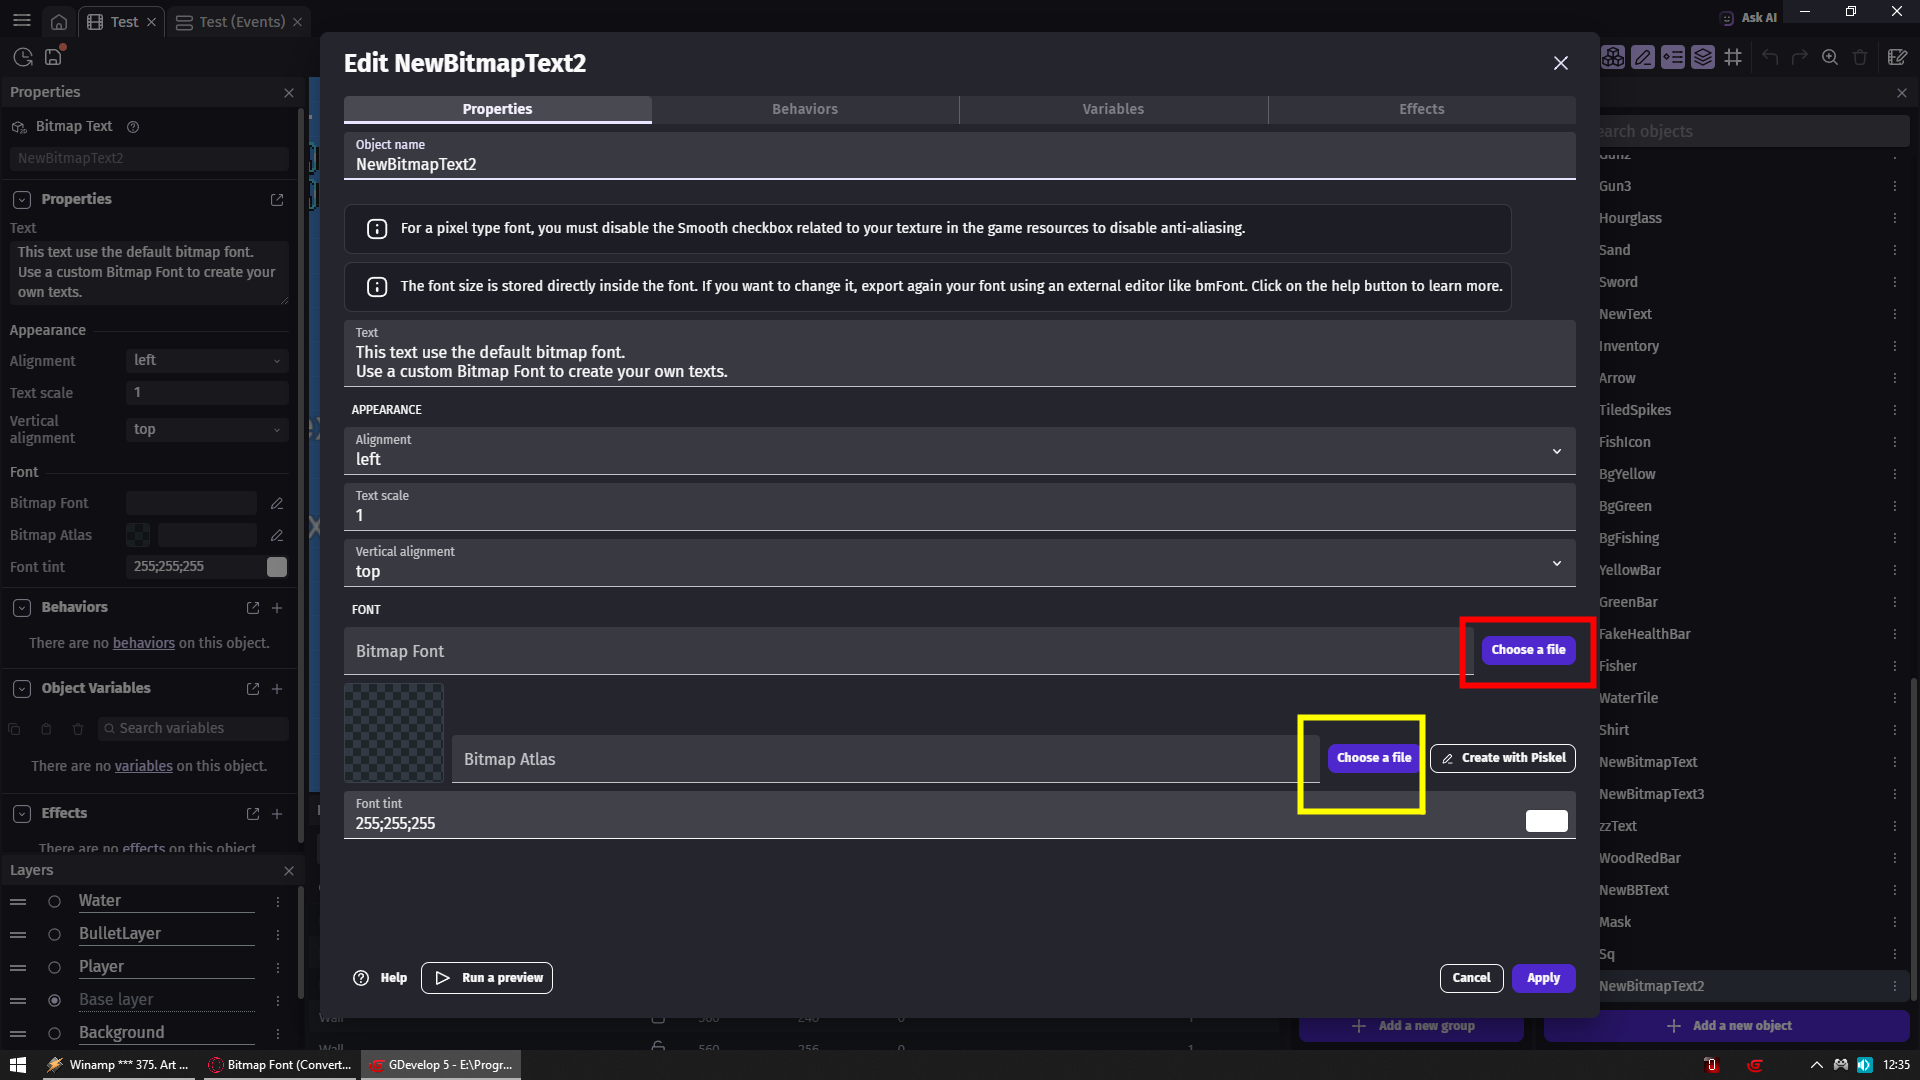
And we are pretty much set here
Convert .TTF / .OTF / .WOFF font to bitmap font
Click to expand
Things you gonna need
SnowB site https://snowb.org/
TTF font file Google Search
I go with TTF cause its easiest to find
Let’s open SnowB site https://snowb.org/
Here all you need to do is
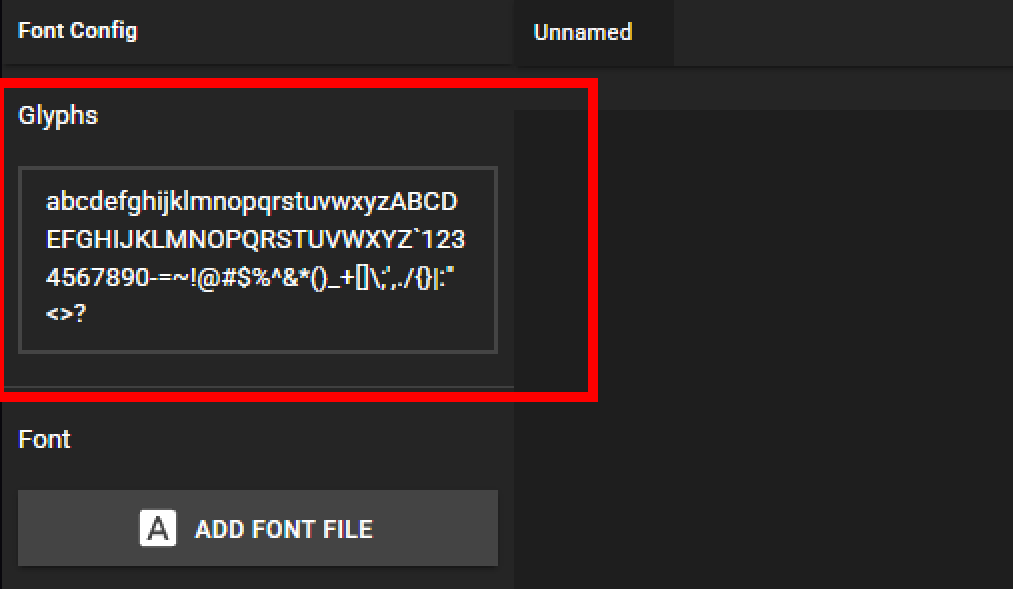
0 - ON LEFT In Glyphs box delete everything and paste this
(There is space on end and you also need it)
abcdefghijklmnopqrstuvwxyz
ABCDEFGHIJKLMNOPQRSTUVWXYZ
`1234567890-=~!@#$%^&*()_+
[]\;',./{}|:"<>?
If you look at it and your keyboard then you have
1st row with a to z
2nd row A to Z (so all caps)
3rd row (LOOK AT YOUR KEYBOARD) ` is one left from 1 and above tab and whole line is up to = then same keys in same order but with shift so from ~ to +
4th row are keys close to enter 1st without shift then with shift
And this covers all keys you have on keyboard
I always buy keyboards with such layout where enter and backSPACE keys are equal size so for me it looks like this
With backSLASH key being here
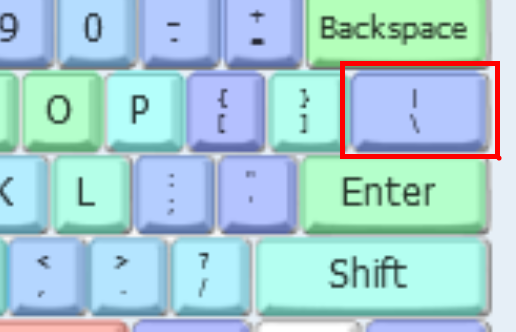
I forgot this backSLASH key can be in different places
Where at the same time different language keyboard layouts can have these special characters key in VERY different layout
So what i wrote above about characters order can be confusing for some of you
1 - ON LEFT Click Add Font File
I gonna go with 8bitOperatorPlus8-Regular.ttf
8 Bit Operator Font | 1001 Free Fonts
2 - ON LEFT Change Font Size to 10 and increase it until it stop looking deformed
3 - ON LEFT Change Sharp from 80% to 100%
4 - ON RIGHT Change Color from Black to White (if you leave it at black you won’t be able to change color of your font in gdevelop)
(Remember these are optional and you don’t need to do them)
(OPTIONAL) Adding Outline
4A - ON RIGHT Click on Stroke to set it to On
4B - Line Join set to MITER
4C - Color set to different than color of Fill
(OPTIONAL) Adding Drop Shadow
4D - ON RIGHT click on Shadow to set it to On
4E - Adjust it to your needs or leave as it is (i always set blur to 0)
5 - Click Export
6 - Rename your font and Click Save

Now let’s extract zip file we just downloaded
We should get 2 files both with name of font we just made one ends with .png other with .fnt
- Put them both inside assets folder of your project
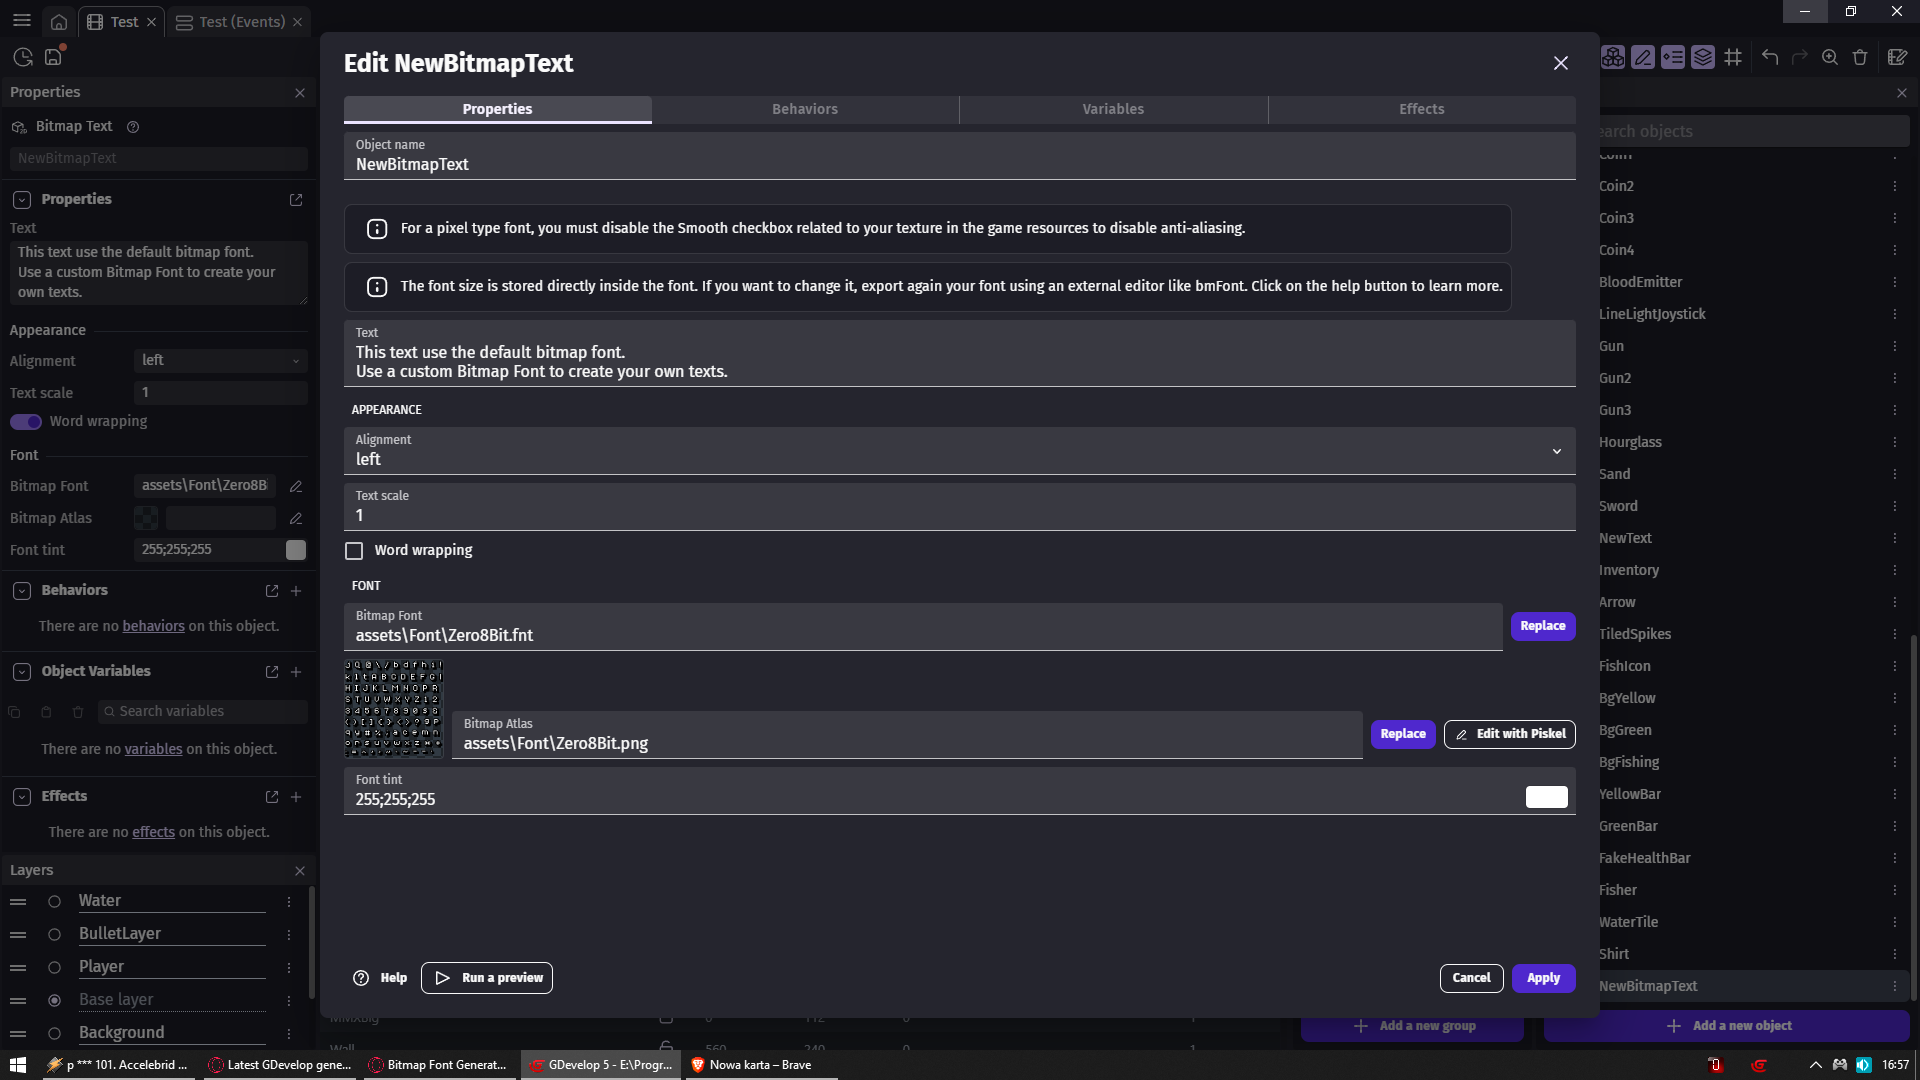
- In gdevelop we add new Bitmap text object
I always un check Word wrapping because i want to have control over when new line is made
If you don’t then idea is your bitmap text object in scene editor width (how long it is)
Will determine when new line is made (like when text is longer than width of your bitmap text object)
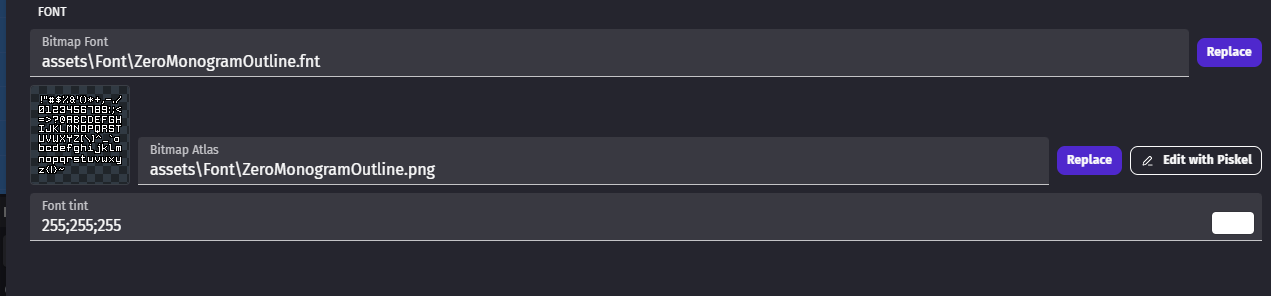
You should end up with
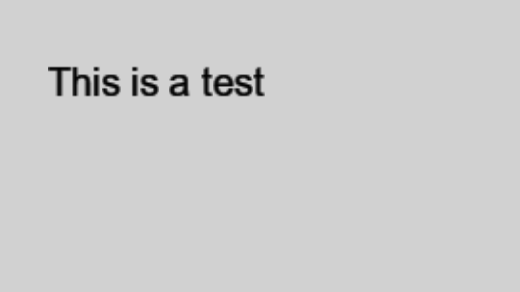
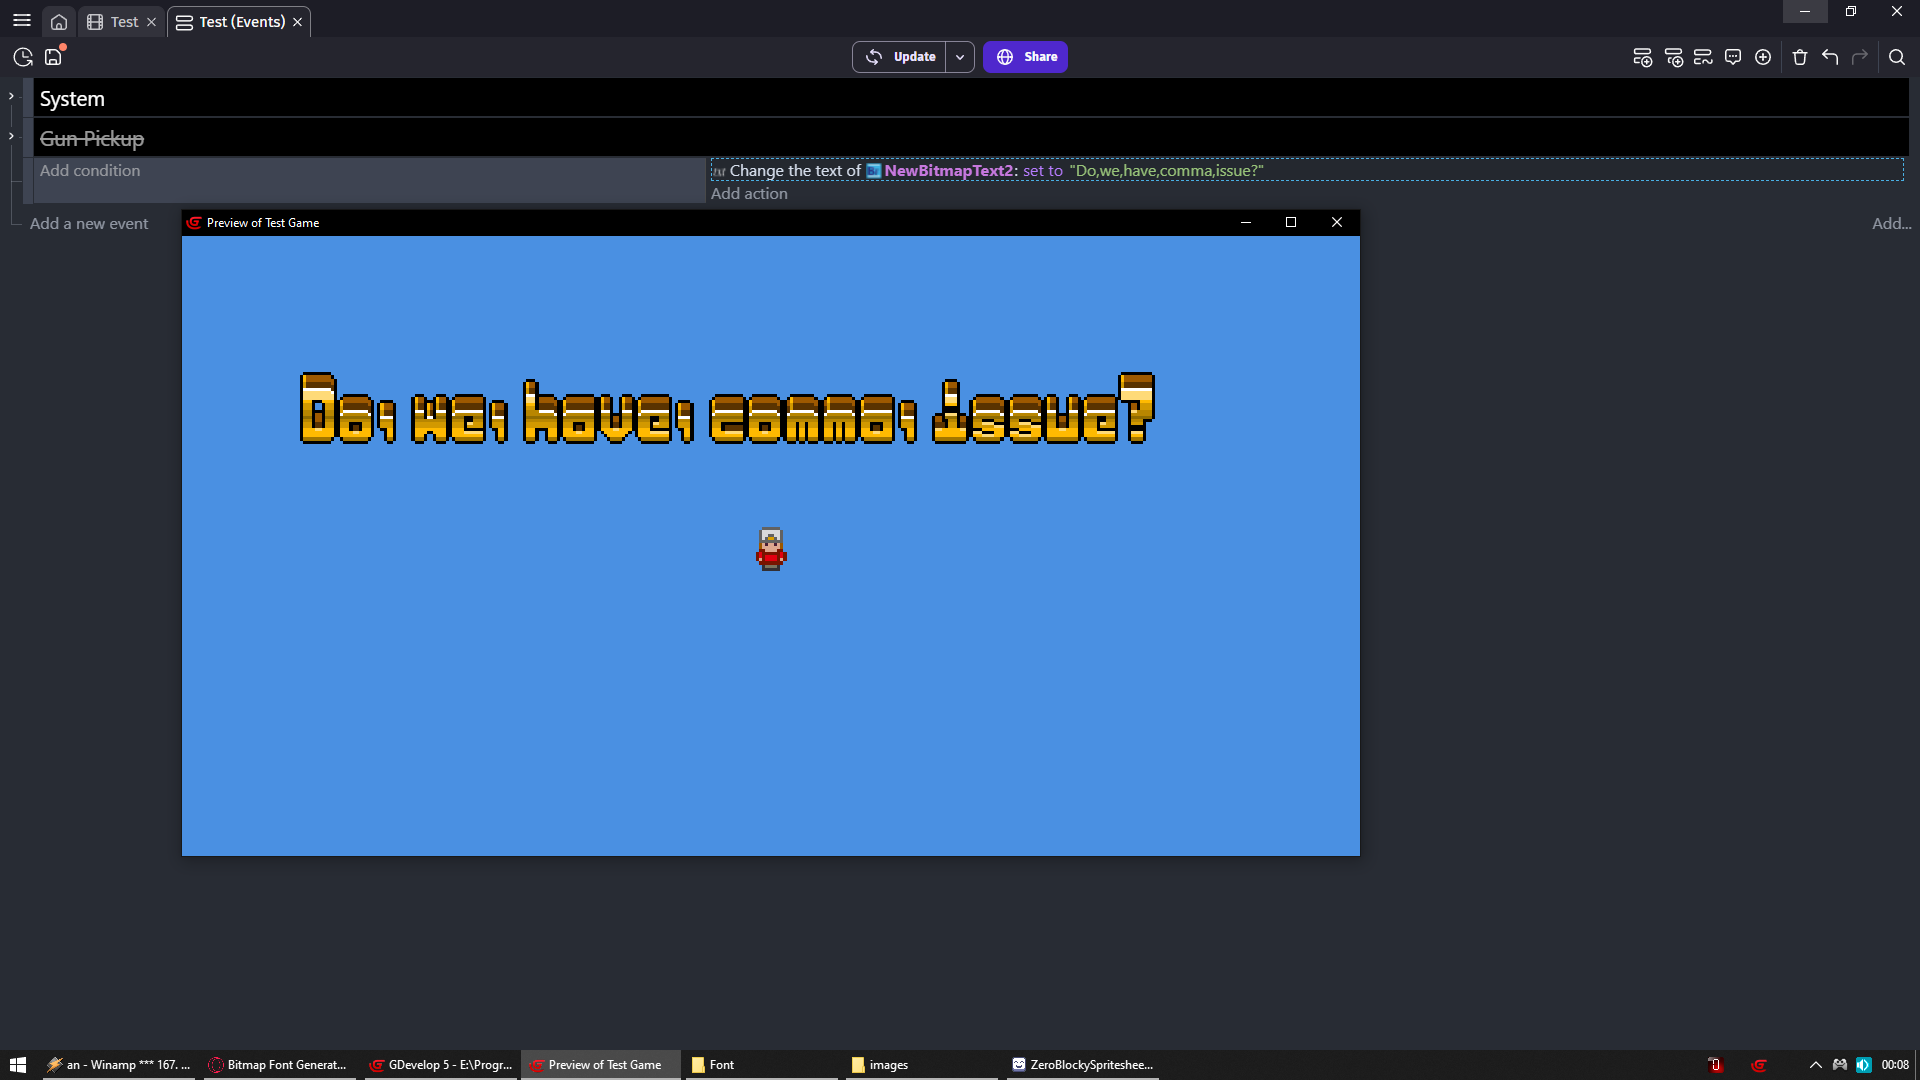
Now let’s place our bitmap text object on scene and test does it work

I say its working fine
Look how bottom line is wrong it contains some extra \ back slashes
That is not issue with font or gdevelop it just how gdevelop text formatting works
But all glyphs are there as you see so do not worry about it
In game you will never need to use them in string causing extra \ to appear
Anyway because we made it white in step 4
We can do this now

Now notice how outline and drop shadow stayed black
That is why you ALWAYS want to change fill color of font to white when converting ttf to bitmap font in snowB
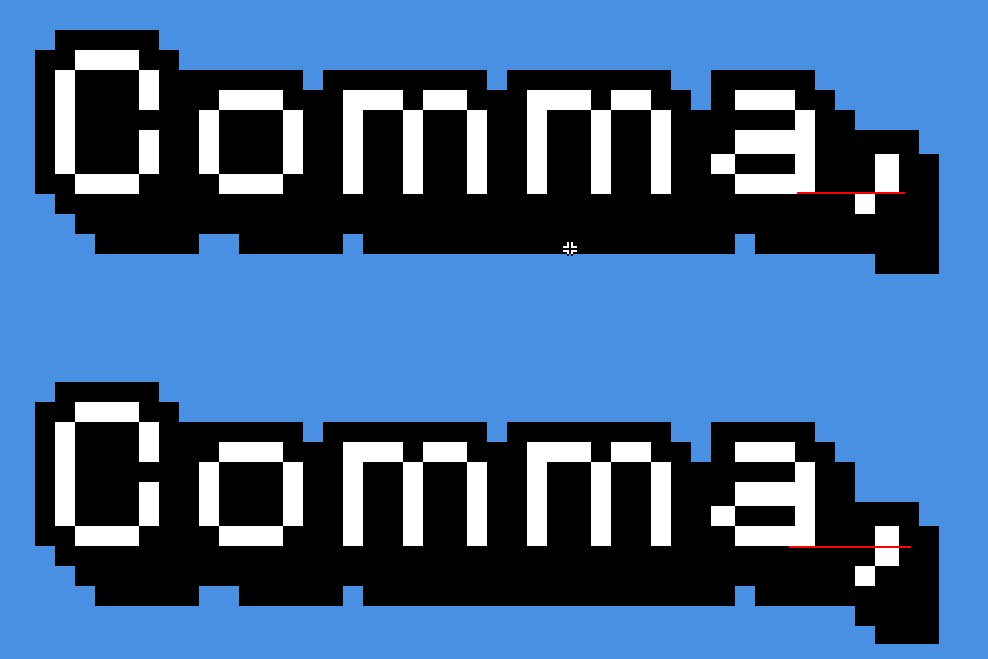
But look comma is too high for my liking
Top one is original bottom one is one i edited
You can now jump to Adjust/edit your font section
Create glyph atlas from scratch (Make your own font image)
Click to expand
We will need
Some image editor i go with Libresprite (its like earlier FREE version of Aseprite) LibreSprite
You can use mine or create your own
BUT !!! And that is ULTRA IMPORTANT
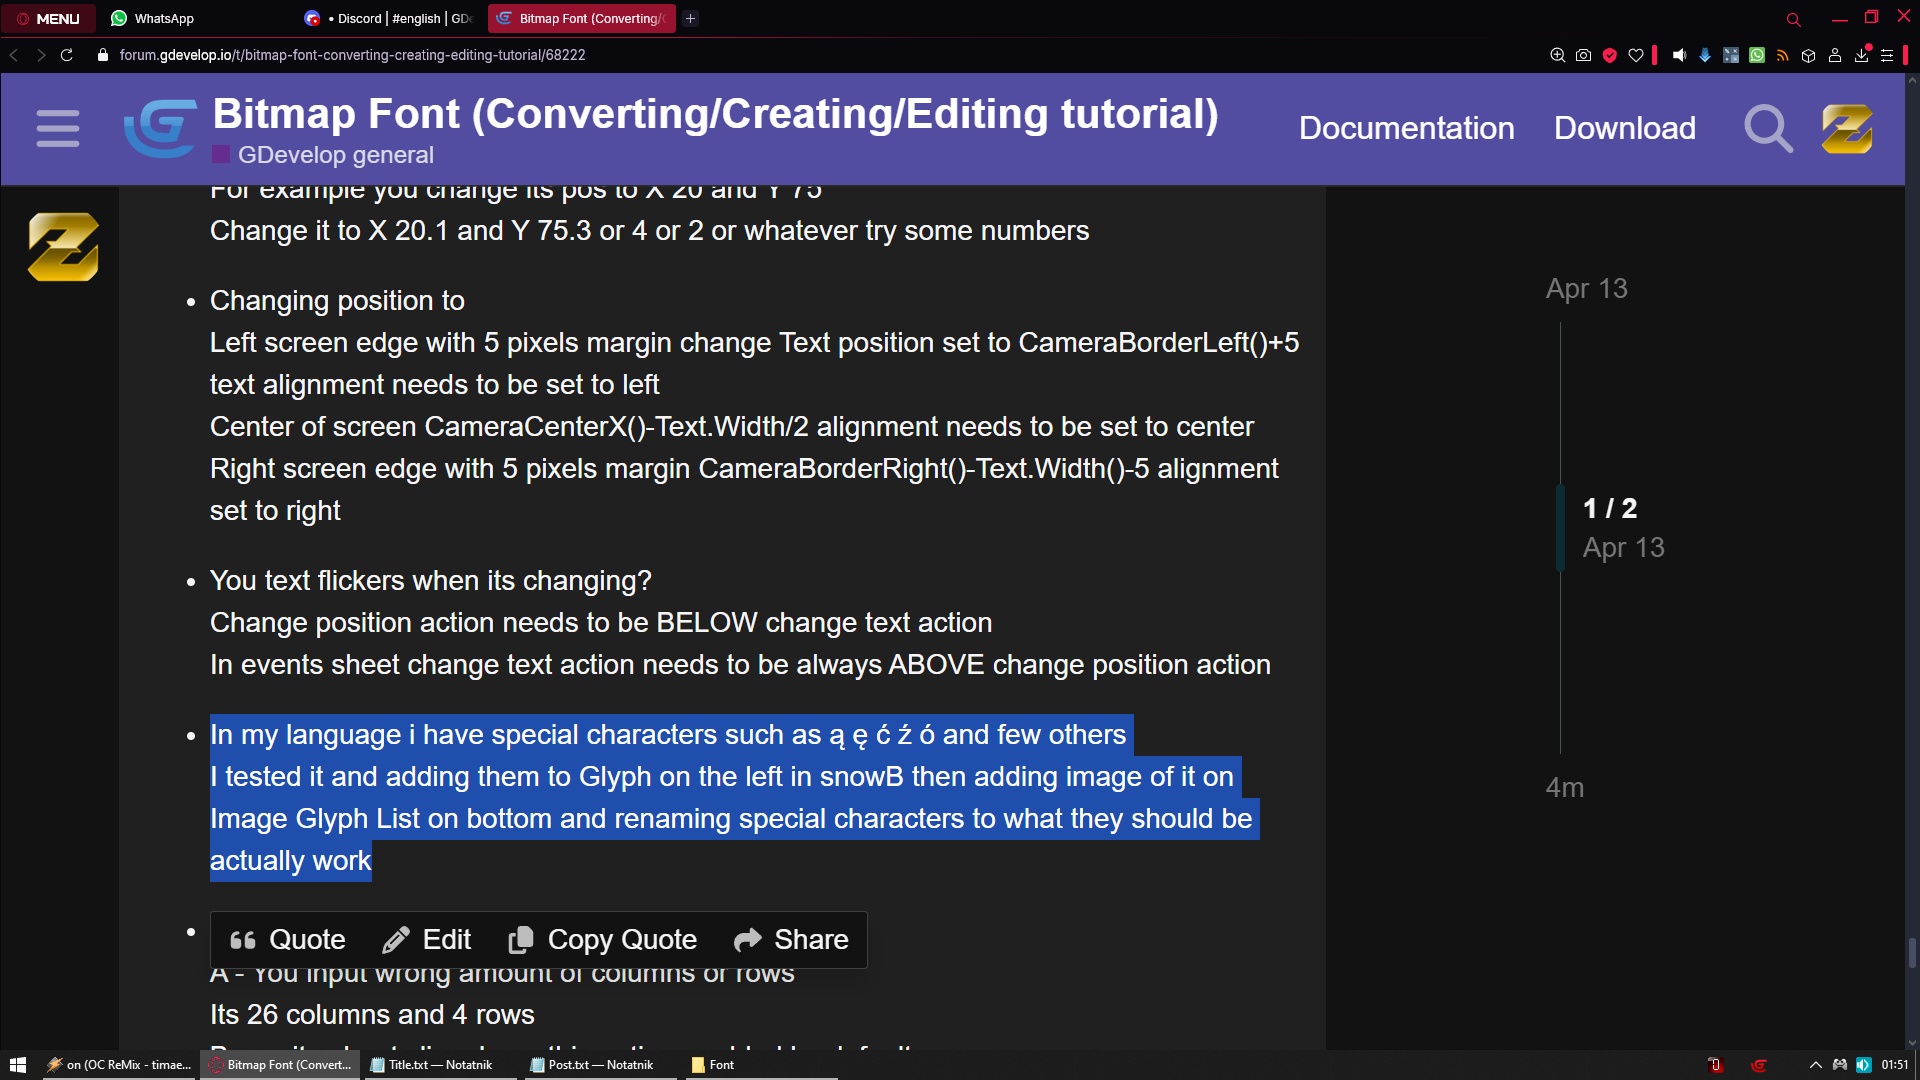
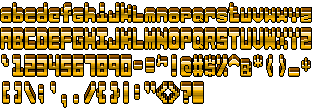
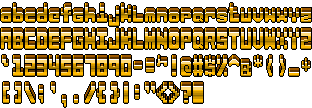
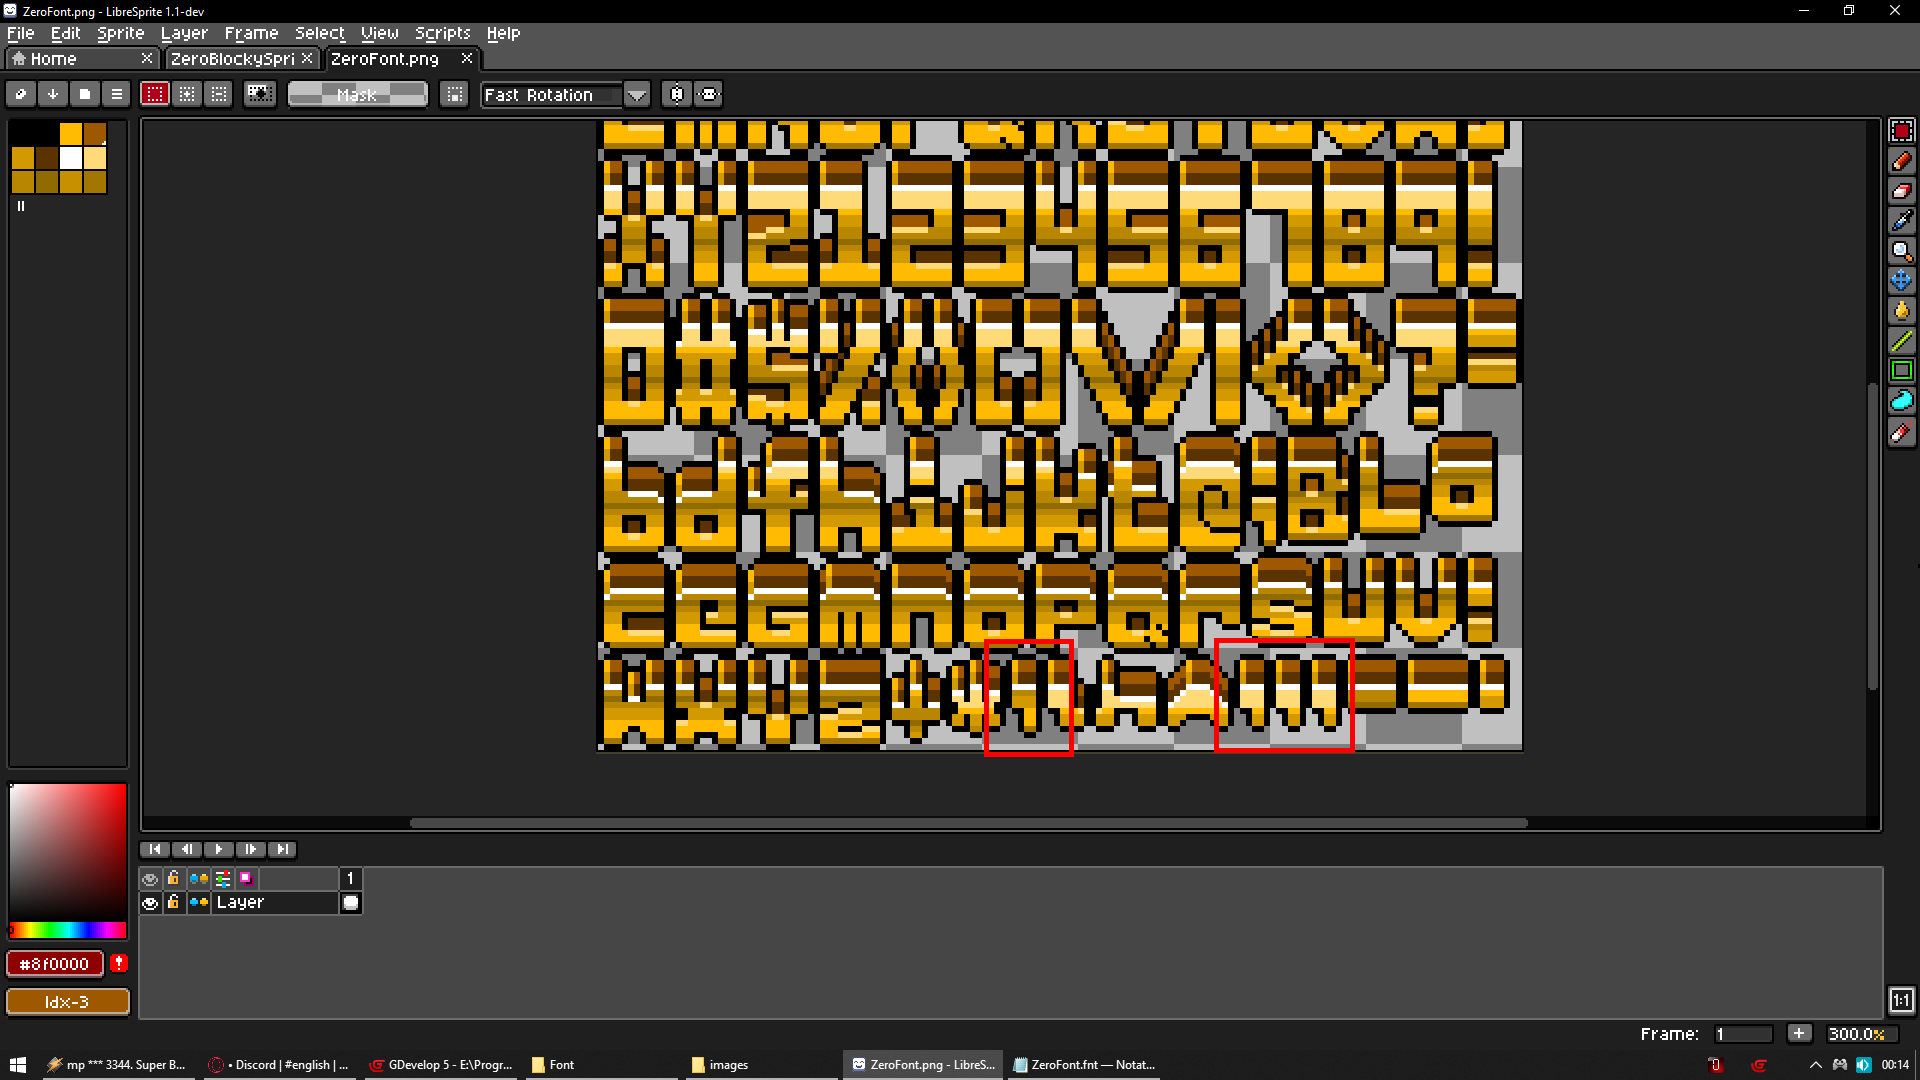
Your glyphs need to be in same exact order you see on image above
Which means 4 rows and 26 columns going like this
Where last character is actual space which you also need
abcdefghijklmnopqrstuvwxyz
ABCDEFGHIJKLMNOPQRSTUVWXYZ
`1234567890-=~!@#$%^&*()_+
[]\;',./{}|:"<>?
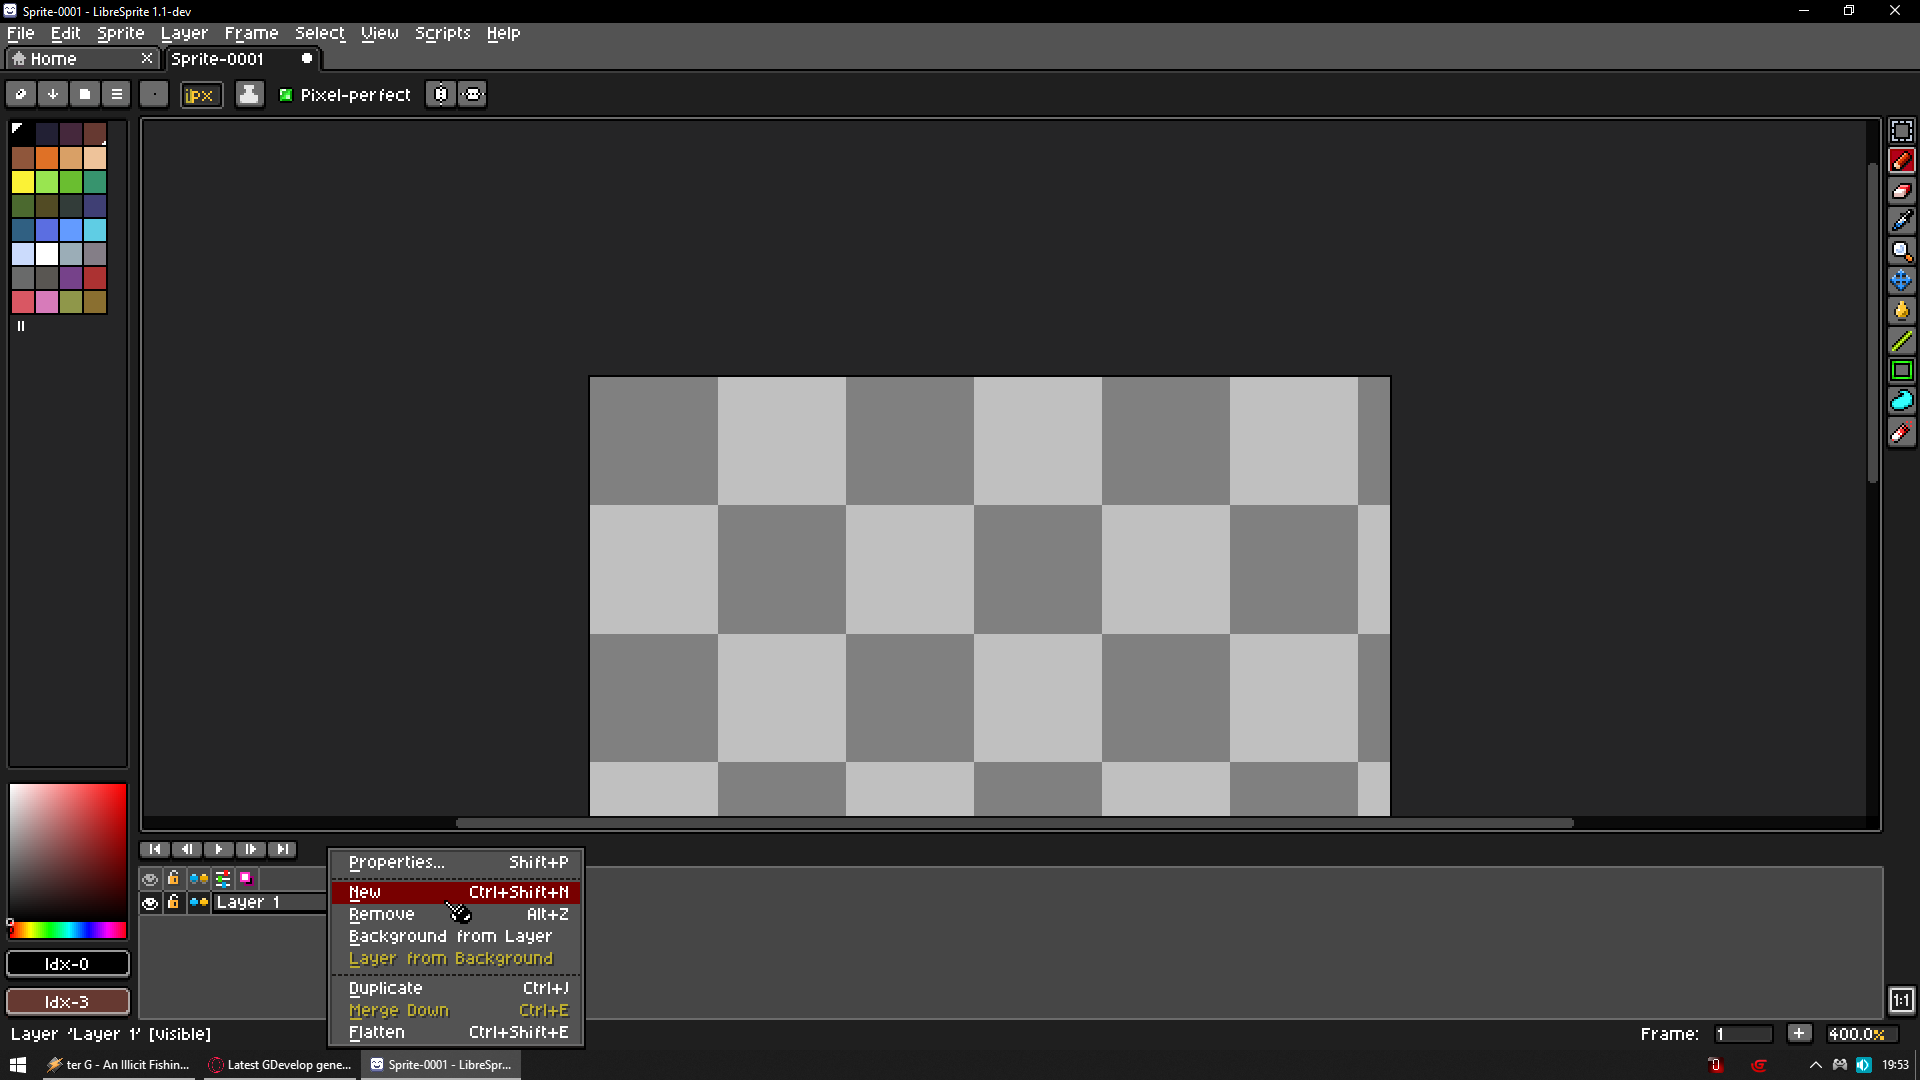
Open libresprite and create new image
Let’s go with 100x100 for now
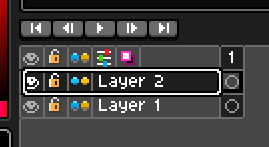
Then we gonna right click our layer and add new
Now we click top layer so its selected
And we begin to draw whatever we want
I will use my original font as base so i go with capital A
And next character i need is small j
So i know dimensions of my grid cell
Look in bottom left you have X and Y coordinates of where cursor is
1st is X next is Y
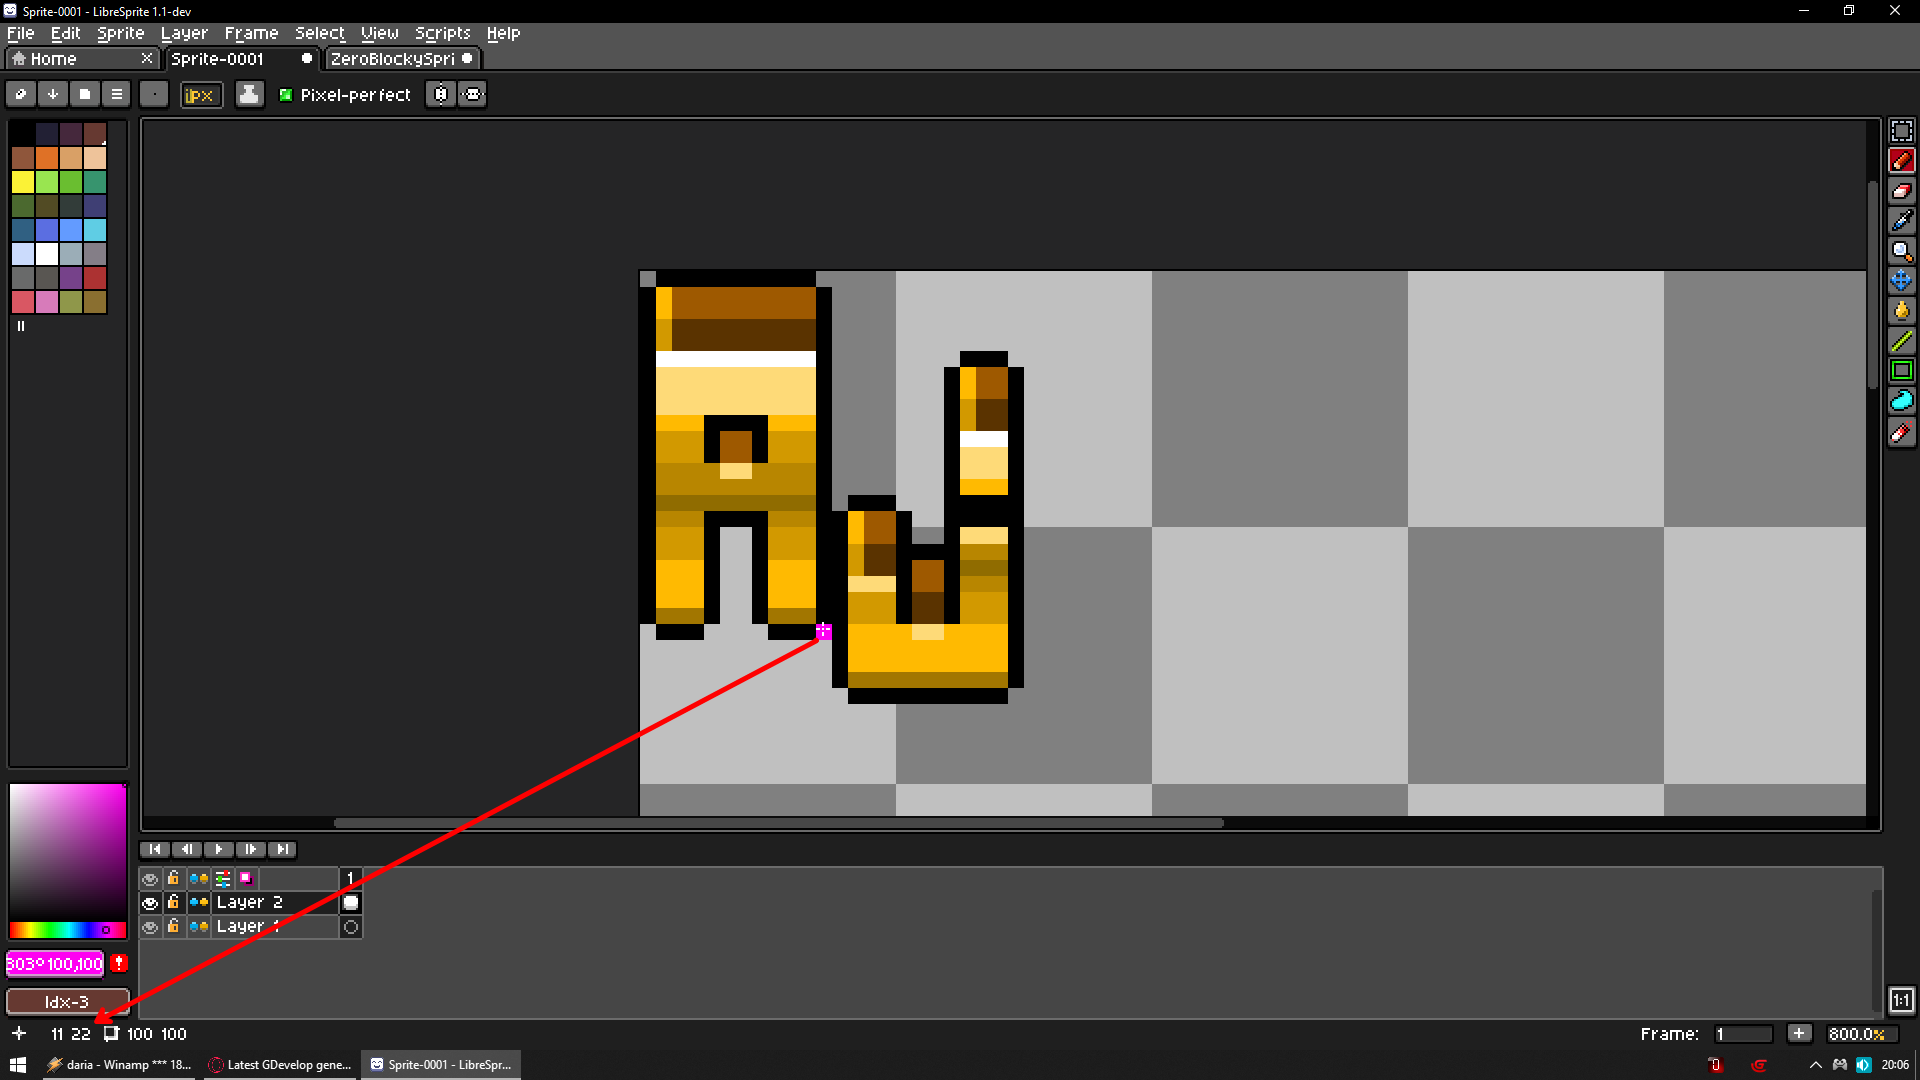
So it means each grid cell will be 12 pixels wide
But it shows 11? Well remember to account 0
And thx to that small j i know cells will be 27 pixel high again account 0

So now i can do 12 * 26 = 312
And 27 * 4 = 108
So i press C or go Sprite > Canvas Size
And change size to
312
108
Also i click top left arrow
To expand image from top left corner and hit ok
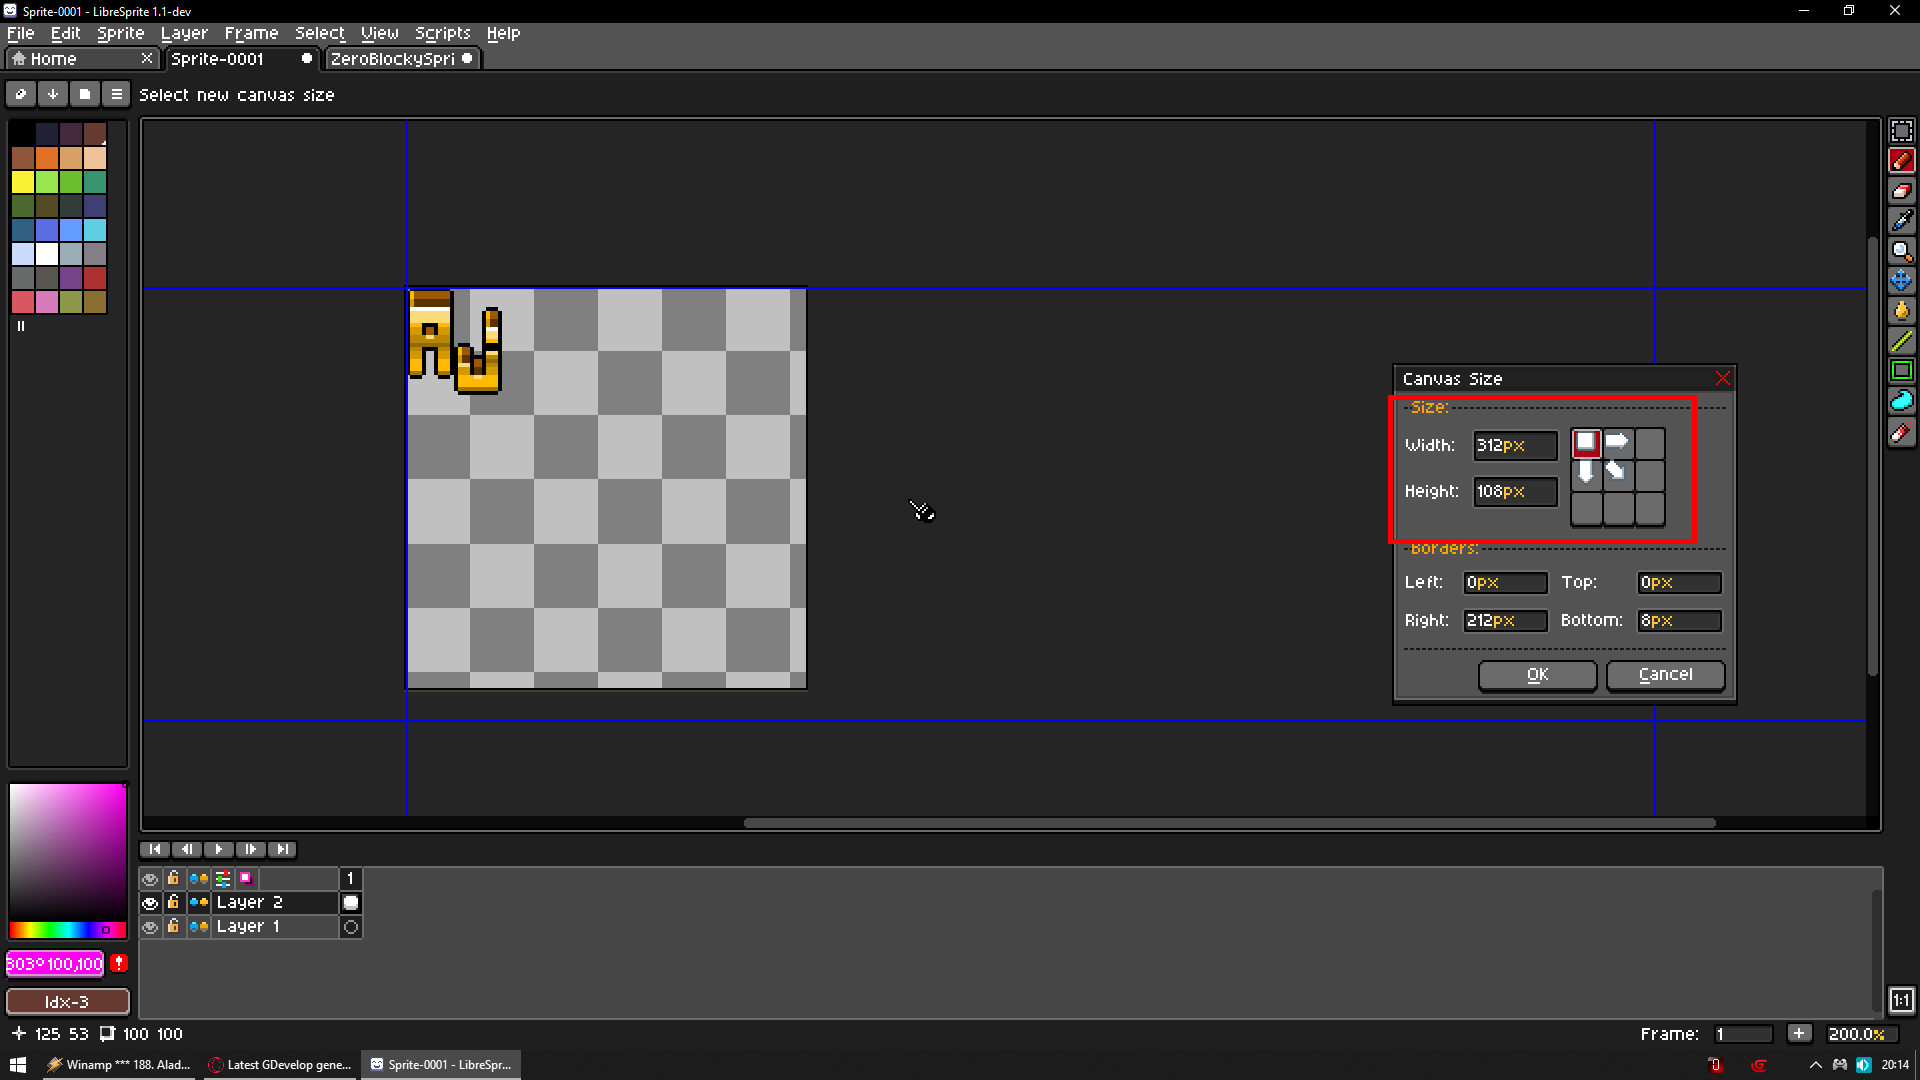
And like that our image dimensions are set
Now we need to draw checkerboard and even so its stupid
Trust me it helps A LOT
1st two important things
1 - View > Grid > Grid Settings
Width and height to our grid cell size so in my case 12 x 27

And hit ok
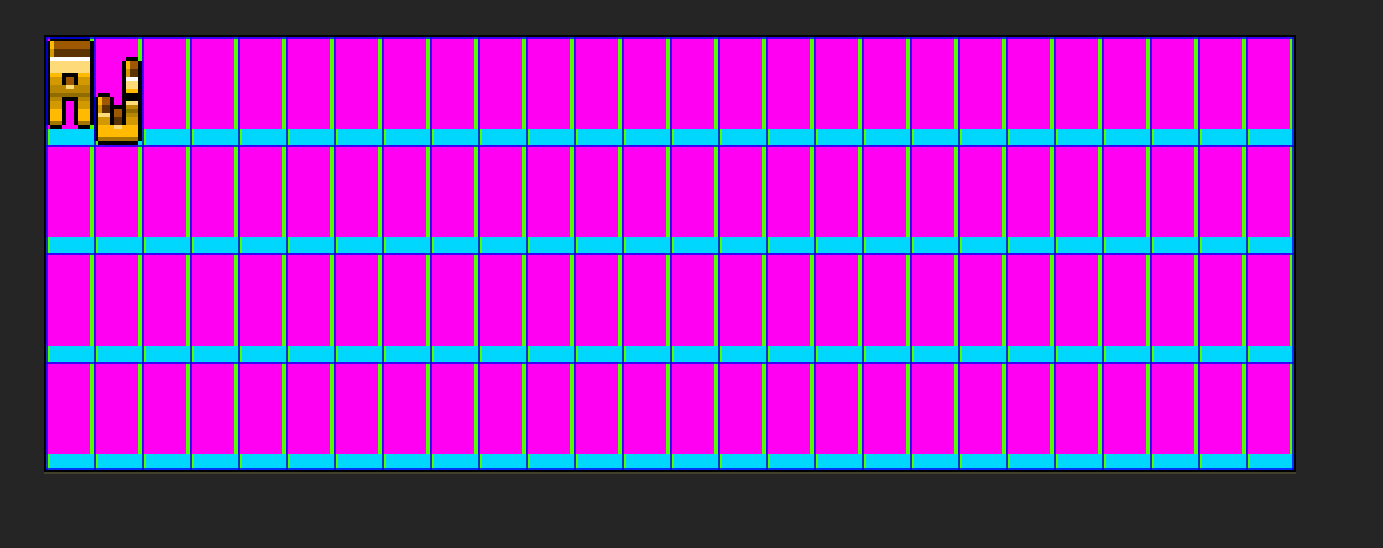
2 - We gonna select bottom layer and draw there checkerboard
You can show hide layers by clicking visibility icon left to them
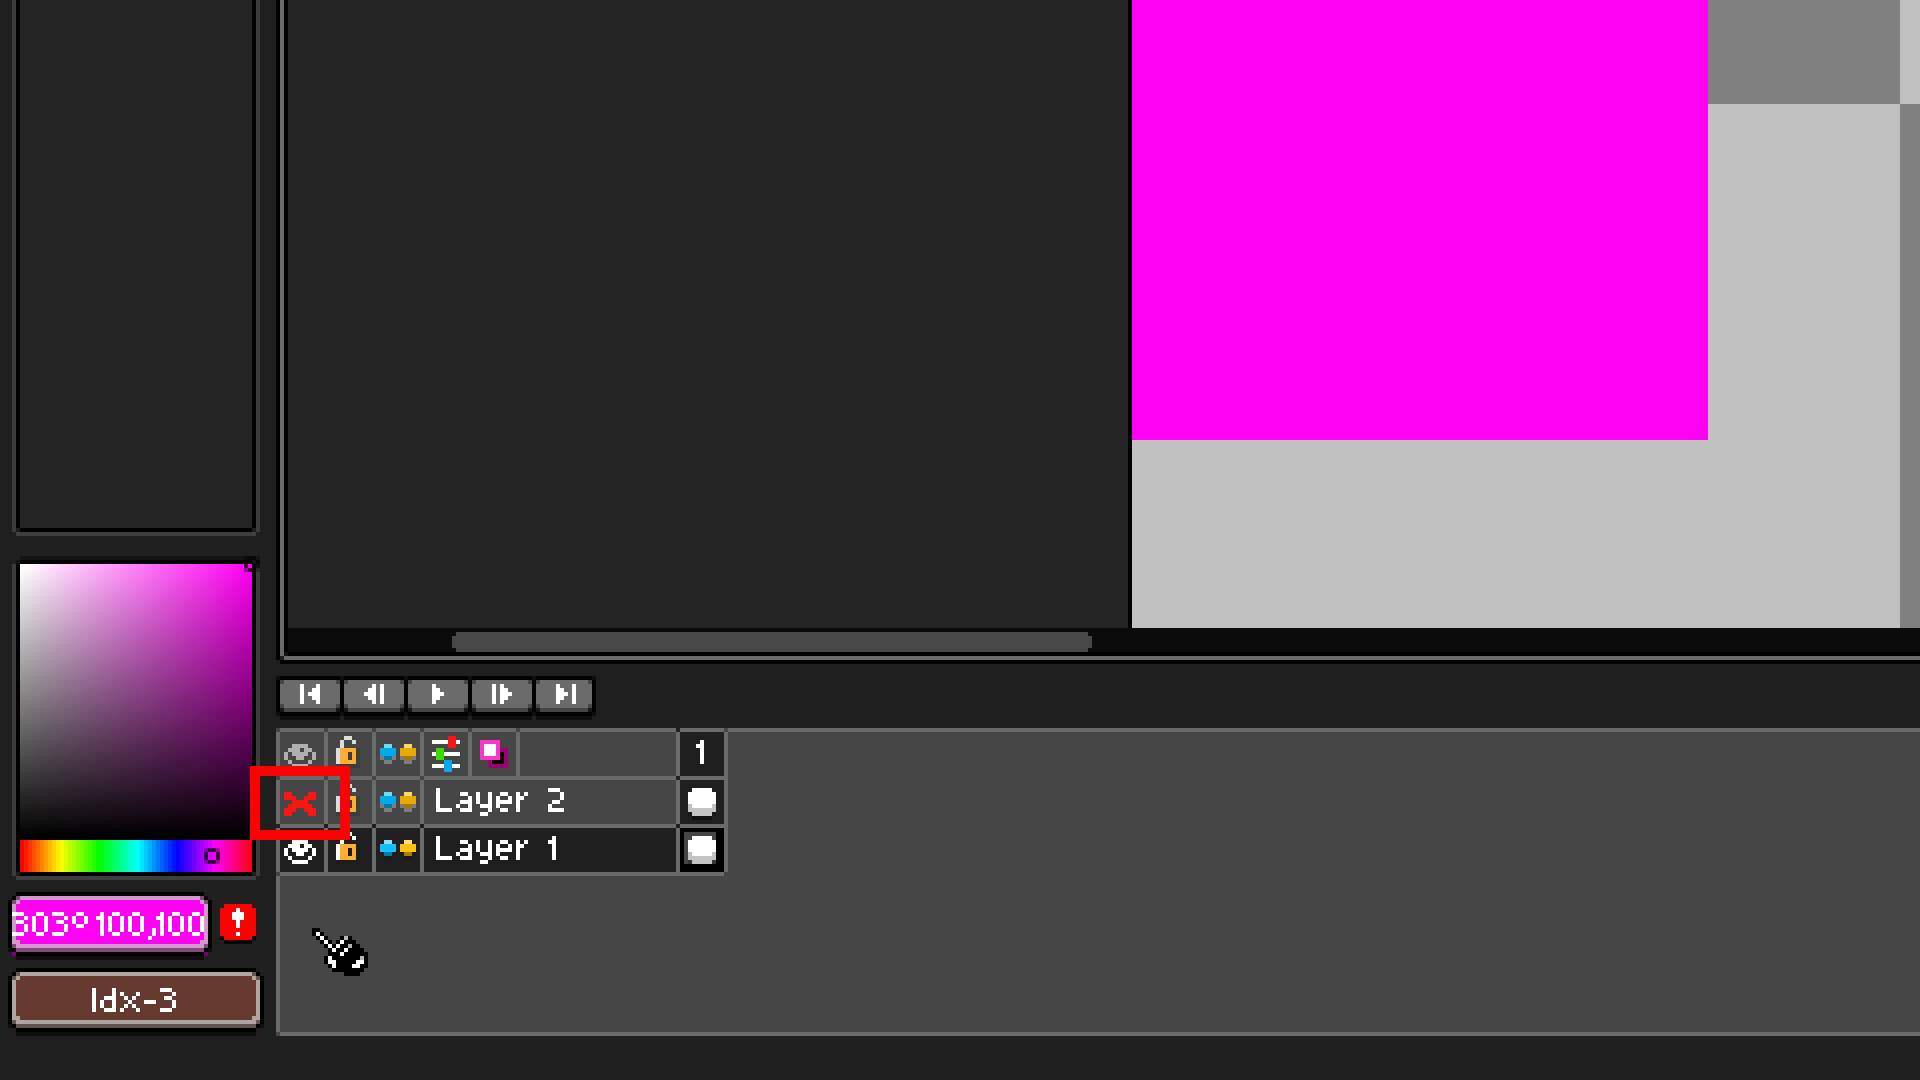
I hide top layer with glyphs for a moment
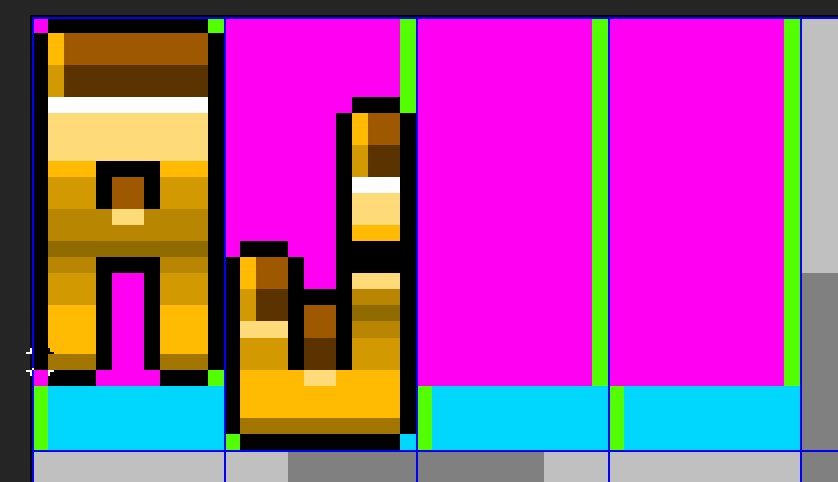
Look i duplicated it 4 times so its better to see

Now as you see A is only contained on purple area
Where j needs to go lower so it goes to bottom of blue area
So purple area will indicate let’s call it our floor useful for y q g comma , and whatever else that can go below floor
Now still being on bottom layer ctrl + A to select all then ctrl + C to copy then ctrl + v to paste
And now we can hold left shift and use arrow keys to move on grid what we just pasted
And we need to cover our whole image this way with our checkerboard
So 1st cover it all from left to right
And then from top to bottom
I added green lines on right of purple area and left of blue area to better represent walls but its option and you don’t need to do it
And like so we have our checkerboard
Now draw all glyphs and remember the layout i mentioned at beginning
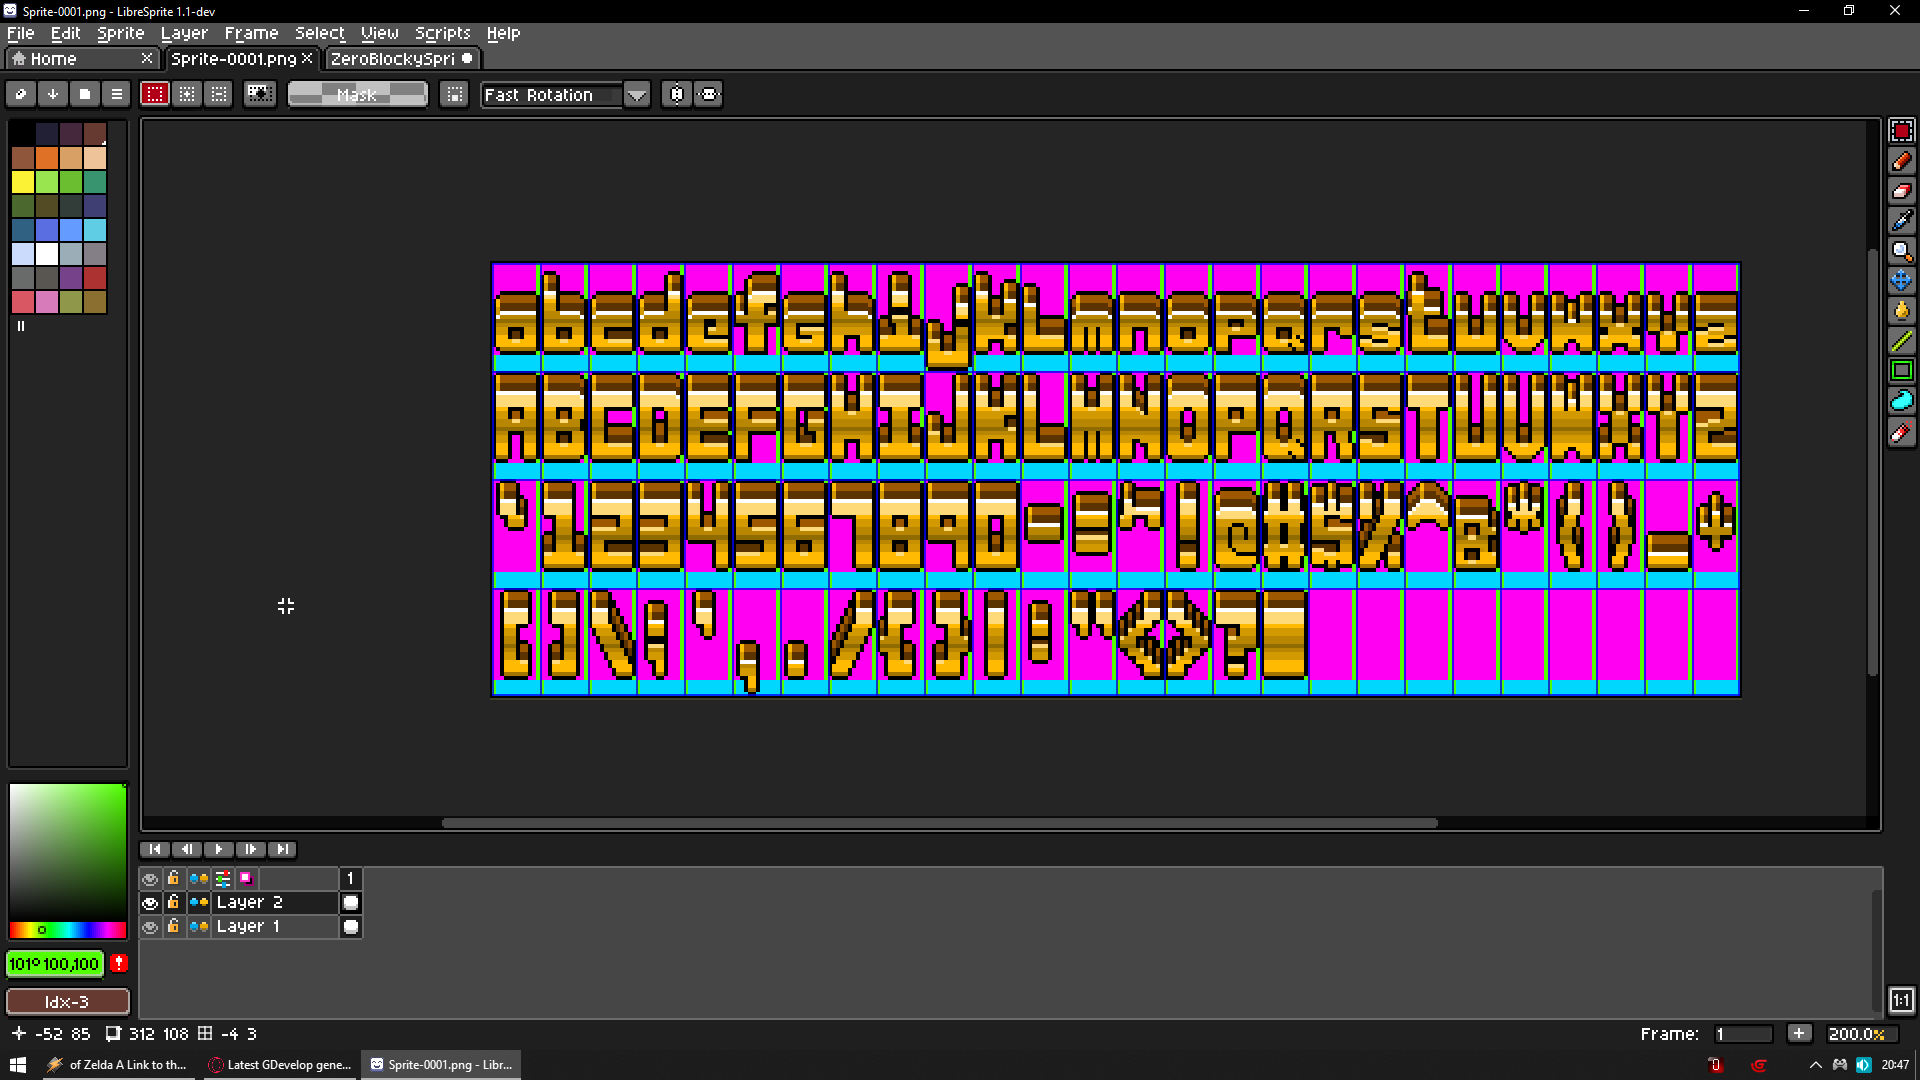
As you see my j and , are hitting bottom of blue area (bottom of cell)
But that is a cheat normally i only need that for comma where j should hit bottom of purple area so floor
However i just wanted to demonstrate how you should handle this
I mean my font is specific so it looks perfectly fine with all characters having same floor level
Now let’s save our glyph atlas
1st make bottom layer with checkerboard invisible
Just hit file > save as
Name your glyph atlas as you want for example GlyphAtlas.png
IT NEEDS TO END WITH .png
And what we get?
Bam
You made your glyph atlas now time to split it into individual glyphs (characters)
Slice glyph atlas into individual glyphs
Click to expand
Things you gonna need
BAT script which will rename files properly for you https://drive.google.com/file/d/1TBqofcgYpnF8nEK0i63ifmBrCOraNWan/view?usp=sharing
THIS SCRIPT WILL WOKR ONLY if you exported your glyphs with Z on end
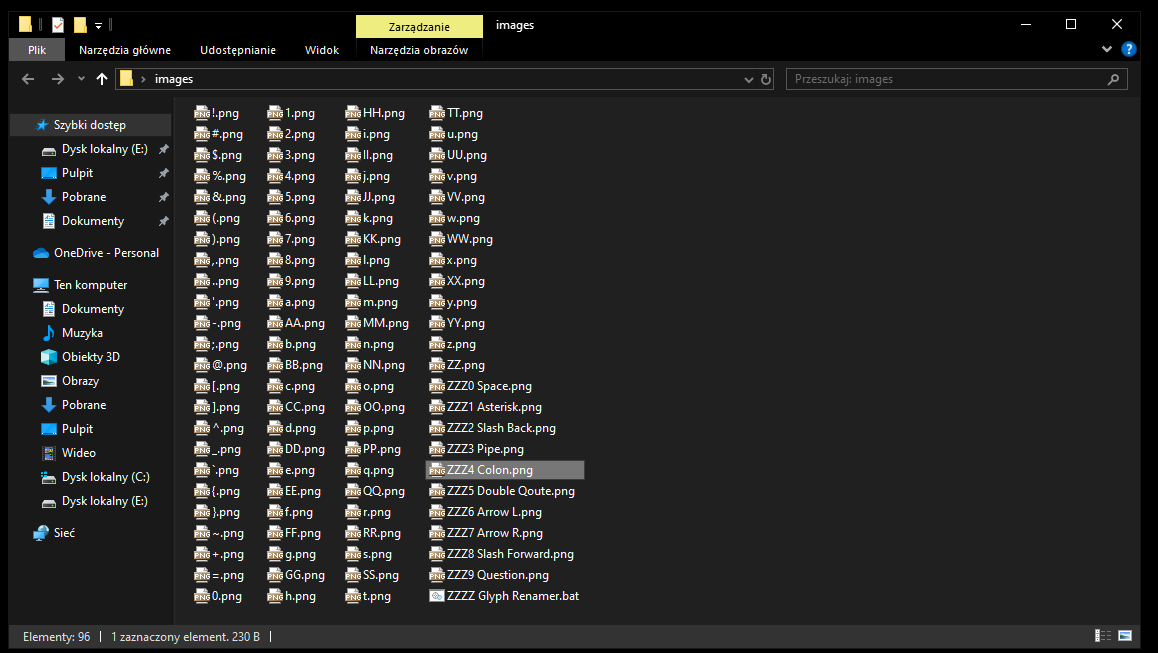
So you gonna get png images like GlyphAtlasZ1.png GlyphAtlasZ2.png
GlyphAtlasZ3.png
And so go on
I will explain it when saving it with libresprite
LibreSprite LibreSprite
Aseprite will also
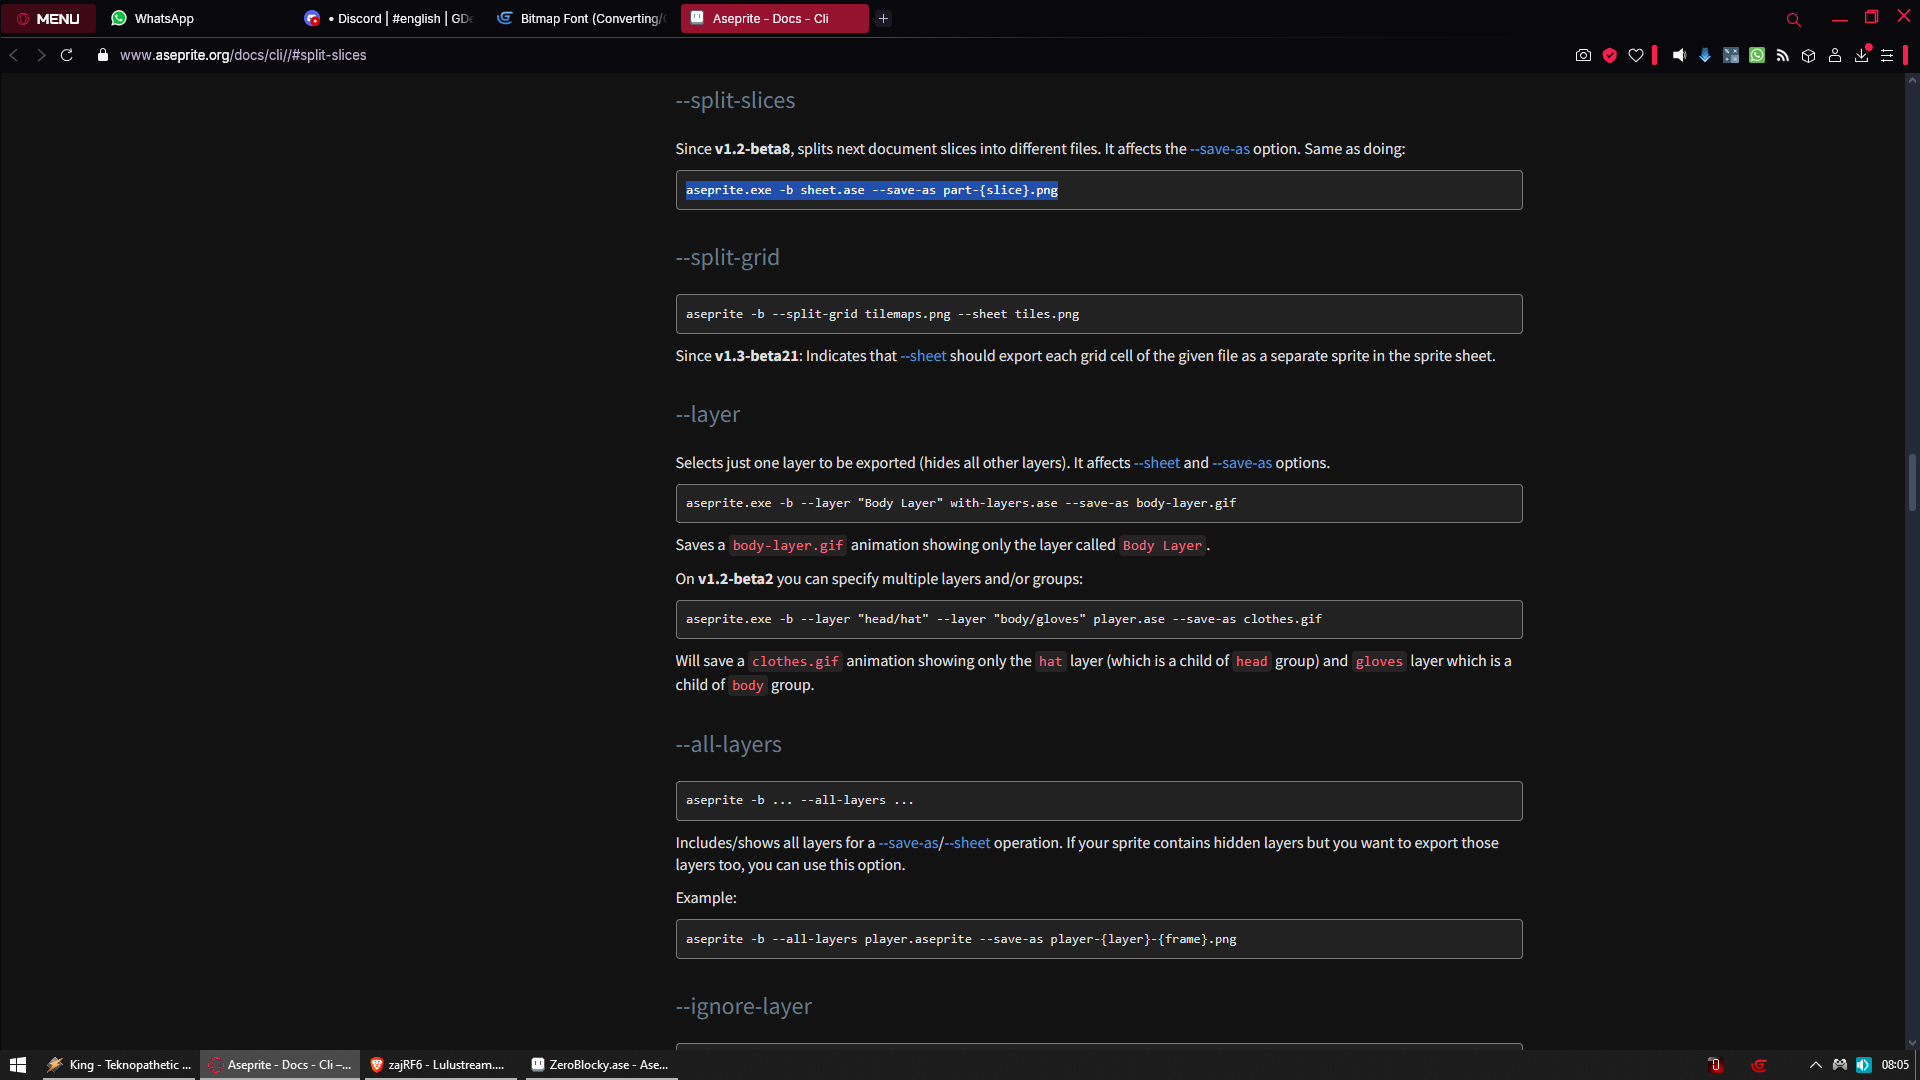
Actually you can split them using any tool that can slice image into smaller images
BUT if you go with something else than Libre/AseSprite then be aware
1st image needs to end with Z1.png and not Z0.png after its exported
Or it will break everything
So if you have some other tool that starts naming slices by 0 and not 1 then it will not work
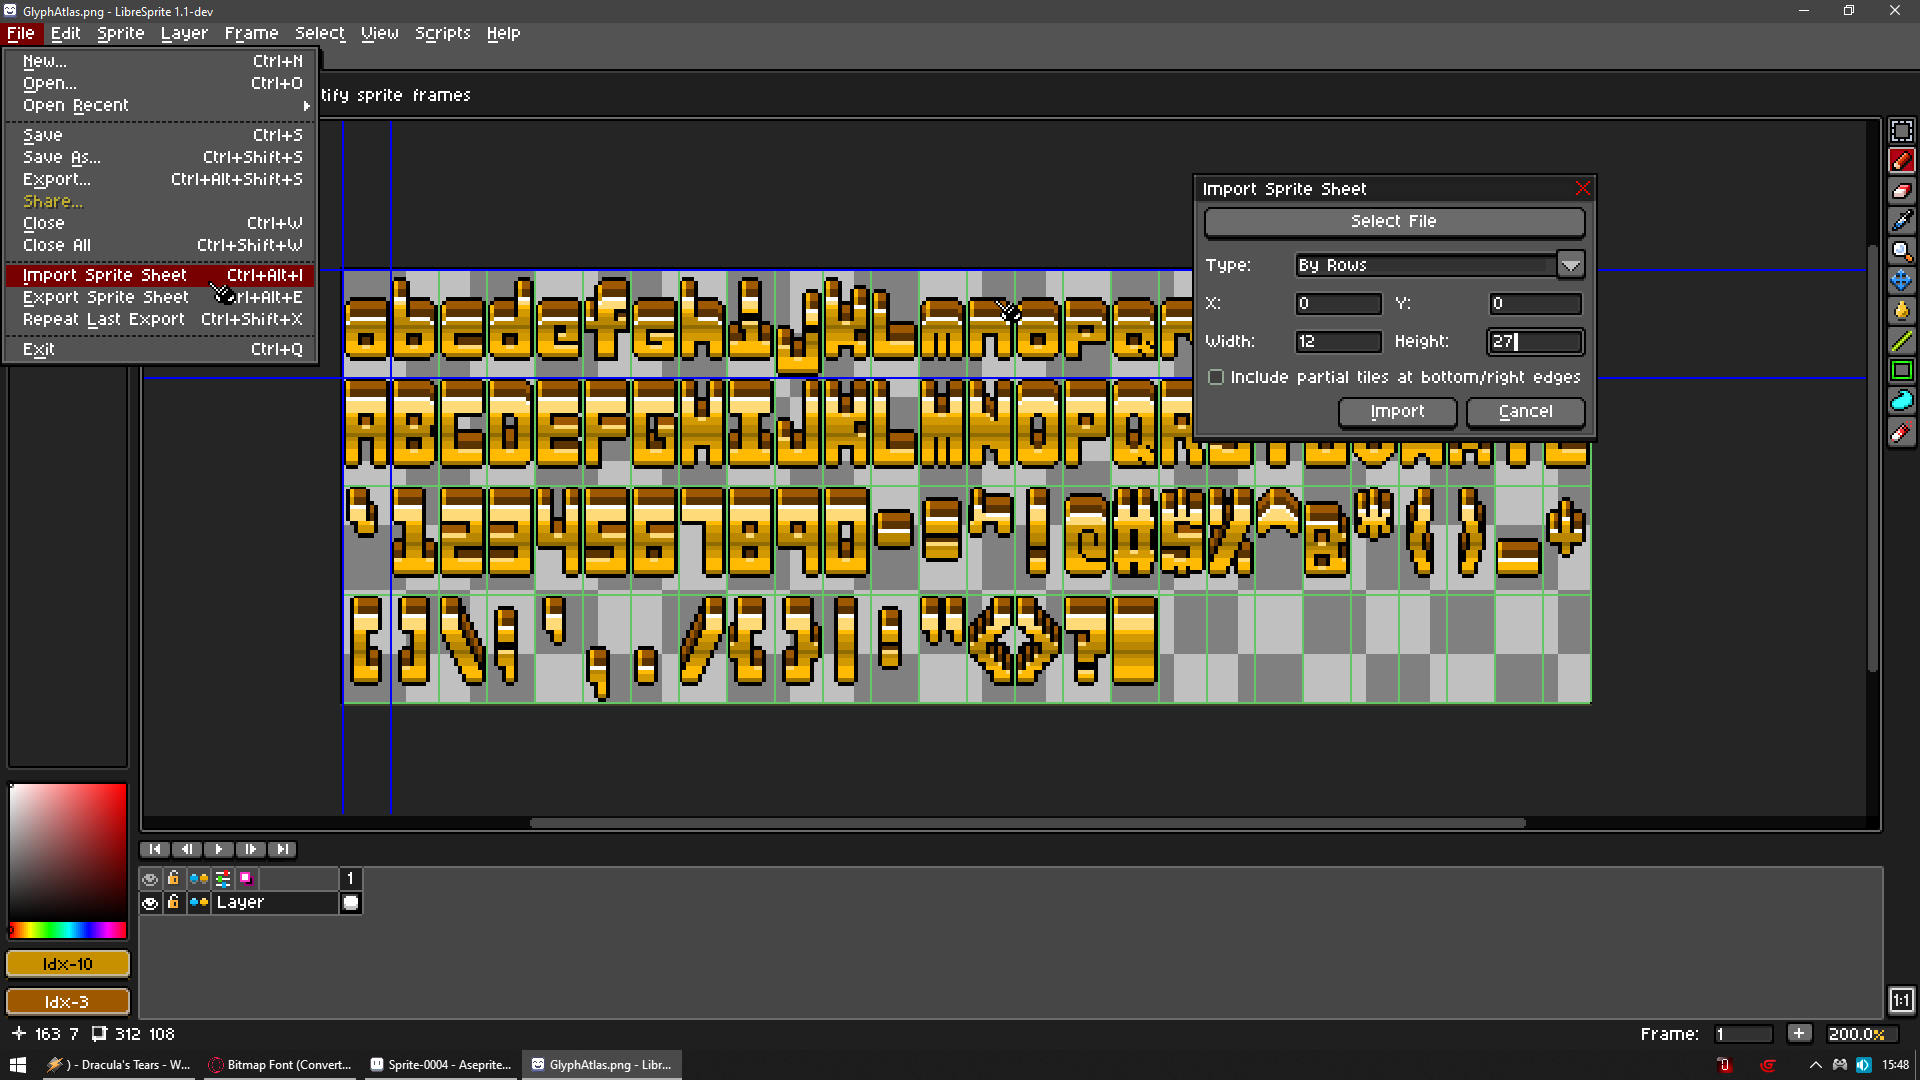
We open our glyph atlas image in my case its GlyphAtlas.png
And we go to File > Import Sprite Sheet
And we fill width and height of our characters here for me W12 and H27
SIDE NOT Aseprite is better here cause it allows you define them by columns and rows which always would be C26 R4
As you see below lines will help you see did you input it correctly
Splitting glyphs by visible grid
We gonna get our glyph atlas sorted into individual frames
(It would be wise to save it to some folder cause it will generate a lot of files)
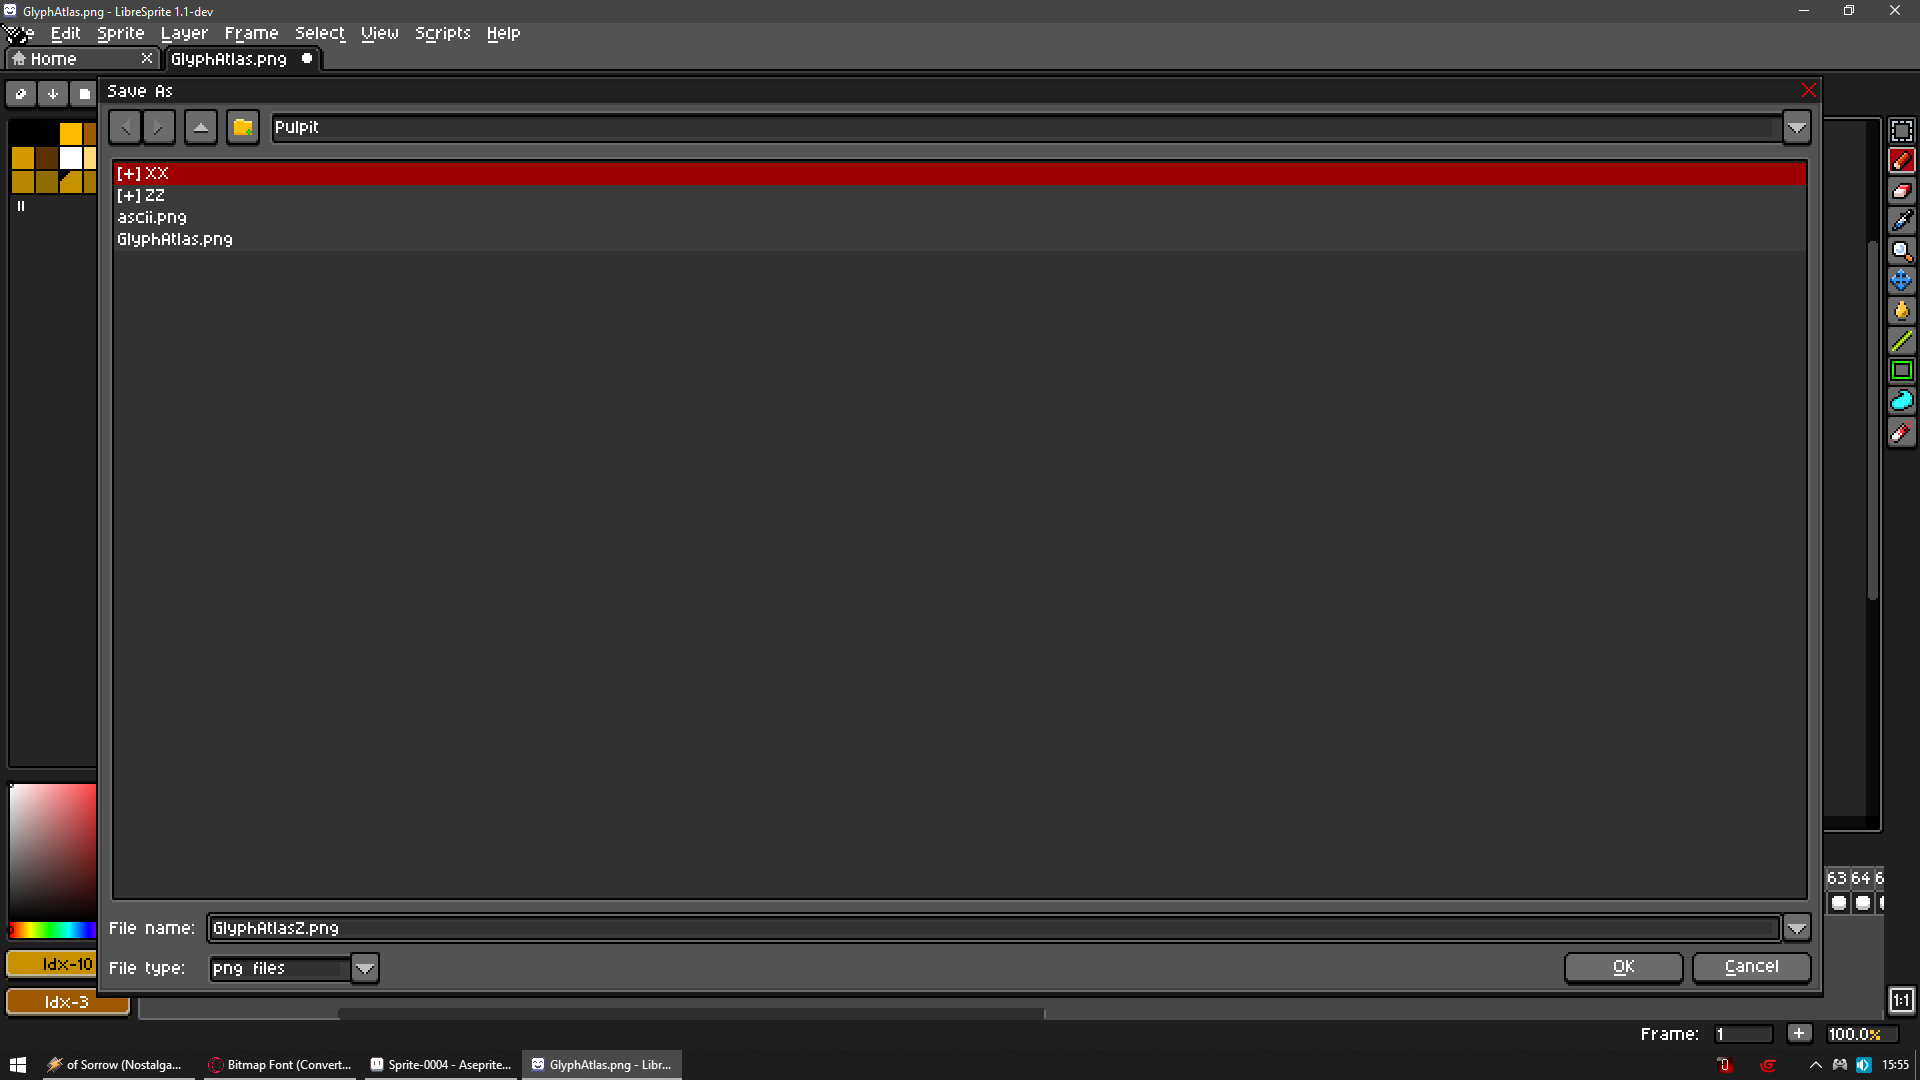
Now we go File > Save as
And now !!! VERY IMPORTANT !!! for script to rename glyphs
We can name it as we want but it needs to end with Z.png
For example i gonna go with GlyphAtlasZ.png
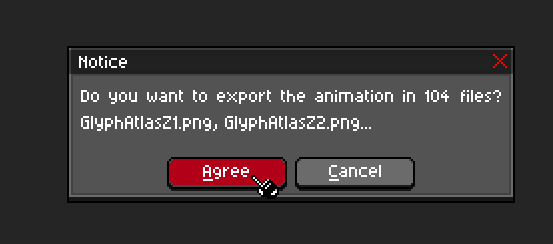
We gonna be asked do we want export animation into 104 files
And yes we do so hit Agree
Now put ZZZZ Glyph Renamer.bat next to all that images
And just double click it
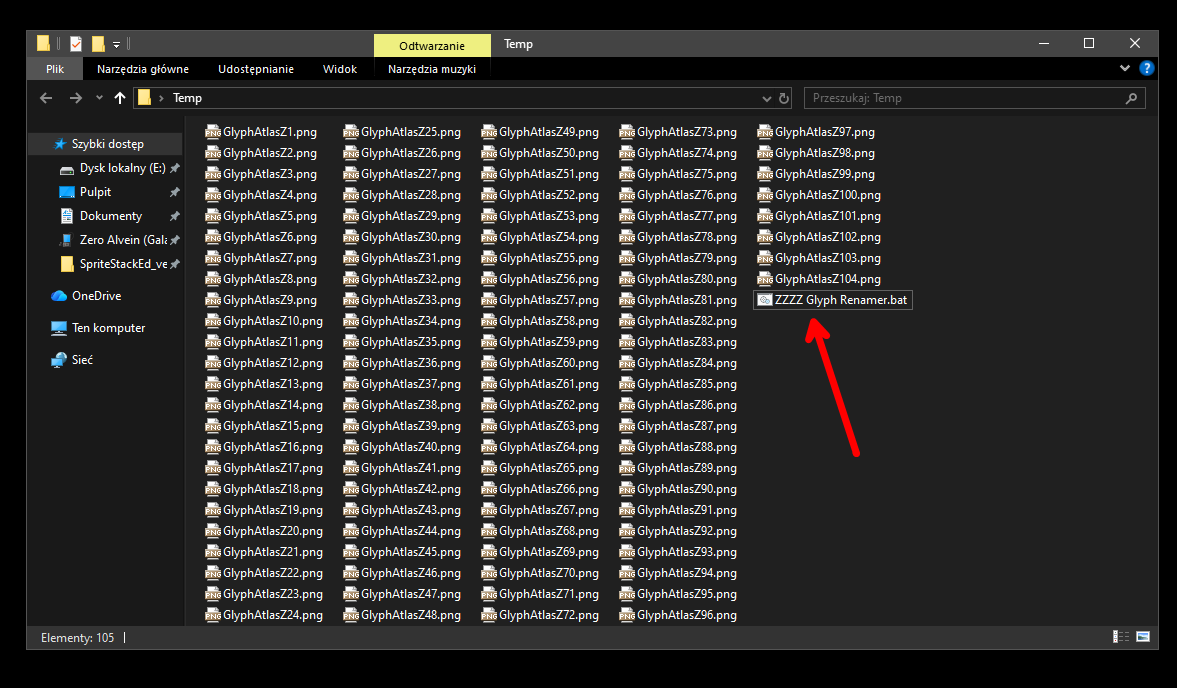
And it will rename all our glyphs
Now just remove these files
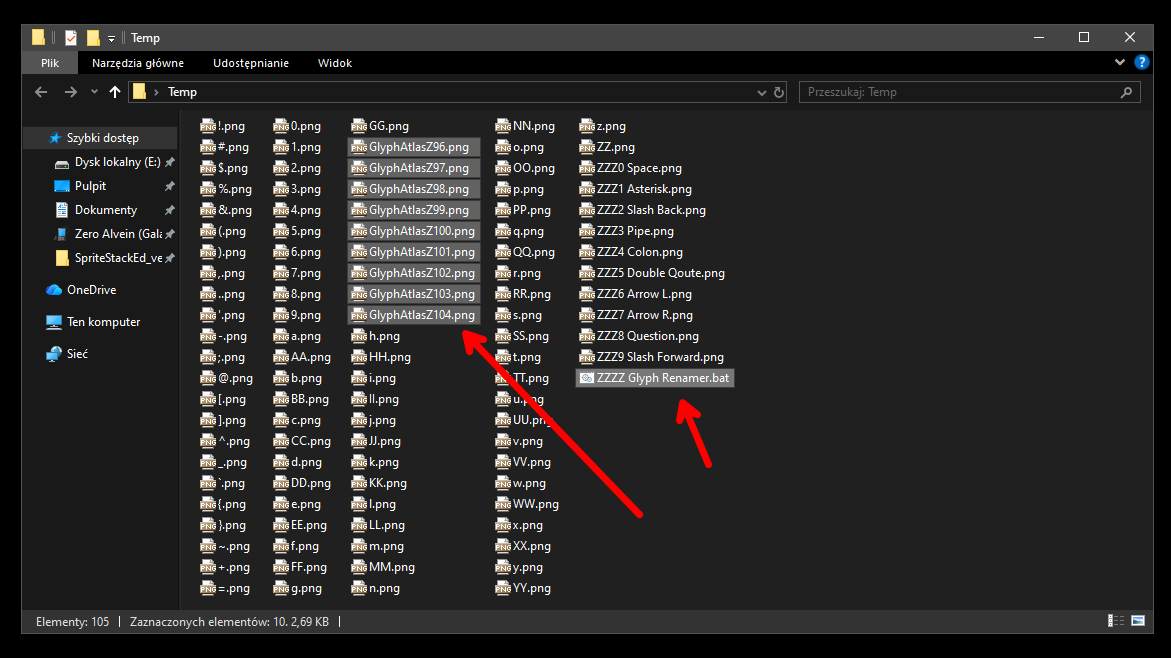
And we are done
Everything is ready to create bitmap font out of them
Create bitmap font from glyph images
Click to expand
Things you gonna need
SnowB https://snowb.org
Open SnowB
1 - Paste this on the left in Glyphs section
abcdefghijklmnopqrstuvwxyz
ABCDEFGHIJKLMNOPQRSTUVWXYZ
`1234567890-=~!@#$%^&*()_+
[]\;',./{}|:"<>?
2 - Font size (does not matter here but for sake of consistency) should be width of your glyphs
Where Line height is distance between each line
So for example you alt enter (in gdevelop) to create new line
How far that line should be from previous line?
Where line starts from top of glyph not from bottom
So if my glyphs are 27 pixel high and i set Line height to 27
It means they will be next to each other
Like bricks one on top of another
I always go with something more than height of glyph
So since mine are 27 i add 3 and we have 30 so 3 extra pixels of spacing between them
3 - Just set both Padding and Spacing 0
Because later it will be easier to find each glyph via its position
Trust me you wan it at 0 and it only affect how image looks and not how font in game will look/behave
4 - Click Select images
5 - Select ALL images
6 - Hit Open
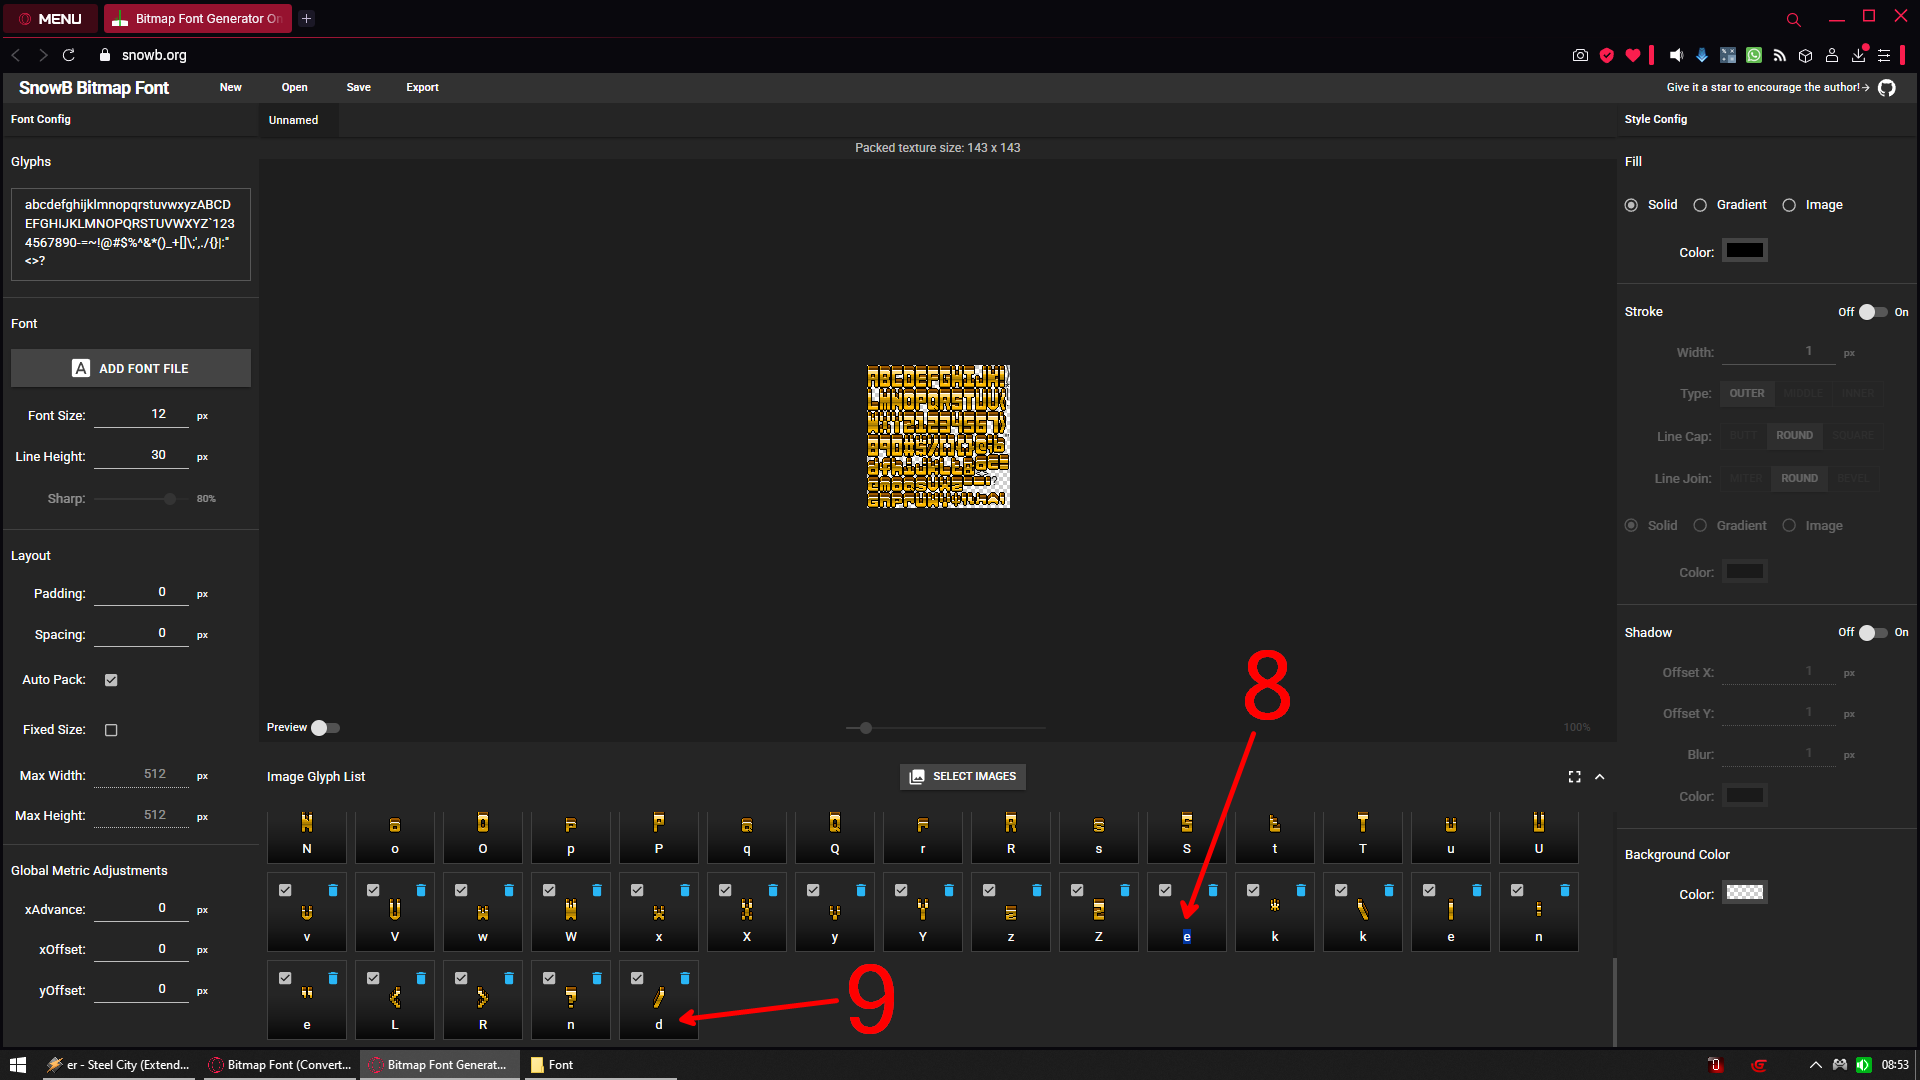
7 - Hit anywhere on Image Glyph List tab

8 - Scroll down on the Image Glyph List and double click text under space image (it will show e and will be right after Z)
Easiest way to rename them is
Press space then 3 times tab you are on next glyph now is * asterisk 3 tabs again and so go on
9 - Continue up to ? question mark
Order of glyphs are
Space * \ | : " < > ? /
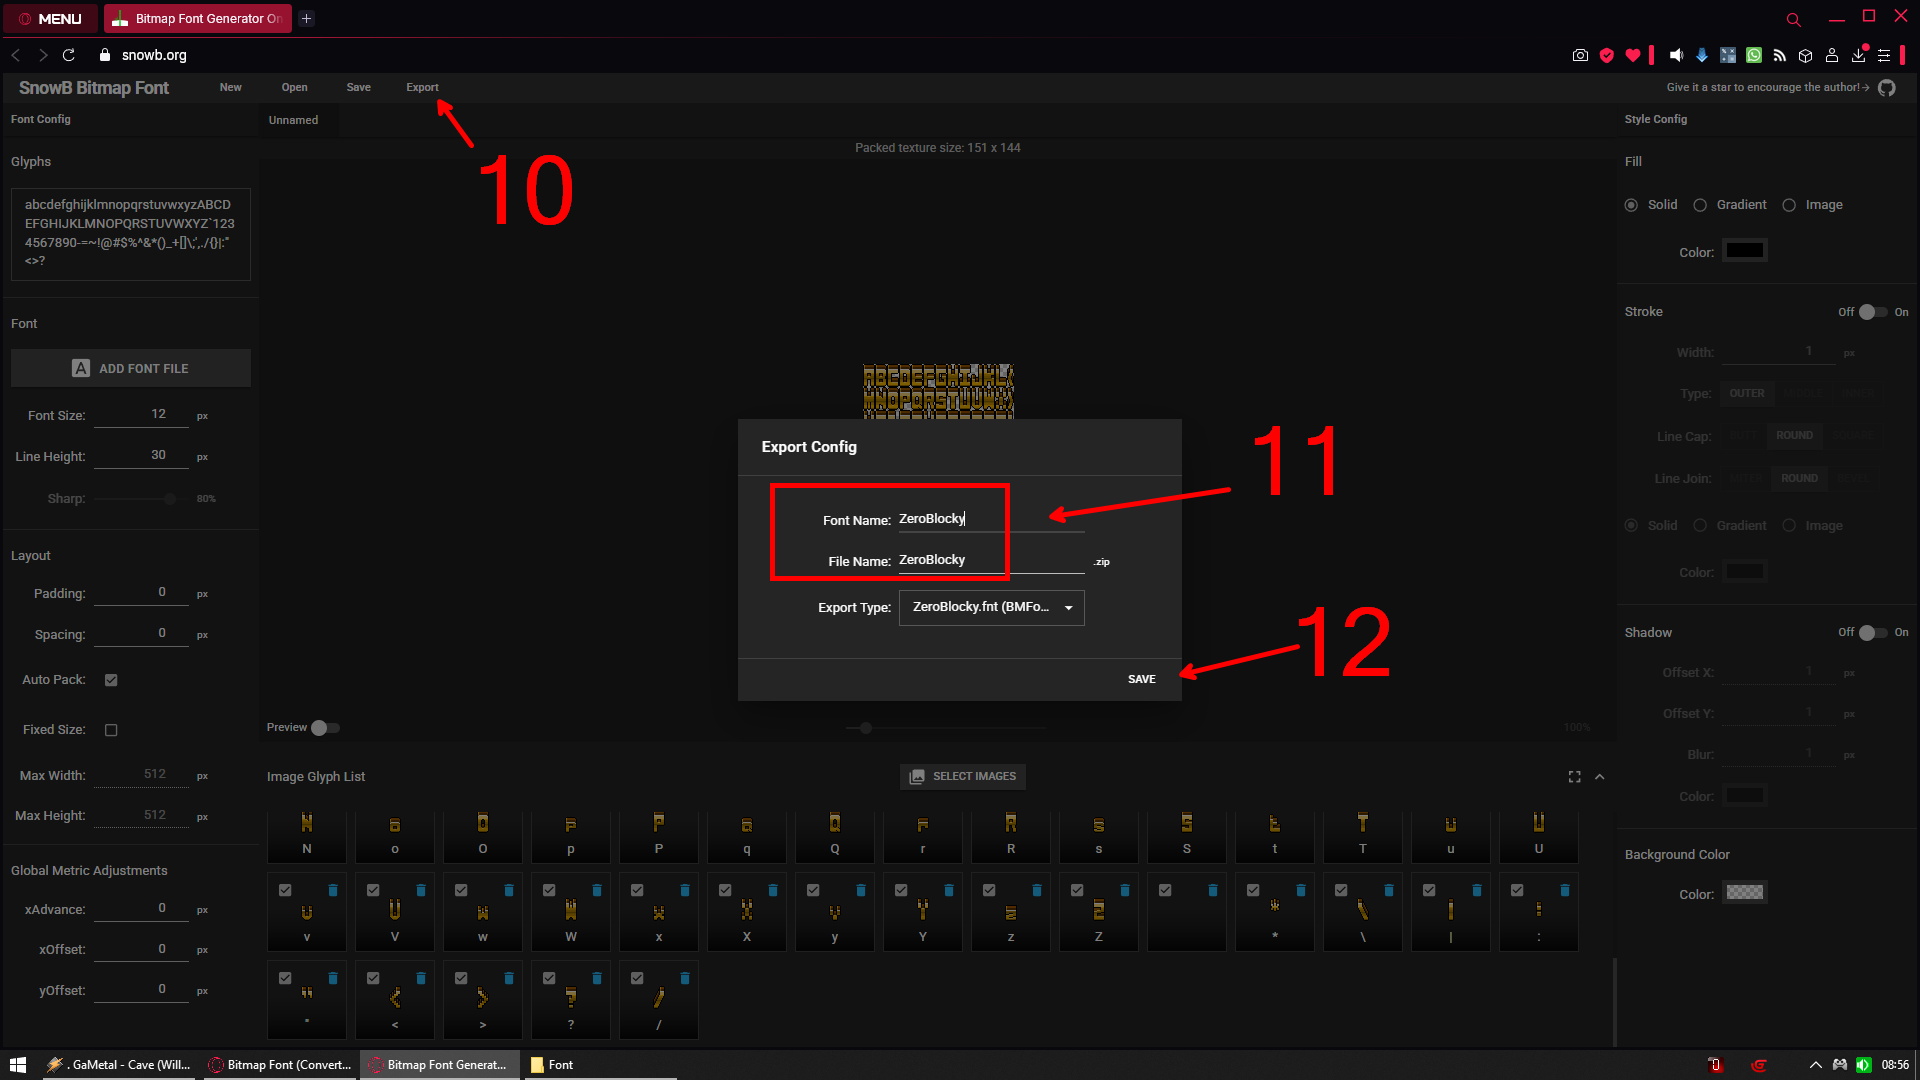
10 - Hit export
11 - Name your font
12 - Hit SAVE
Now extract your font from zip
You will get .fnt and .png file
And place them in assets folder of your project
Add Bitmap text object in gdevelop
And just select your font .fnt and .png files
Better disable word wrapping it will automatically add new lines
If glyphs would exceed width of bitmap text object and you don’t want that

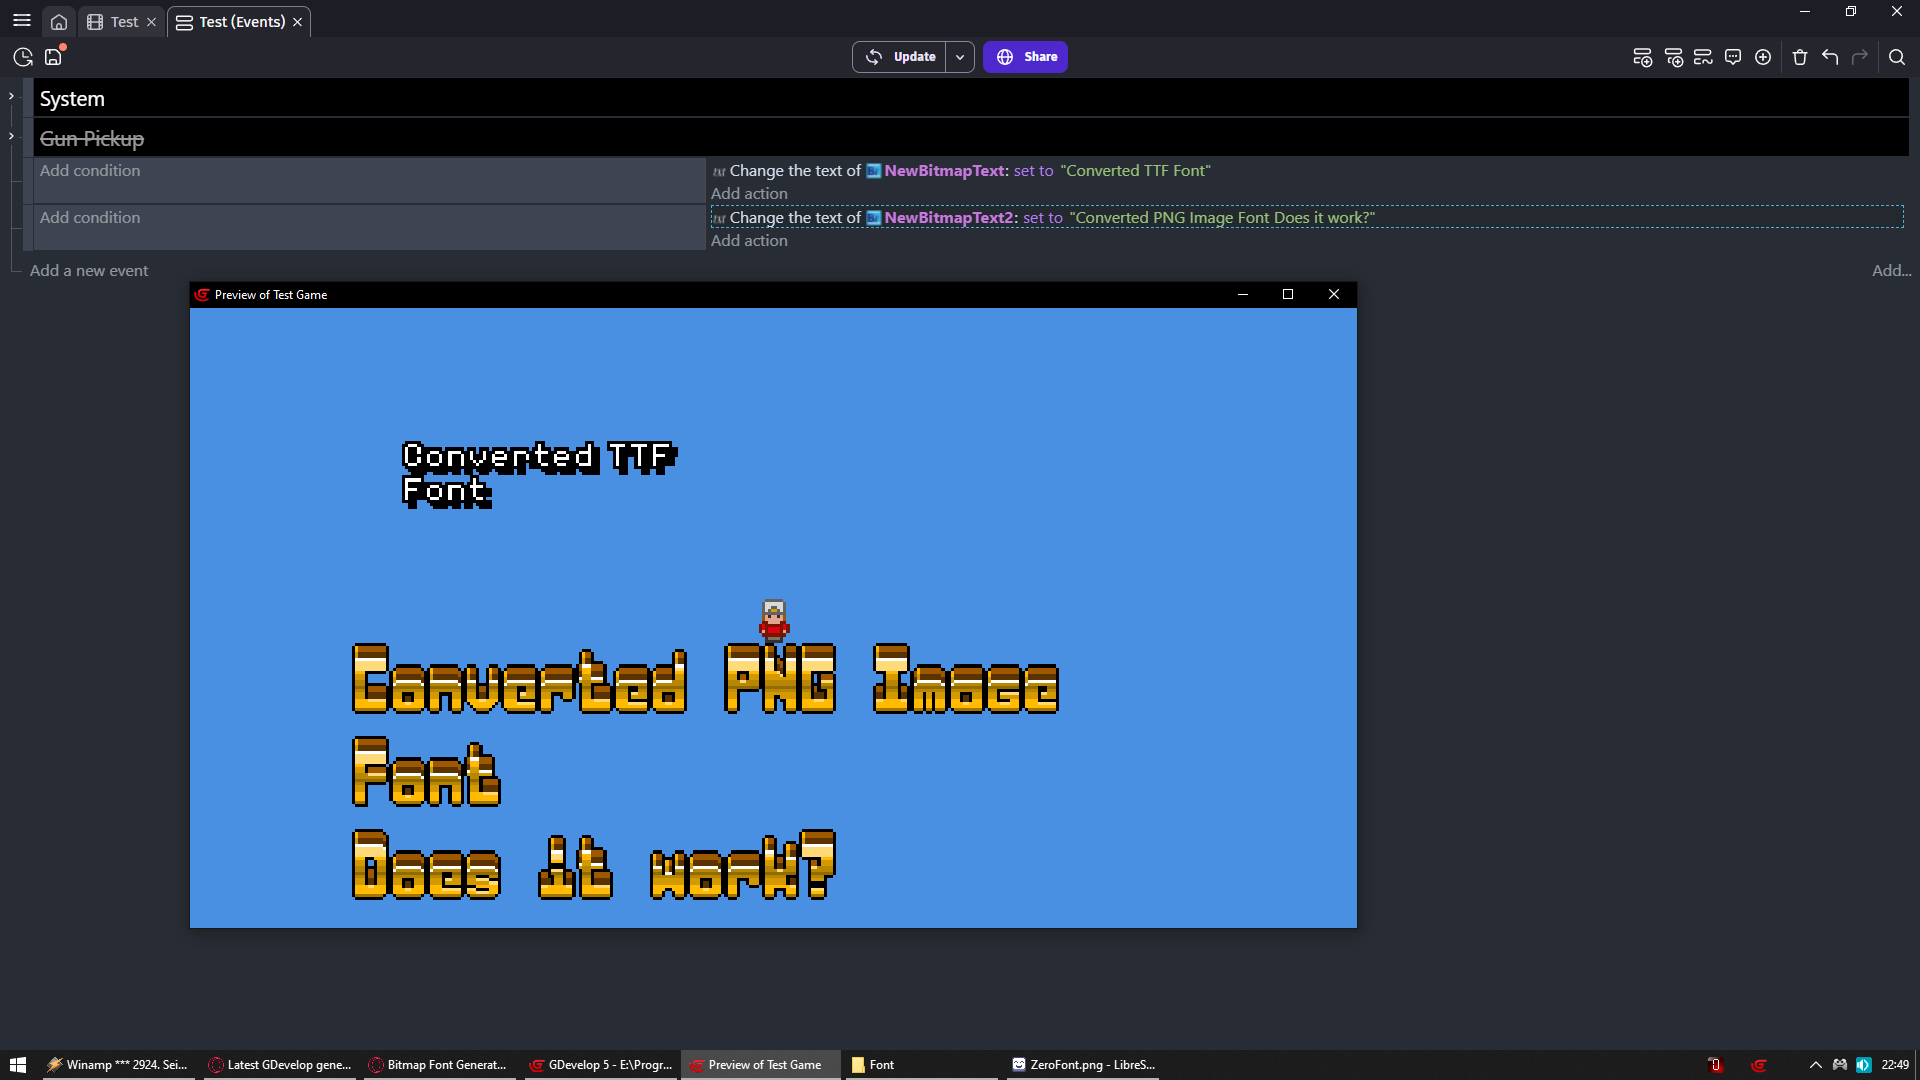
Let’s test that

I say it works
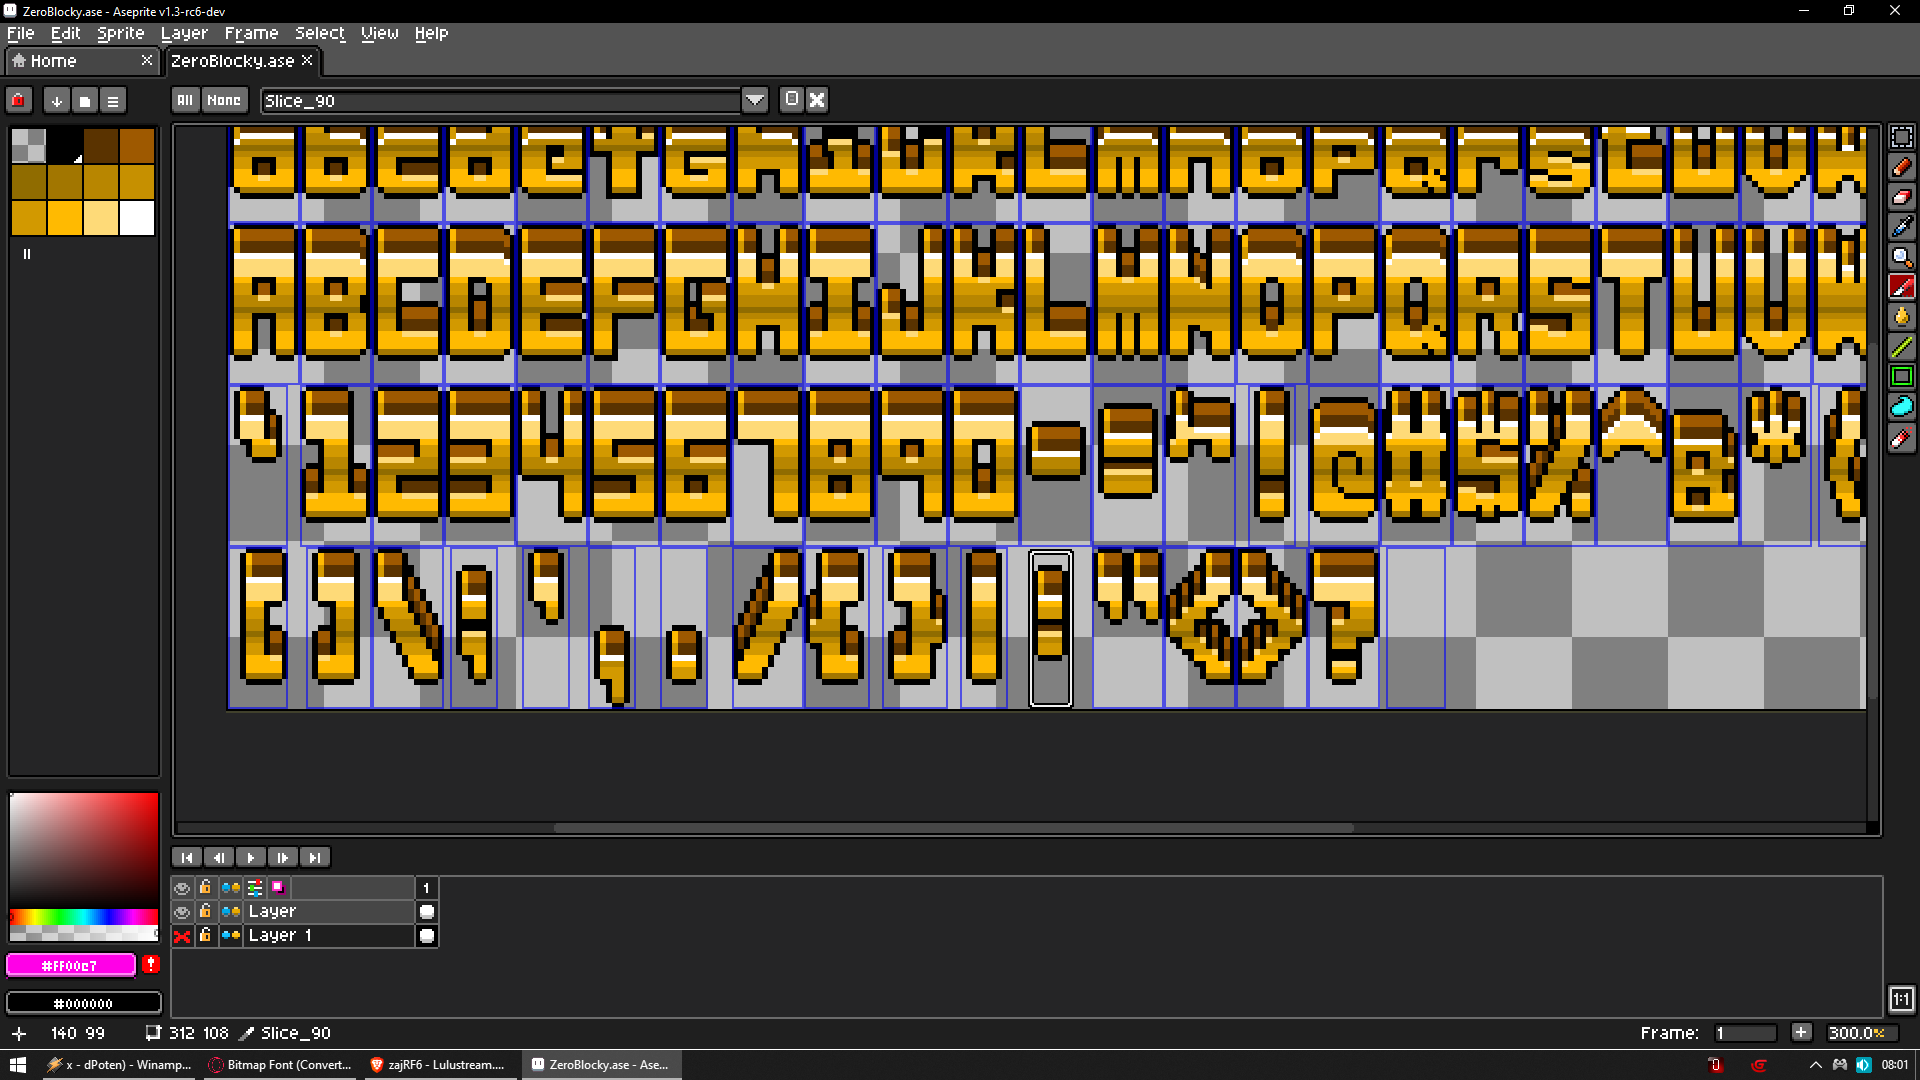
BUT WTF where is space?
You see i on purpose left it as this full block worth of glyph
Because now its easy to find
Let’s open our font .png file in librespirte
See easy to find
Now i gonna select Rectangle Marquee Tool
Select that glyph and simply hit delete then ctl+s

And let’s see how it looks in game now?
I say it looks ok
Now because some characters like l or i or : among some others may require some adjustment
In next section i gonna explain how to find and adjust them to your needs
Adjust/edit your font
Click to expand
Some glyphs need adjusting cause when you convert image to bitmap font
You do it for sliced images of same size
And at that moment there is NO WAY to set dimensions of for example B to be different than i
Same with most special characters like : will require less space than =
And on top of that maybe you wanna make some fancy font?
Well let’s start with that
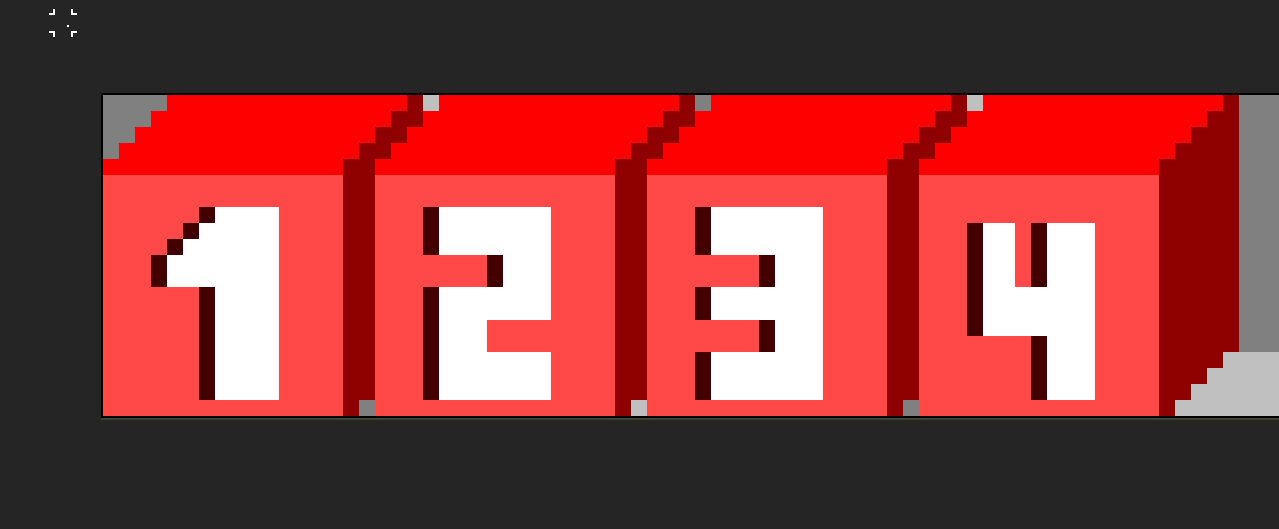
So i made this font
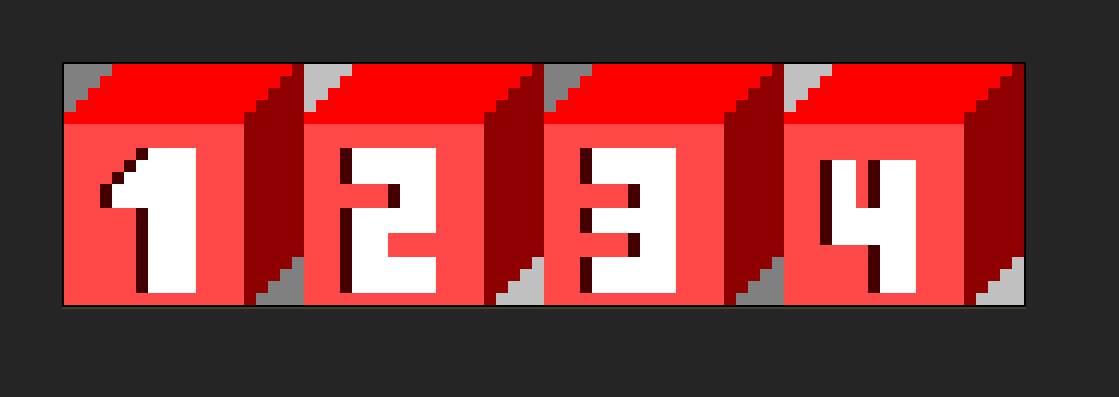
And this is also a tip that you for example can create font containing only numbers
Like for score or whatever
Mine will just be 1 2 3 4
And as you see its cubes
But they are spaced out
I want them to overlap
For example like this
I could simply cut out holes on right side of each of them
But then last glyph would have visible cut out hole
And we do not want that
Not to mention what if there will be only 1 glyph visible at a time in our game?
Well
Let me slice it and let’s go to snowB
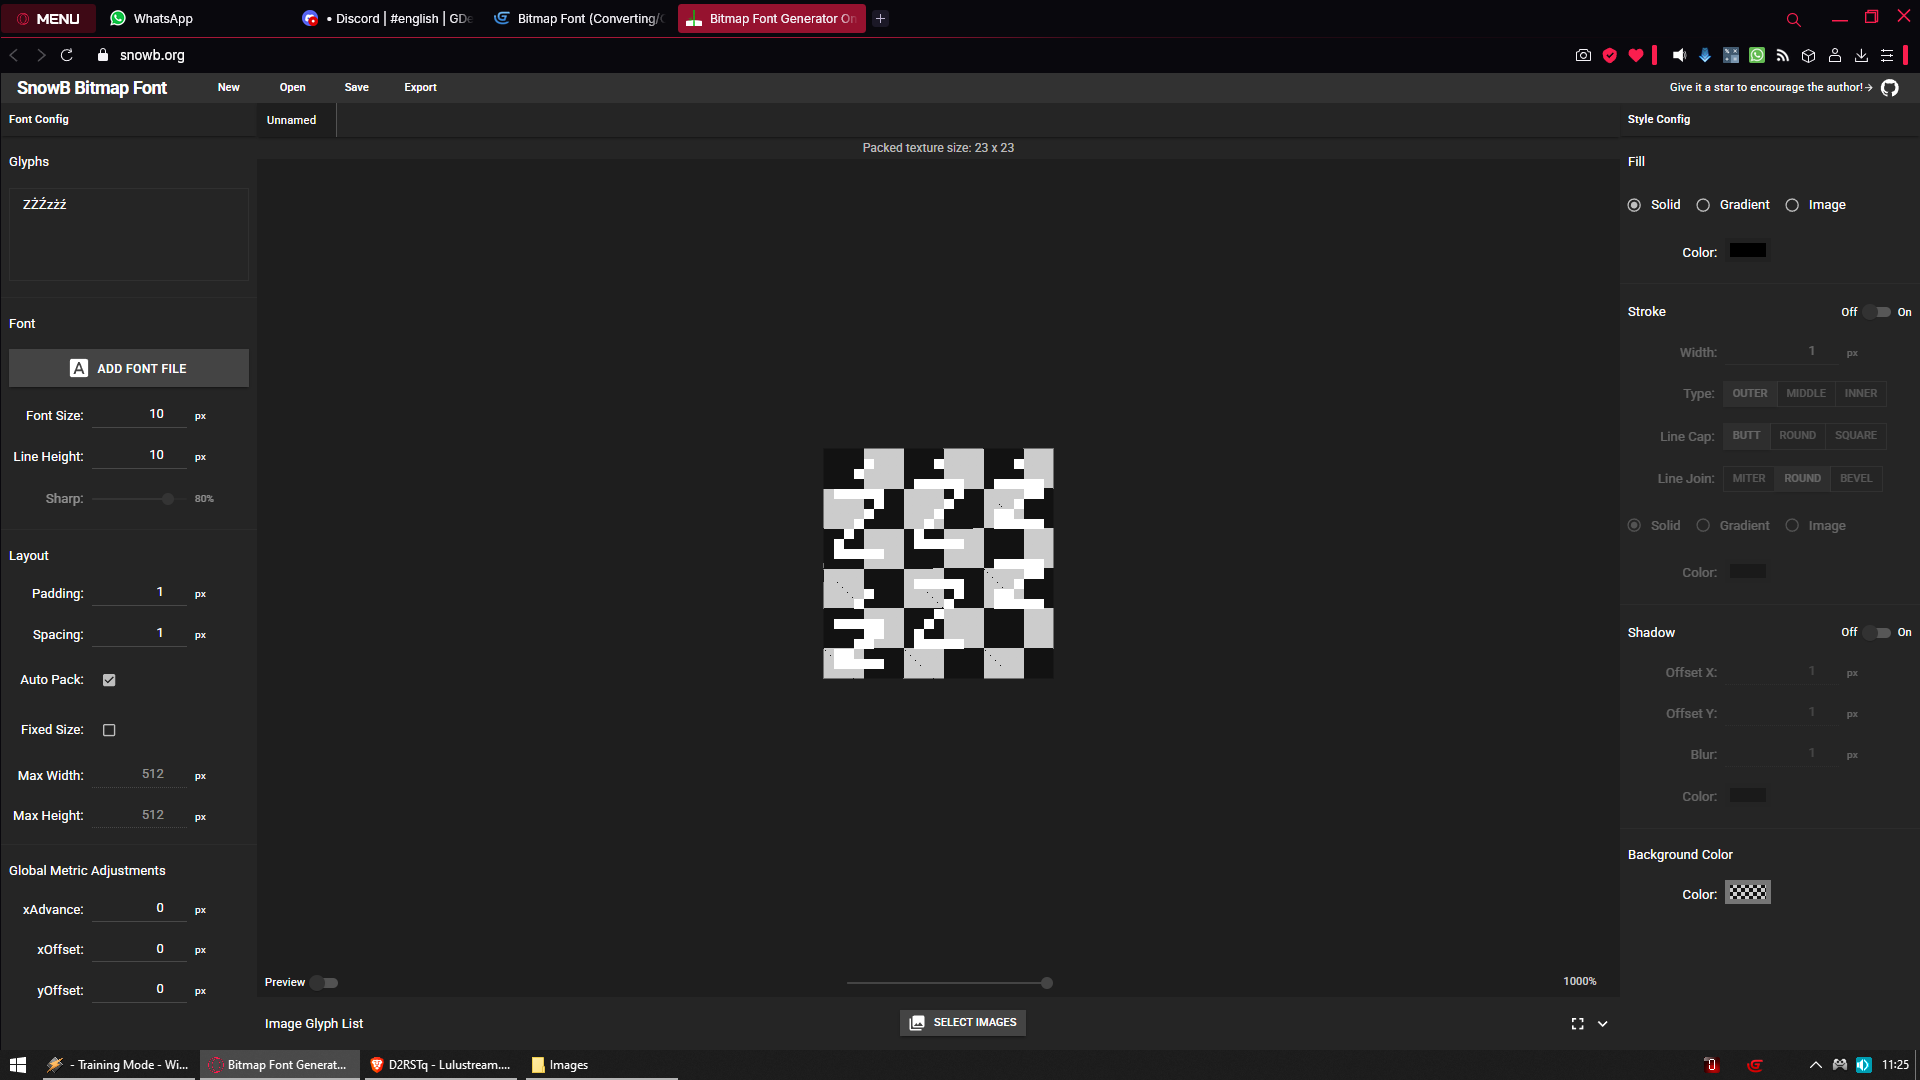
So we change Glyphs on left to 1234
Font size to our width which in my case is 20
Height for me is also 20 but i am giving it extra 5 pixels of space
Padding and Spacing to 0
And now XAdvance to -3
Why -3? Cause like in gdevelop if you want to move something to the left you subtract

Let’s export it and check how it looks in game
Is that?
Black magic?

Now let’s adjust for example : colon so it does not take so much space

Well looks way TOO spaced out
So before you import your image files to snowB
You most likely want to edit images of some glyphs
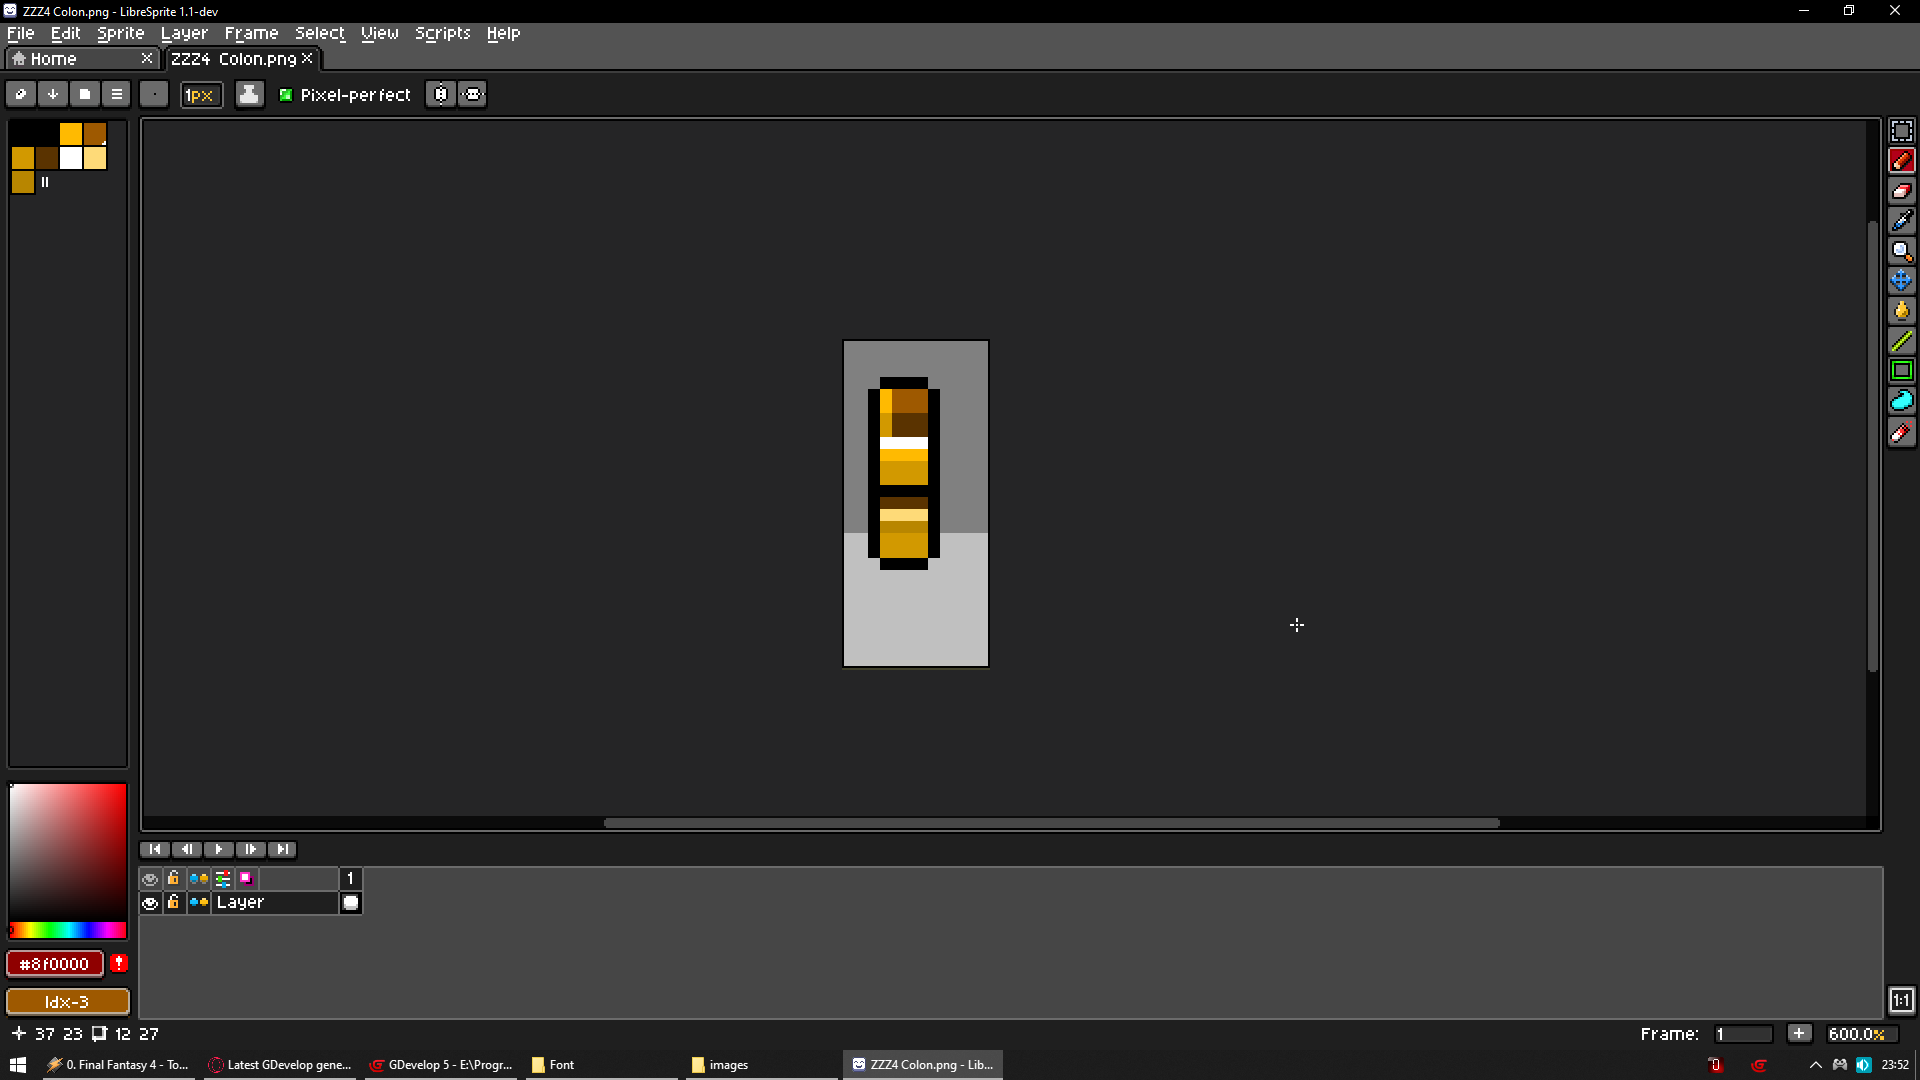
So we got our colon in images folder
let’s load it into libresprite and change canvas size (press C or Sprite > Canvas size)
Let’s leave ONE empty pixel on both sides
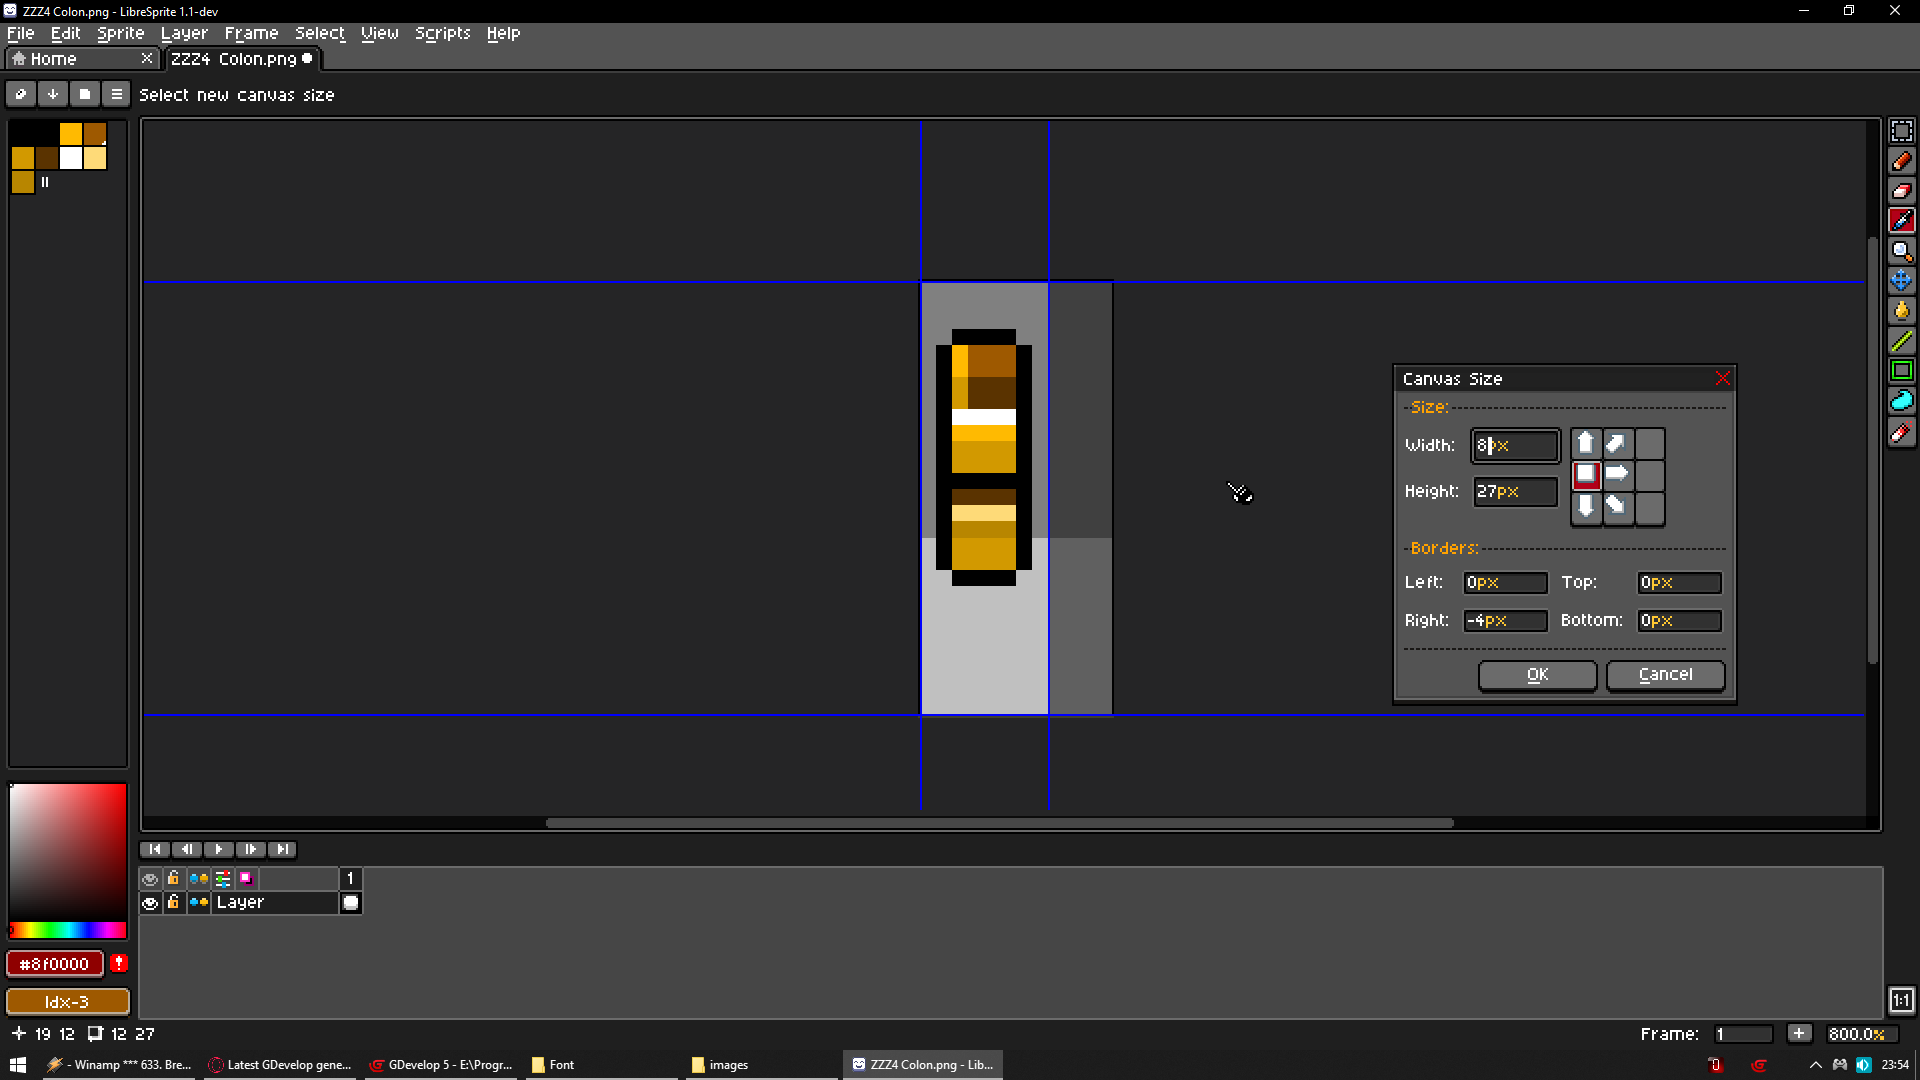
Looks about right
Now let’s save it and load it with all glyphs to snowB and export our font again

I think it worked
Now you need to repeat same process for each charter which you want to adjust
BUT i wanna show you one more method
Imagine my ORIGINAL font was meant to actually be mono space
So i do not mind l or colon or ! take so much space on sides
BUT i do have issue with comma , being too high look

Well
If that does not look stupid then i don’t know what does
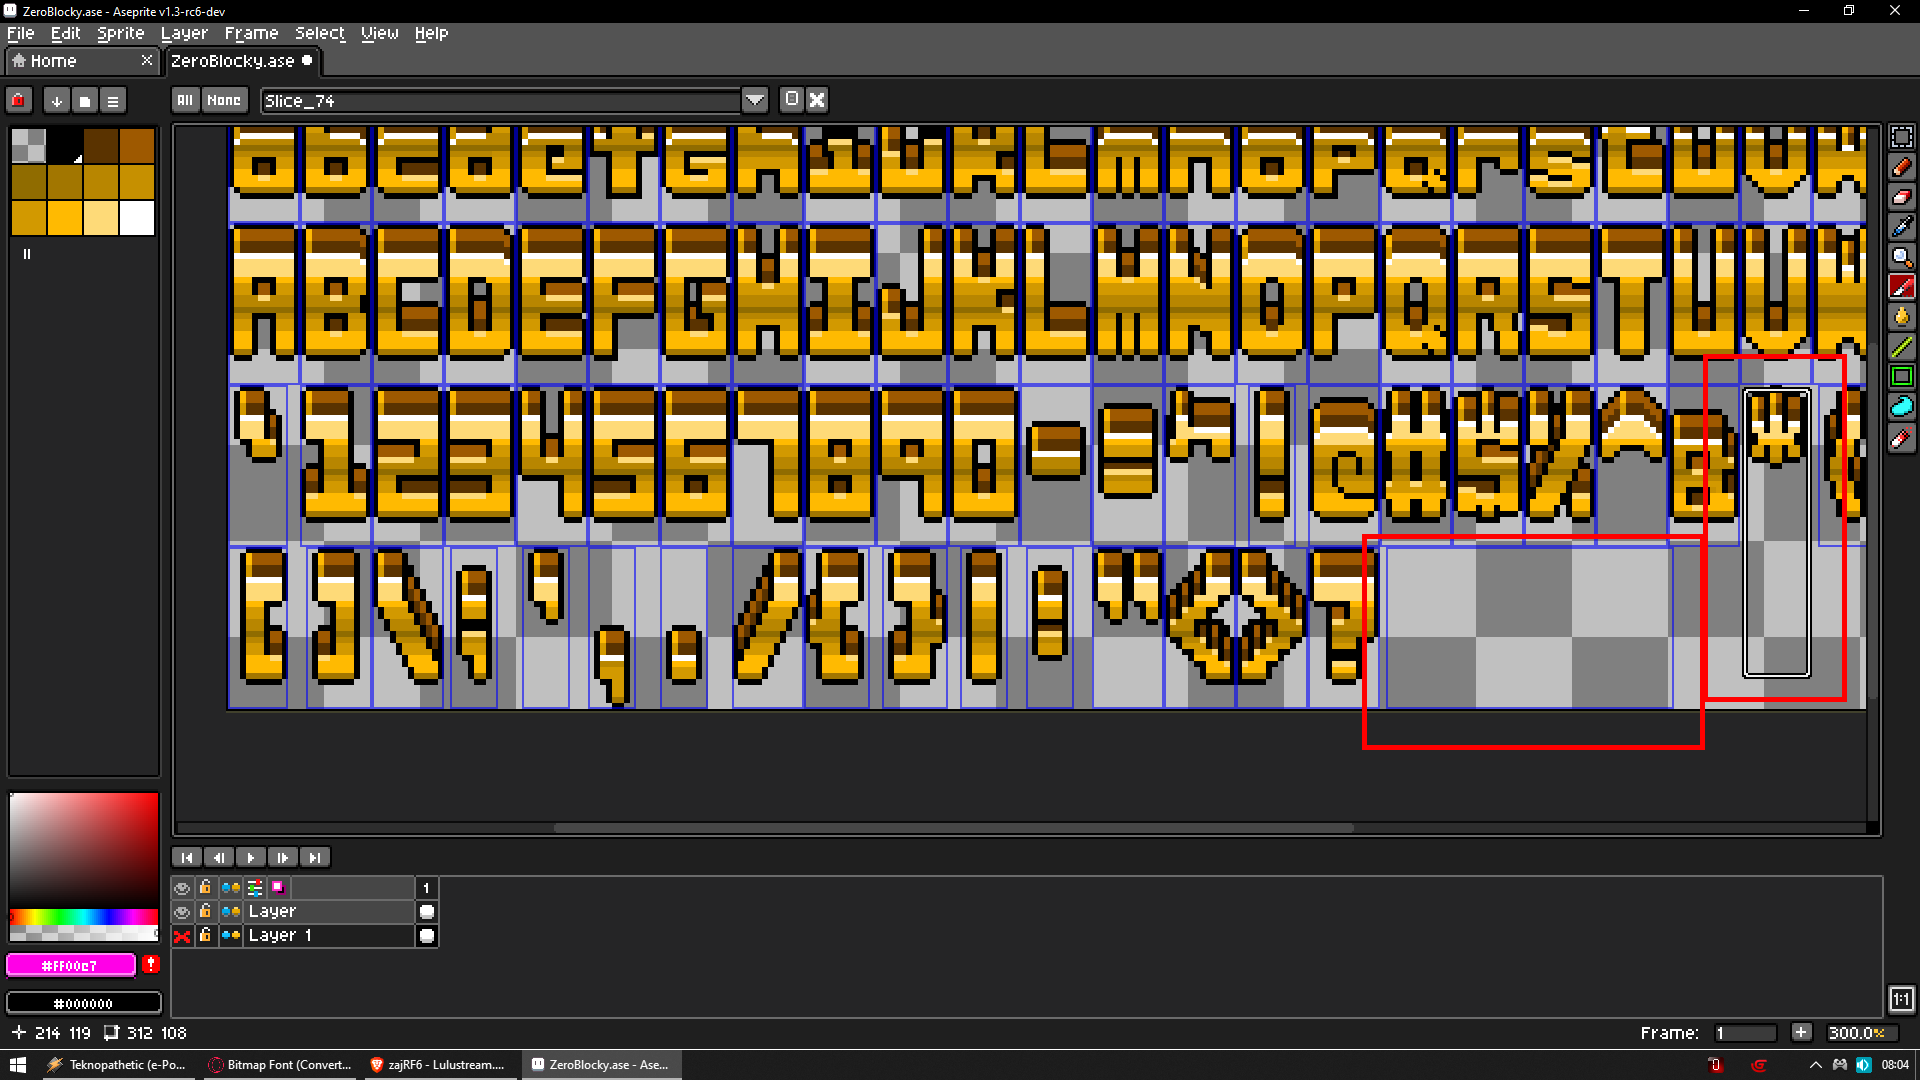
Let’s load our glyph atlas into libresprite and try to find there position of comma
Look
I know one of them is my comma but which?
Well actual i know its one the left
Since its darker
If you look at my font it is lighter on top and darker on bottom
BUT that is not the point
I could simply place red pixel on it before converting to bitmap font with snowB
And now it would be ultra easy to find
BUT why we want to find it here?
To find its coordinates actually its X and Y origin point
That is exactly why i told you to use 0 padding and 0 spacing
Cause glyphs take now as much space in atlas as they need to
So they are like compressed as much as possible
Now look

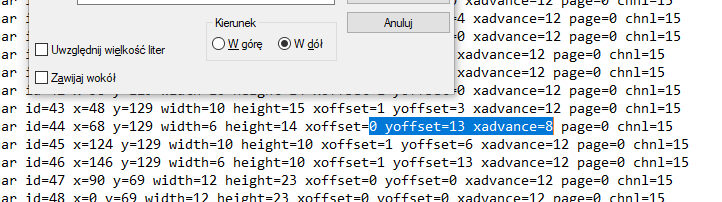
We got coords so let’s open our .fnt file and try to find comma with its position
I gonna search 68
BTW i opened .fnt file with notepad
JACKPOT

Now lets move it 4 pixels down without editing image
And for that we changer Y offset from 9 to 13 (you know 9 + 4 = 13)

Ctrl + S and let’s see how it looks in game
Well
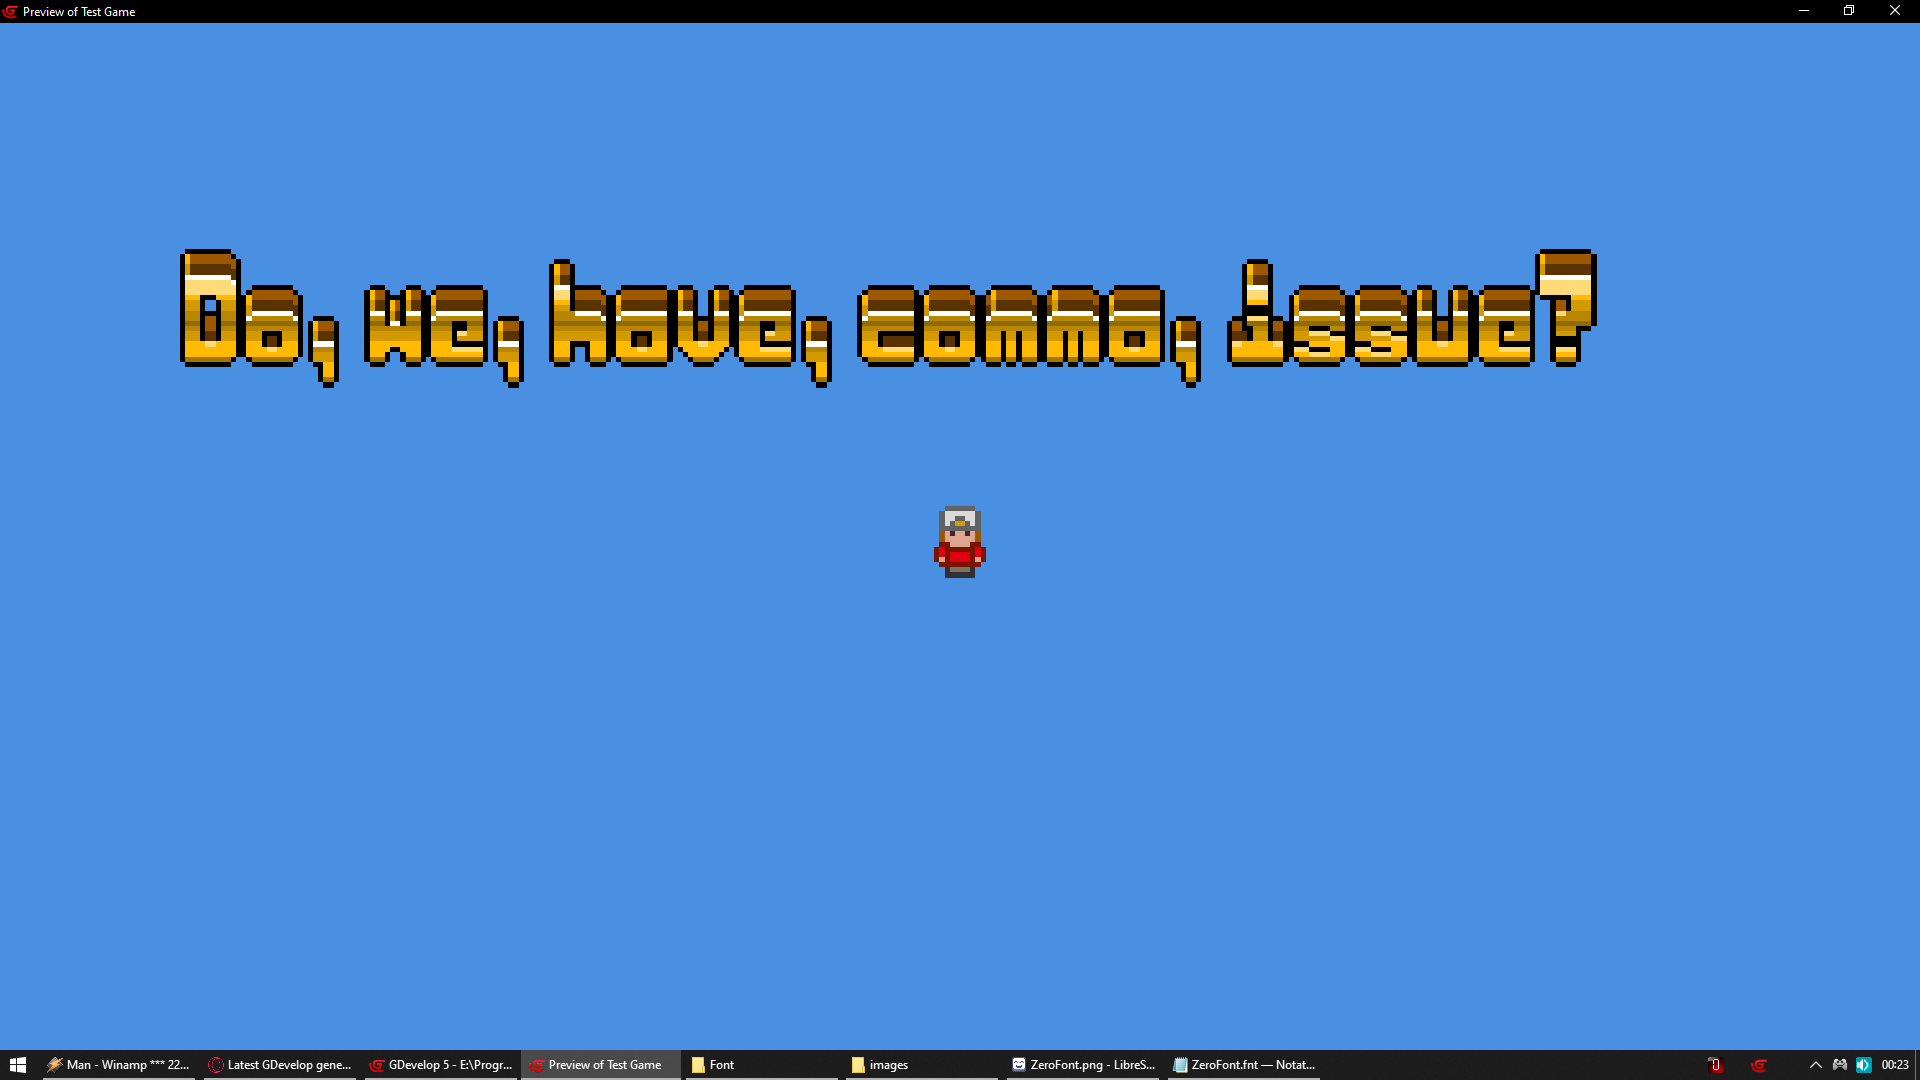
How about we reduce space on left and right side?
I changed xoffset from 1 to 0 which moved it 1 pixel to the left
Then i changed xadvance from 12 to 8 which removed 4 pixels of empty space right from it
And how does it look?

And in case of my font that is only change i really needed
I could either before converting my font to bitmap in snowB change image of comma
Or do it by finding glyph itself in atlas .fnt file
However you do it is up to you
Some tips
Click to expand
-
Your font gets blurry?
Go to resources tab (you can open it from project panel on left)
And click on your atlas image and un check smooth image on left
To avoid following images to share same fate go to project properties
And just change scaling mode to nearest -
You see strange lines on left/right from some glyphs when changing position of text object?
Try changing it to something with decimal
For example you change its pos to X 20 and Y 75
Change it to X 20.1 and Y 75.3 or 4 or 2 or whatever try some numbers -
Changing position to
Left screen edge with 5 pixels margin change Text position set to CameraBorderLeft()+5 text alignment needs to be set to left
Center of screen CameraCenterX()-Text.Width/2 alignment needs to be set to center
Right screen edge with 5 pixels margin CameraBorderRight()-Text.Width()-5 alignment set to right -
Your text flickers when its changing?
Change position action needs to be BELOW change text action
In events sheet change text action needs to be always ABOVE change position action -
In my language i have special characters such as ą ę ć ź ó and few others
I tested it and adding them to Glyph on the left in snowB then adding image of it on Image Glyph List on bottom and renaming special characters to what they should be actually work -
Always make backup of your sprite sheet and edited image
You never know when it will save you from losing hours of work -
Look at some fonts before you create your own
So you can plan each glyph
For example if you seen mine font it does look strange when it comes to k or i but in my case its charm of it but in many other fonts
You want have different size for multiple glyphs -
Am i only one here feeling strange calling them glyphs and not characters or letters/symbols?
-
Remember that after you exported bitmap font
You can literally edit atlas image
So you could simply mark some glyphs with some pixels to find them easier later -
Also you can simply change visually your font from atlas image
Even go as stupid as having ONE .fnt file but multiple .png files
Where one have outline other don’t
Where one is normal and on other each i have heart instead of dot above it -
My font is free so you can use it in your game without a problem