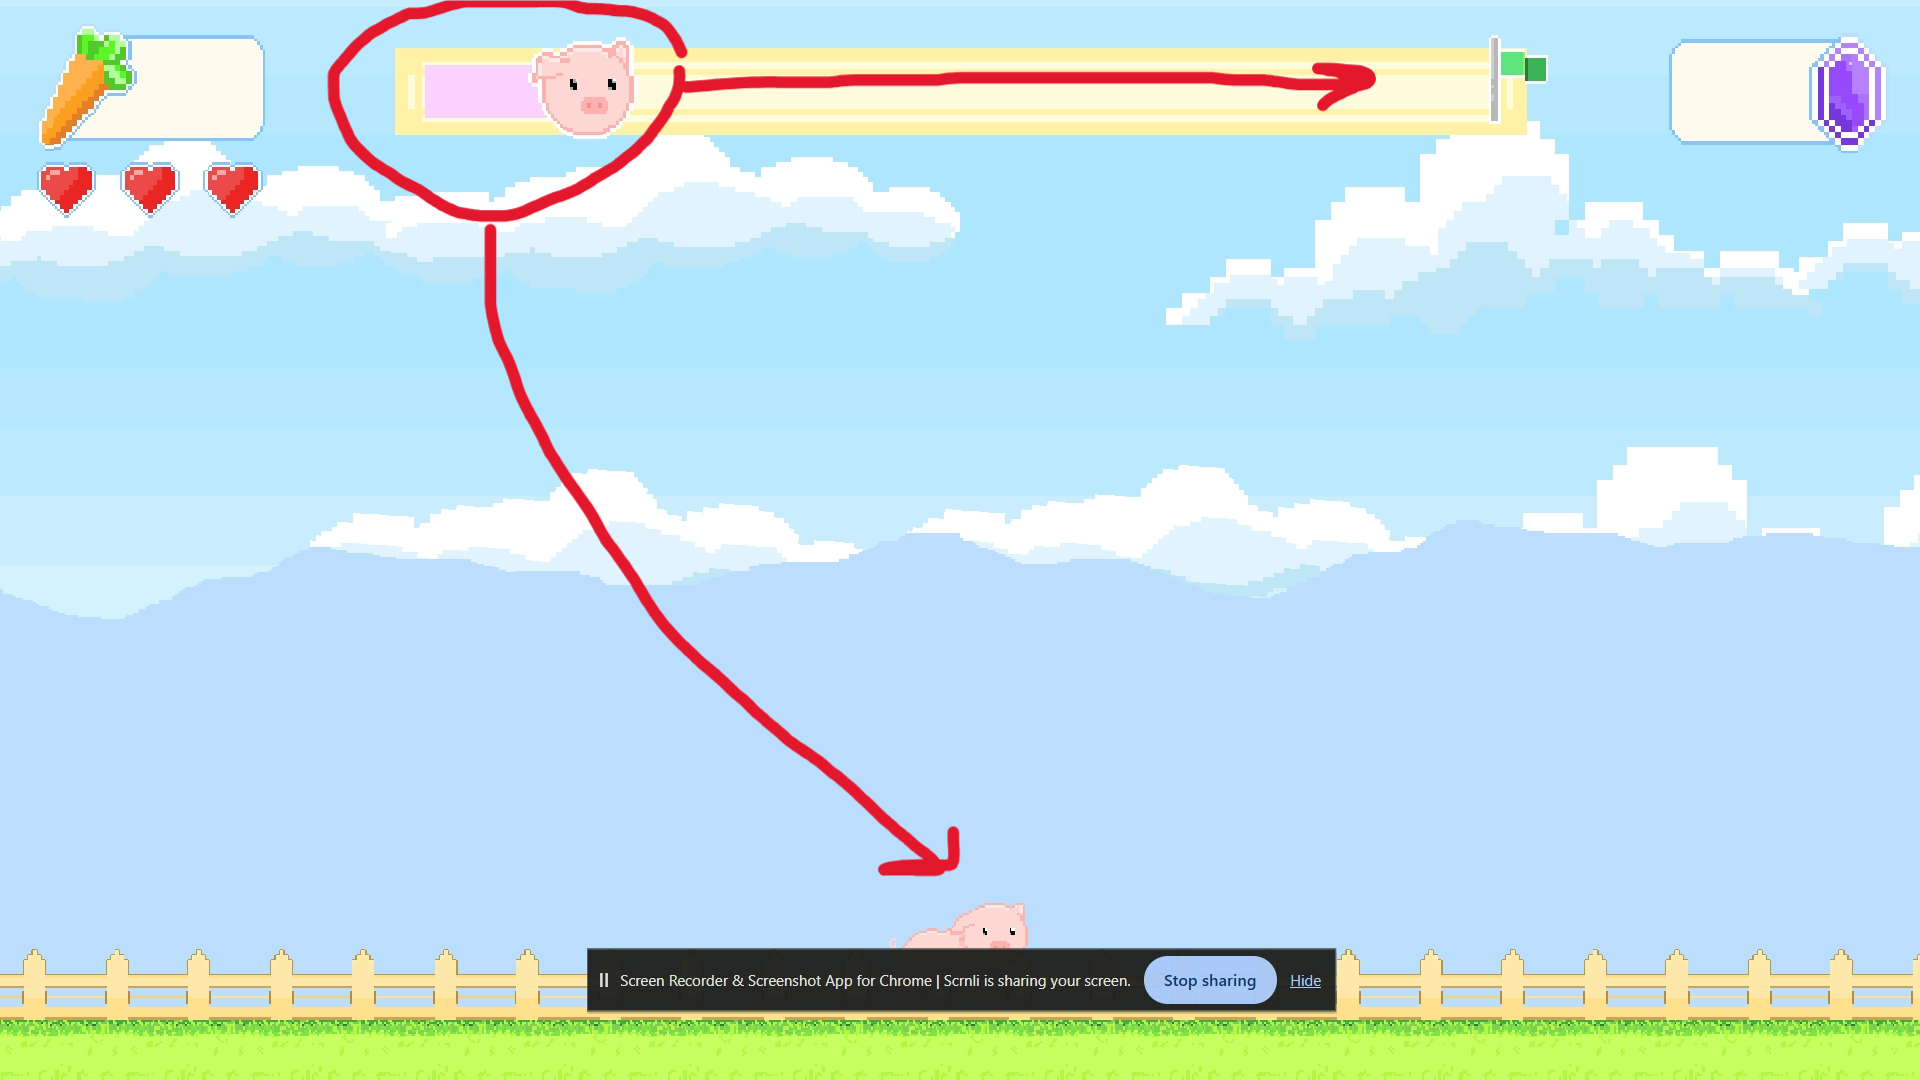
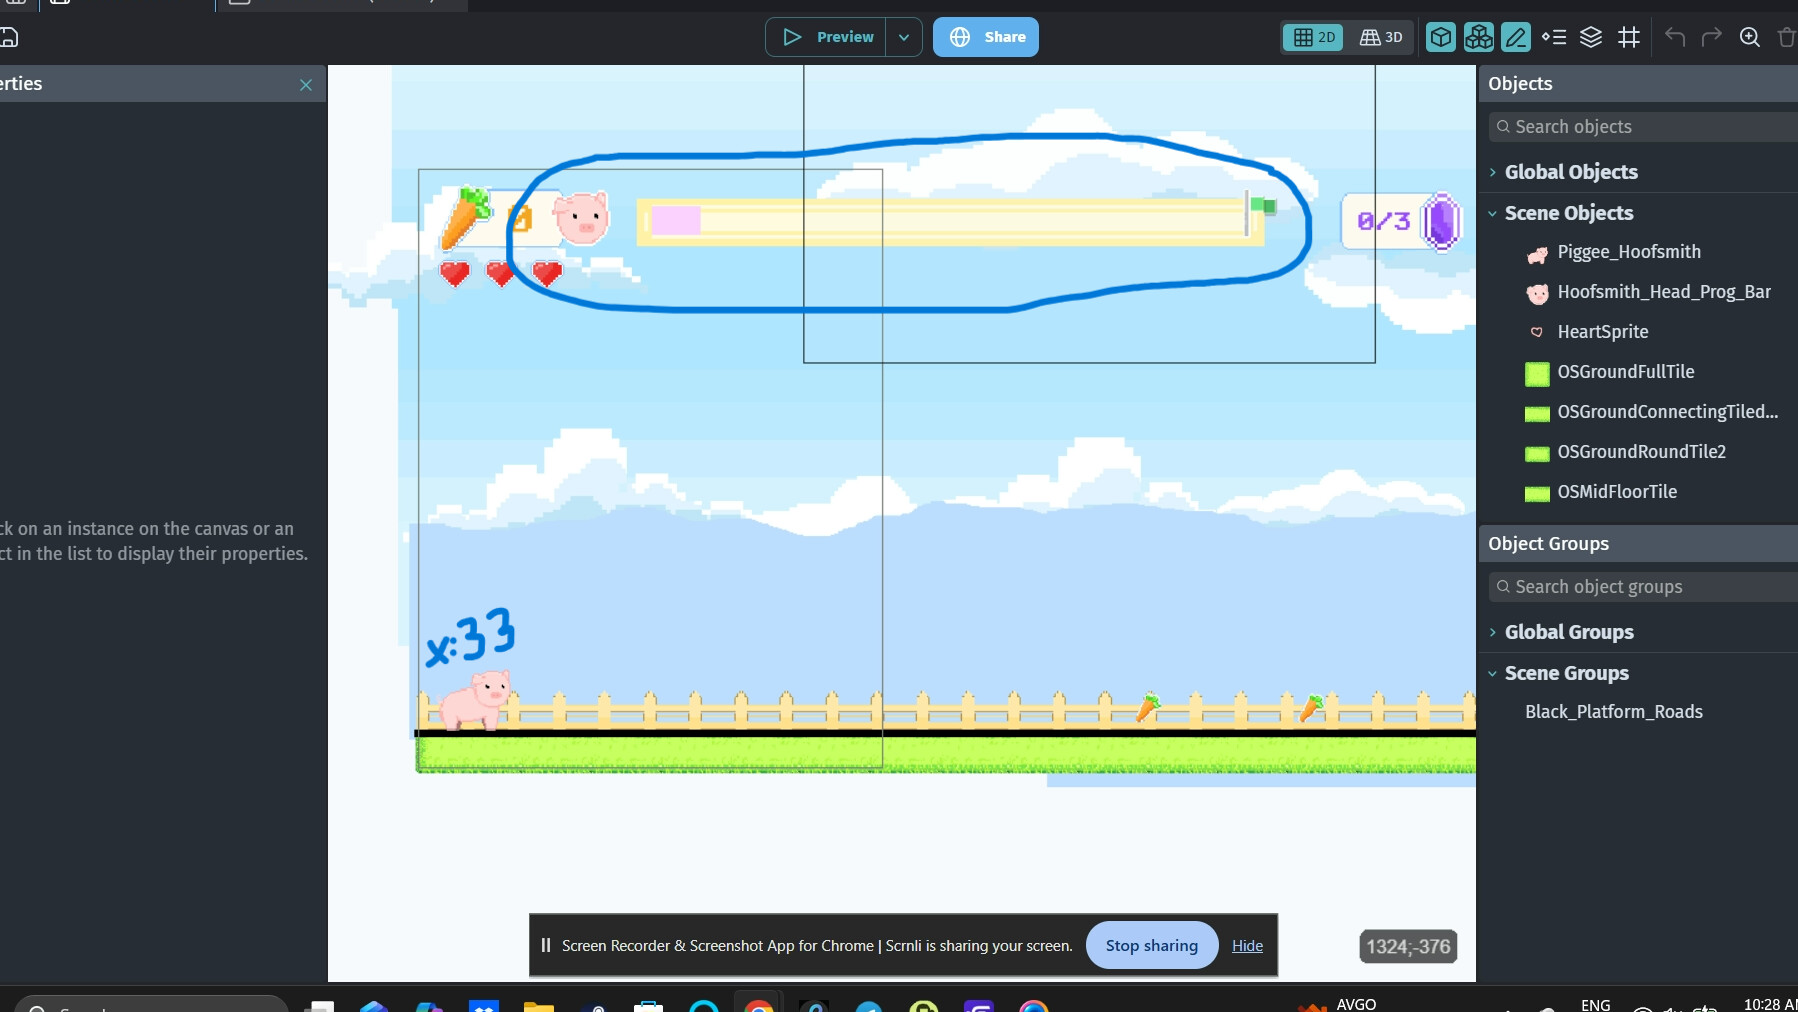
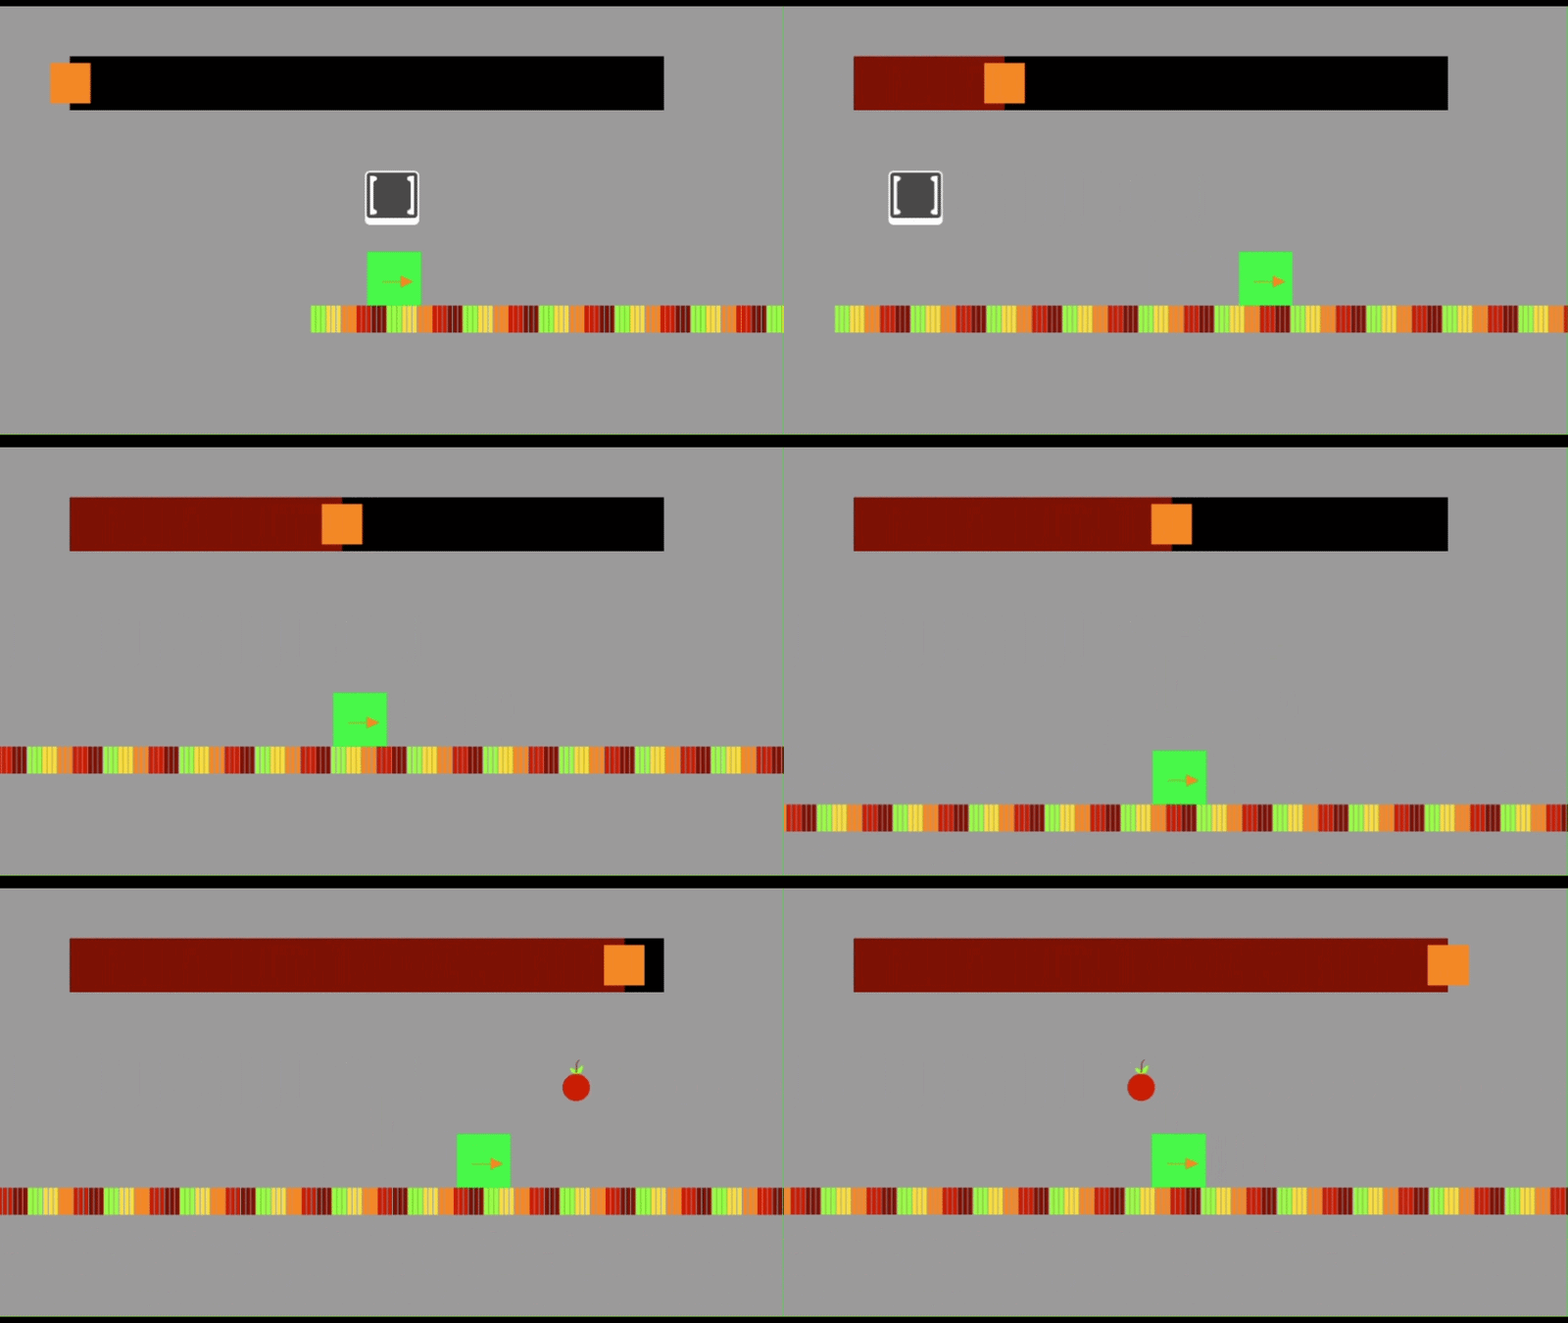
I’ve done a bit of searching online and in this forum, and I haven’t found a way to create a progress bar that would work with my game’s visuals. Below in the screenshot, I have a visual idea of how it would work. As the character’s icon crosses across the top part of the screen, the pink bar follows and also fills up the bar. The filling bar and character stop moving when the character reach the green flag at the end of the level.
I haven’t been able to figure out how to do so without messing up my bare bones coding, and I barely know how variables work so I would be making this progress bar from scratch essentially. Could someone so kindly help me set the progress bar up accordingly? Thank you <3 c:
P.S. I’ve included arrows that kinda help illustrate what I mean lol.
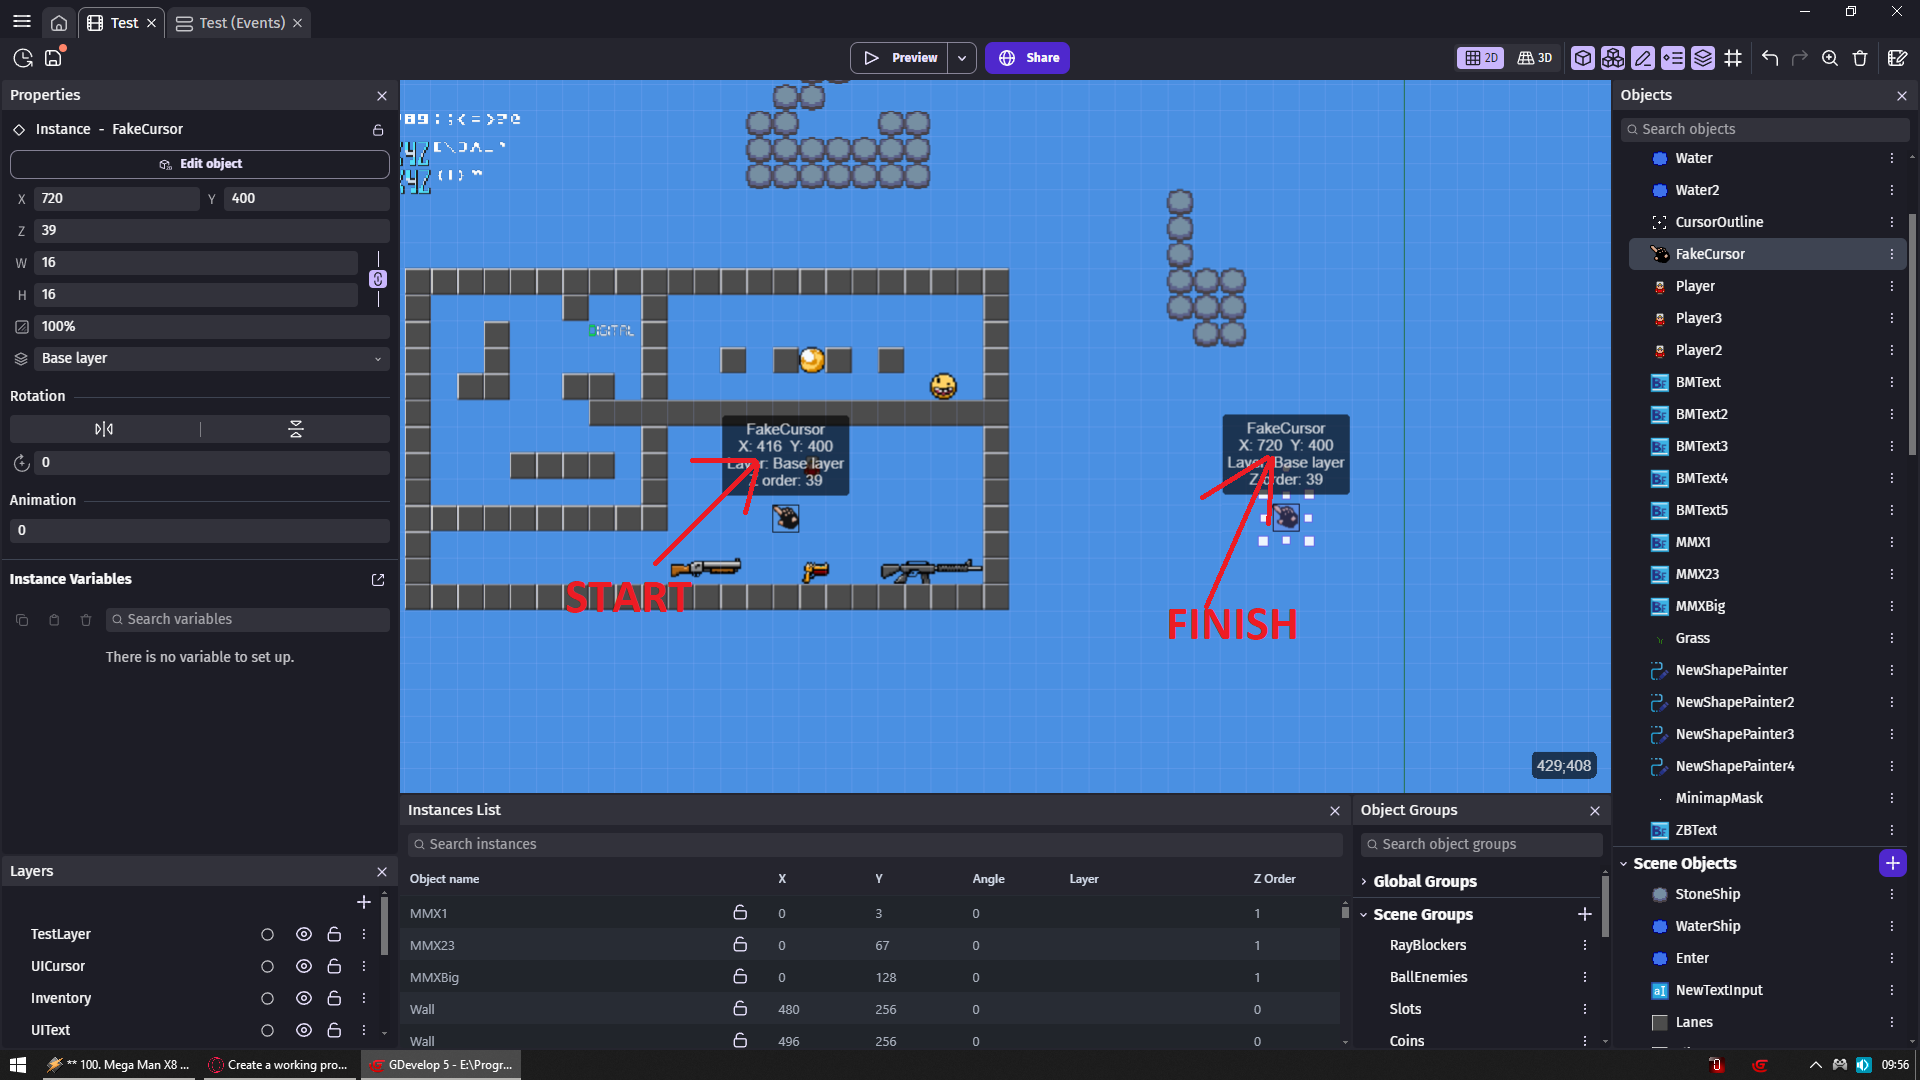
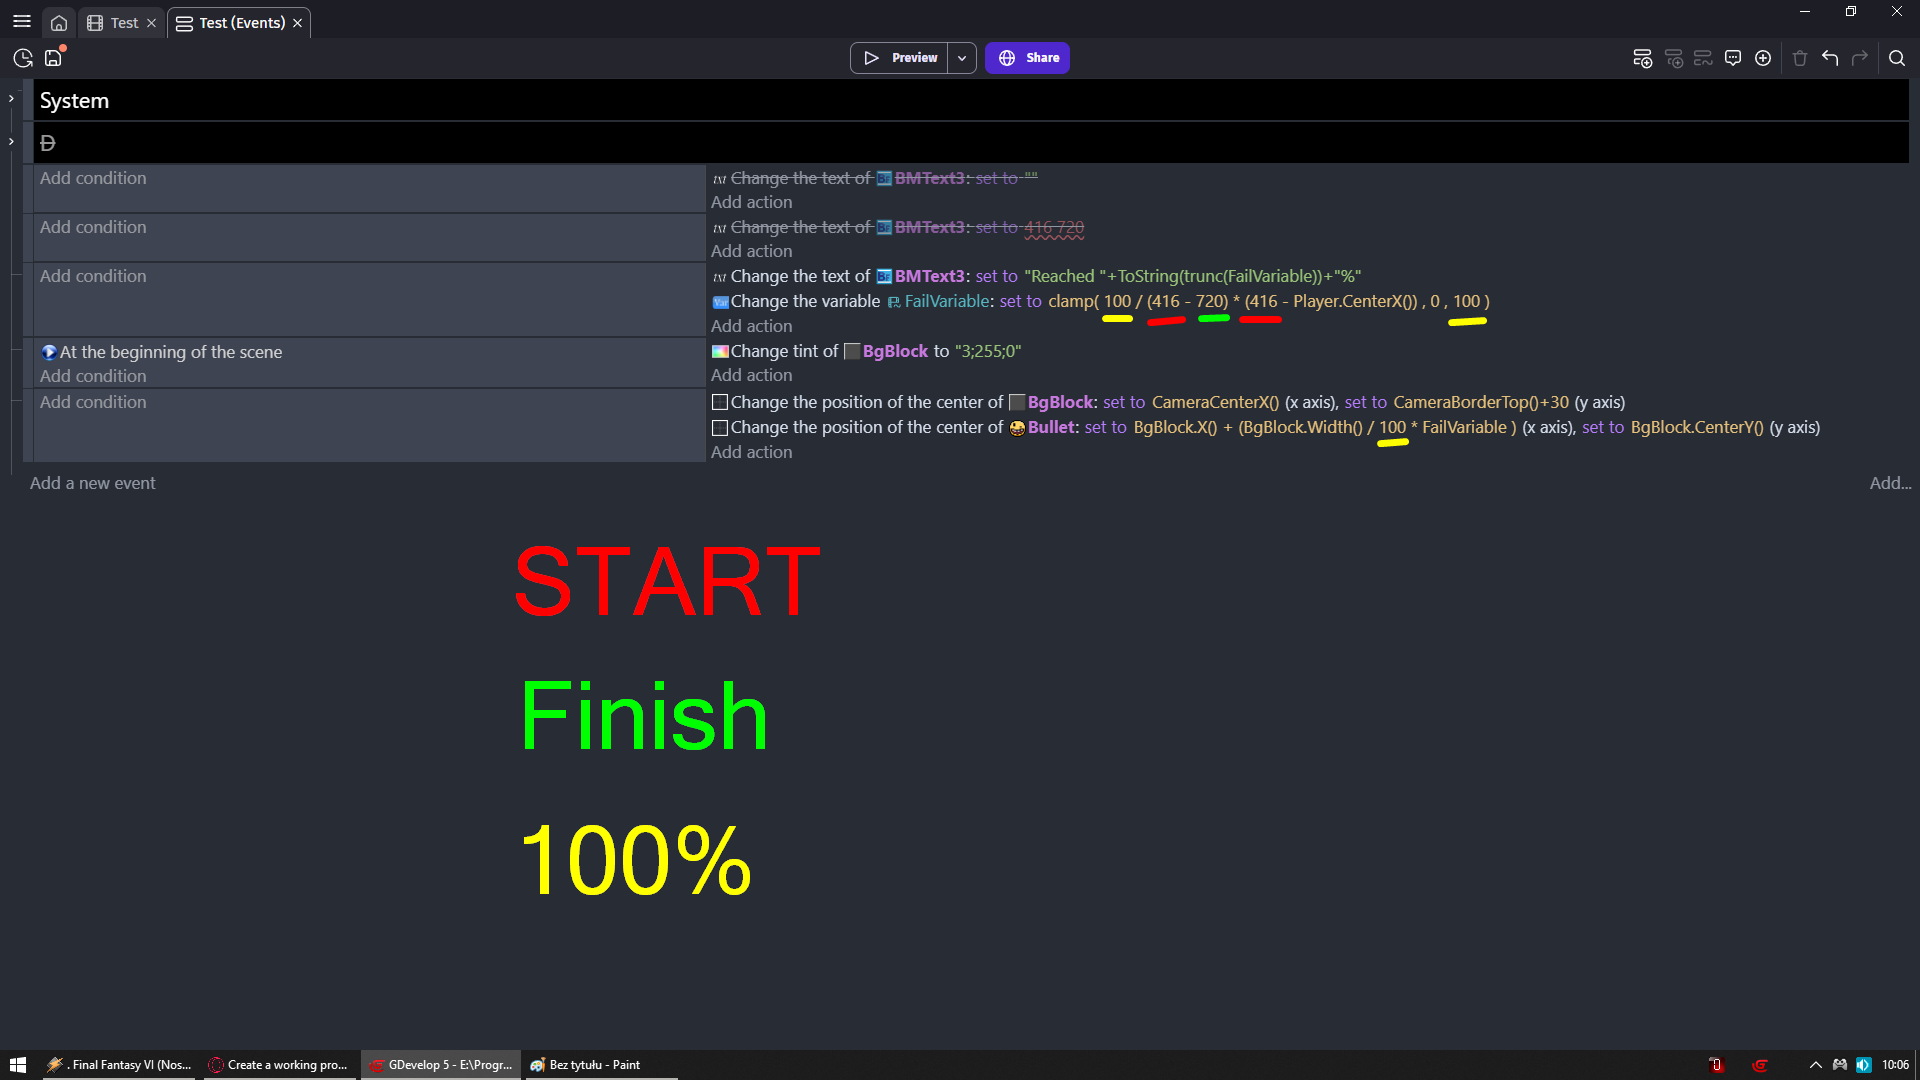
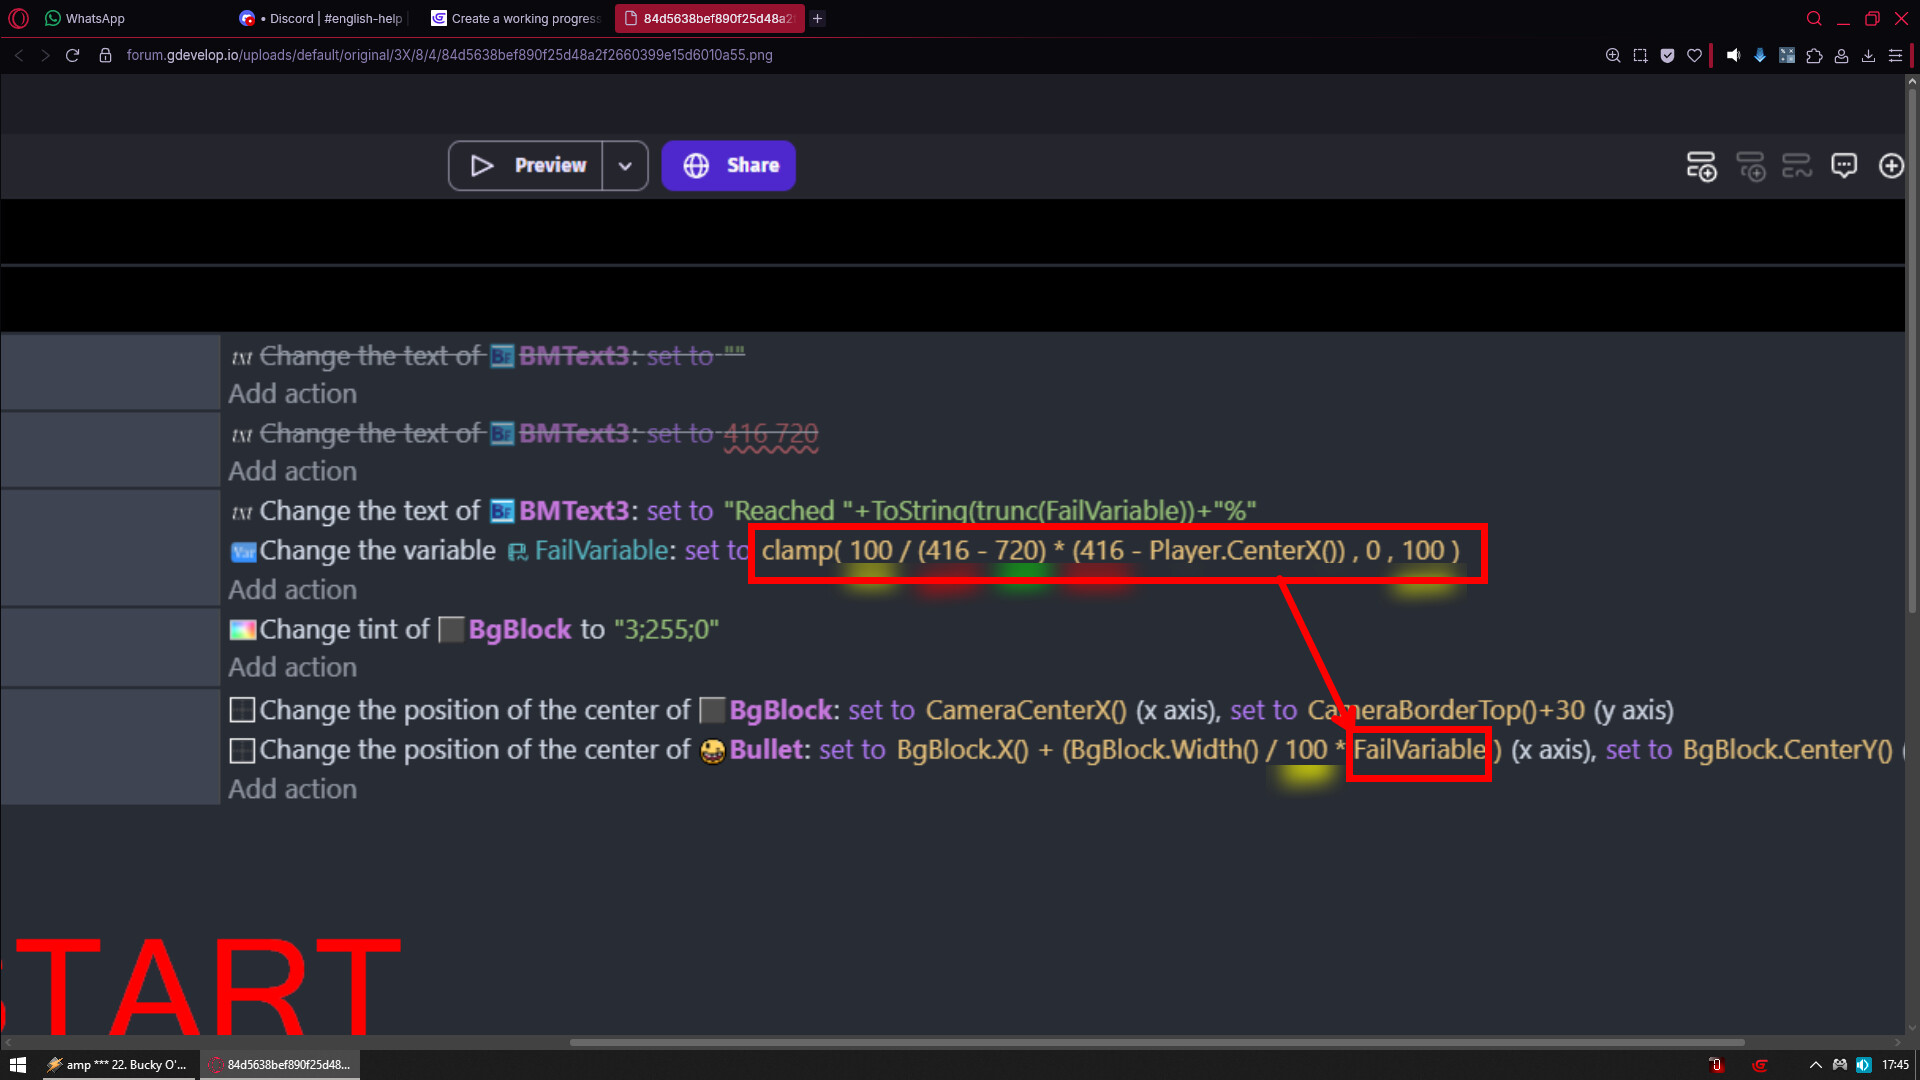
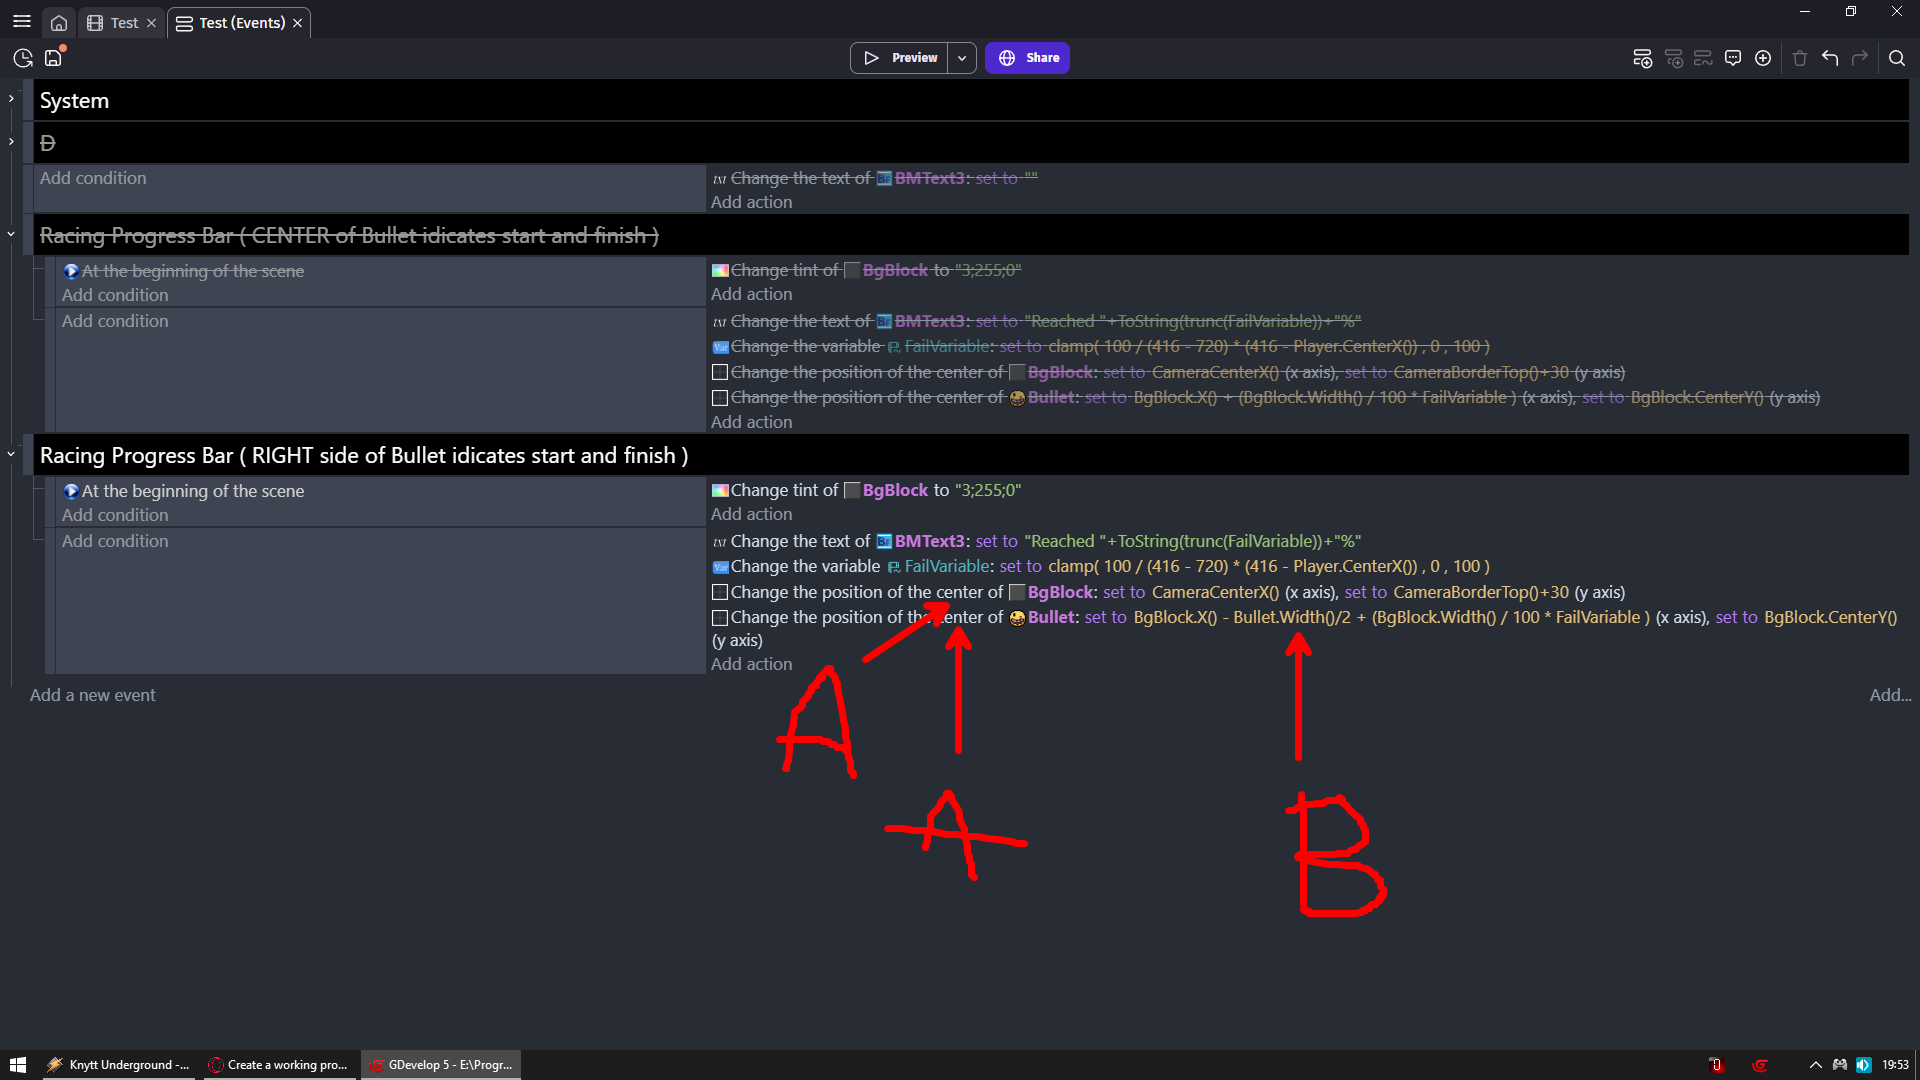
I used variable to be able to print to text object distance reached in %
Basically you don’t need it you could put math from FailVariable into formula in change center X position of marker object (bullet) (last action) which indicates your progress on bar (BgBlock)
I’m not really sure what part you are asking for help with exactly. It sounds like you already have the icon moving toward the green flag, and just need help with the bar itself?
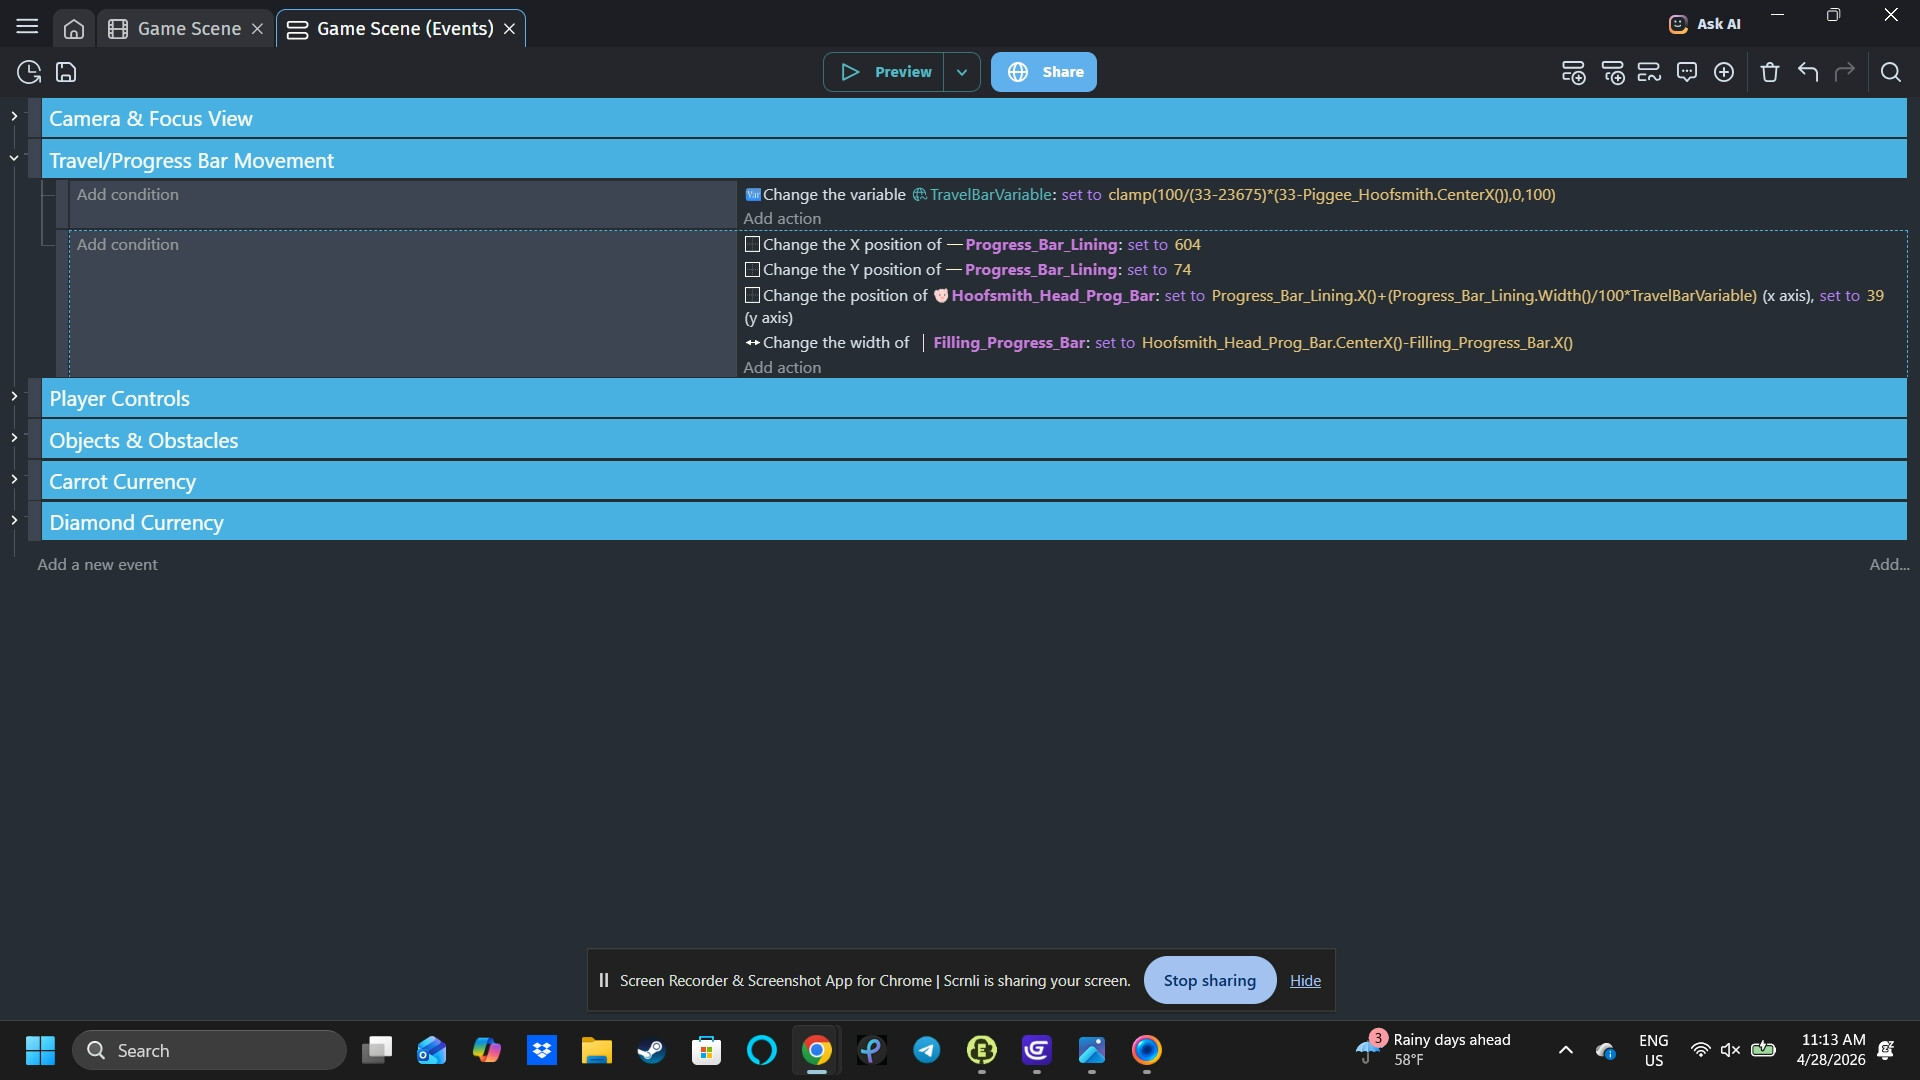
If that’s the case then I would just use a 1px wide sprite (since the bar is solid pink - if you want a pattern, you will need to use tiled sprite). Then as the icon moves, you set the width of the sprite to “fill” the space up to that point. Adding width will expand the sprite to the right by default so you don’t have to recalculate the original position:
Hi, I actually completely illustrated the bar moving, so the pink bar is a static sprite and I just popped the icon over the top of that and ran the game preview. Also, appreciate the feedback and am implementing all advice shortly.
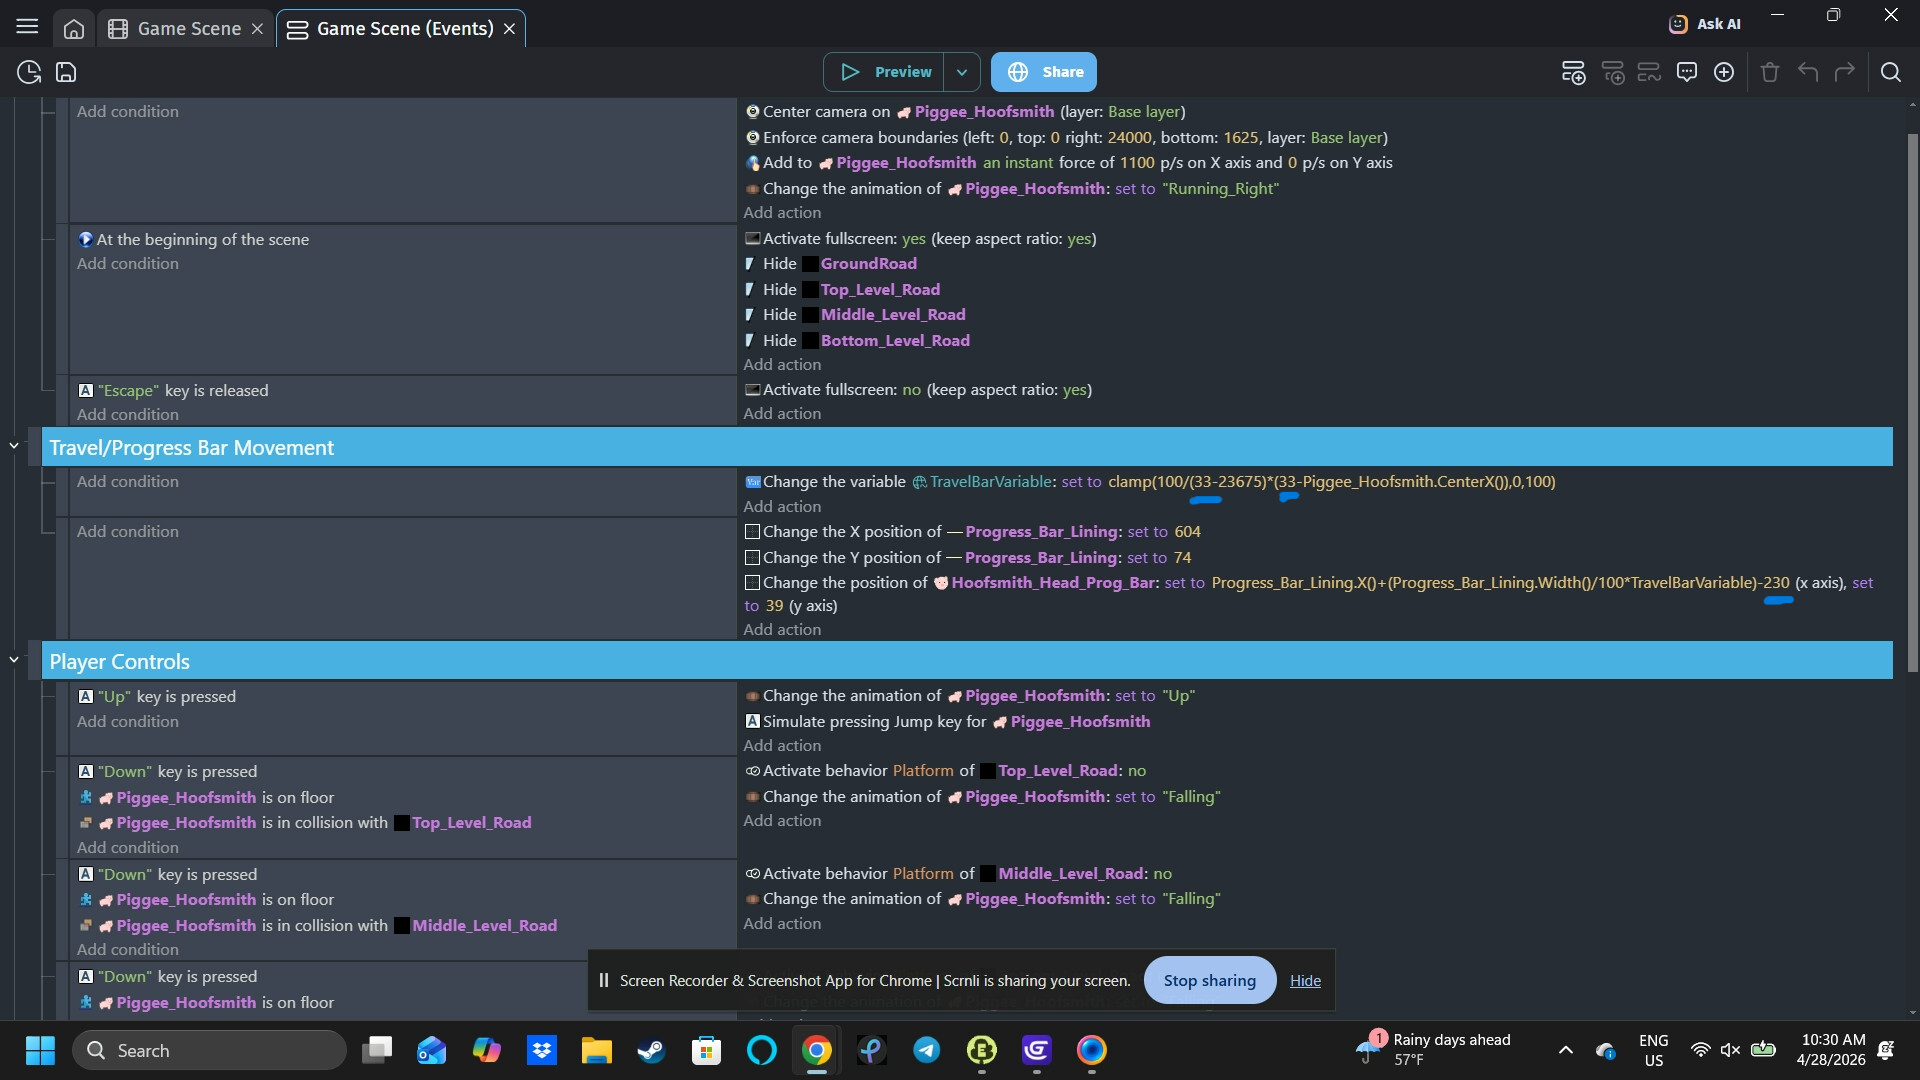
Hey, so your scene coding worked and I made it a global variable so it went super well. However, a problem I encountered is that the character’s floating head starts before the travel bar. I’m not quite sure how to fix it. I’ve included screenshots below.
TLDR; Character’s head starts before the travel bar, and ends after reaching the flag. Used “-230” in the scene events to fix the head surpassing the green flag. Could not fix the head starting before the progress bar.
In this screenshot, although the scene is not playing, I moved the character’s head to mimic where it starts when the scene does play. The character at the bottom starts at 33 on the x axis.
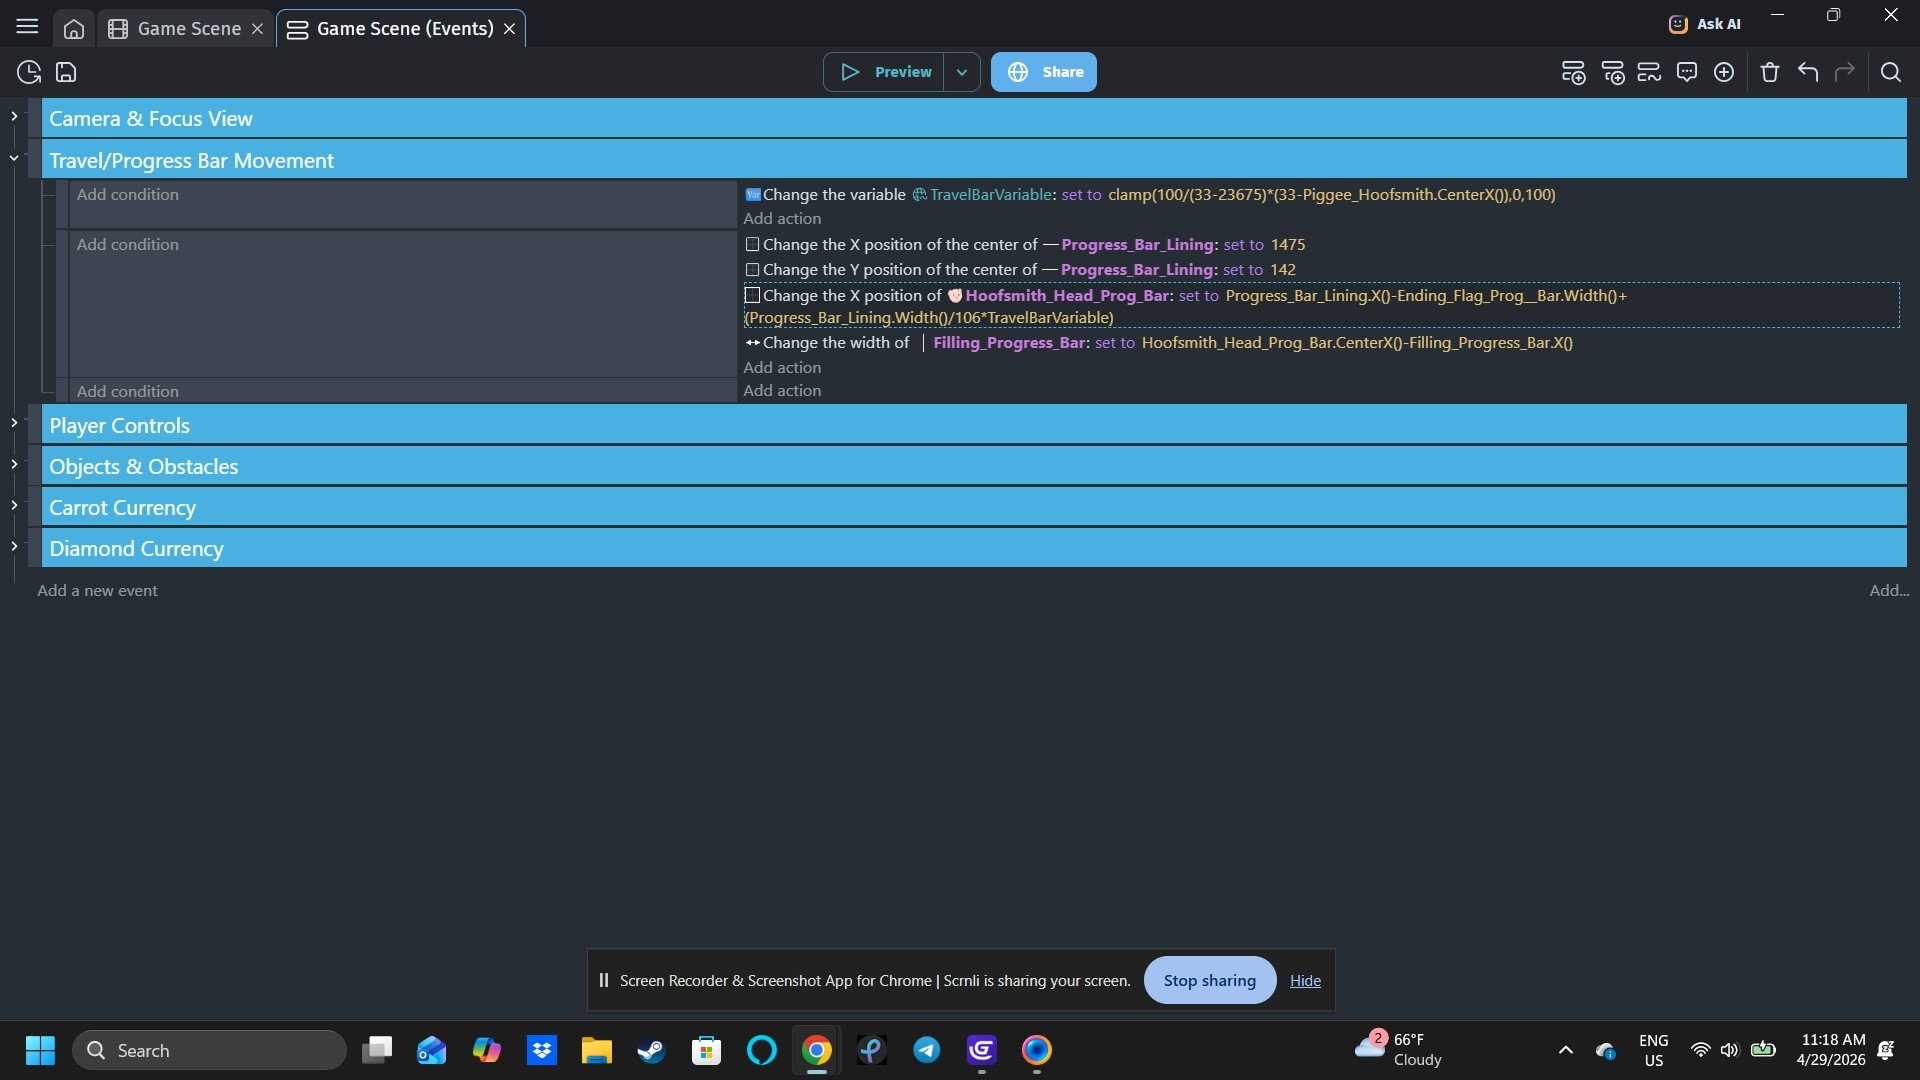
Here’s my coding underneath the “travel/progress bar movement” event group. I’ve highlighted the “33” because that’s where my character starts. But something I had to implement was the “-230” at the end of the action because the character’s head would also end after the green flag. Using the “-230” I was able to stop the character’s head where I wanted (right before the green flag), but I wasn’t able to fix the character’s head starting before the progress bar. :c
You are changing POSITION of your head
Not CENTER POSITION there are 2 different actions for that
Keep what you have but have but remove these offset numbers cause they mess whole math
Easy fix would be to double click your head object in editor
Go to points
And now if you for example head start at right side of head (it will also consider finish when right side of head touches finish line)
Then move origin and center point to right side of head
If you expect something else
Then i would need exact explanation of what position of head you consider as start and what as end
I would consider the end of the character’s head the on the x-axis 2138. I also got rid of the extra “-230” and it fixed the start position of the head. However, now the head still goes past the green flag.
Now think carefully what you are talking about
Cause maybe you have good idea but in reality it should be something else
HEAD should indicate progress of your player on ground
Even in real life what we consider beginning of participant is his RIGHT side
Same for end
When you have all this runs or races
Reaching finish line = touch finish line with your RIGHT side (if we are looking side view)
BUT in progress bar
CENTER of your indicator (head) should determine being on start/finish line
Imagine if it would be arrow pointing down
Would it make sense for it to start on bar by right of arrow and finish when LEFT side of arrow reach finish line?
Or would it make more sense for center of arrow pointing down be the indication?
What you want to achieve is doable just think before you decide its what you want
I mean if it doesn’t look, I’ll just change it if need be. How would I go about fixing the position of the head so the right side is touching the flag?
Thank you! Although that solution did not quite work, I actually just replaced the “item.width()/100” with “item.width()/105)” and added the subtraction of the flag in this progress bar at the top that somehow did the trick.
If I centered the position of the sprites, unfortunately the character’s head on the progress bar would only move on top of the actual progress bar and I’m not sure why that is…
Here’s a solution that hopefully fits your requirements:
Notes:
Meter sprite has a point added to the middle of the right edge named “HeadPos”.
ProgressBackground is a sprite with a width of the entire progress bar.
HeadIcon sprite has the origin set to its centre.
Start is an object marking the start of the level
Target is the object marking the end of the level