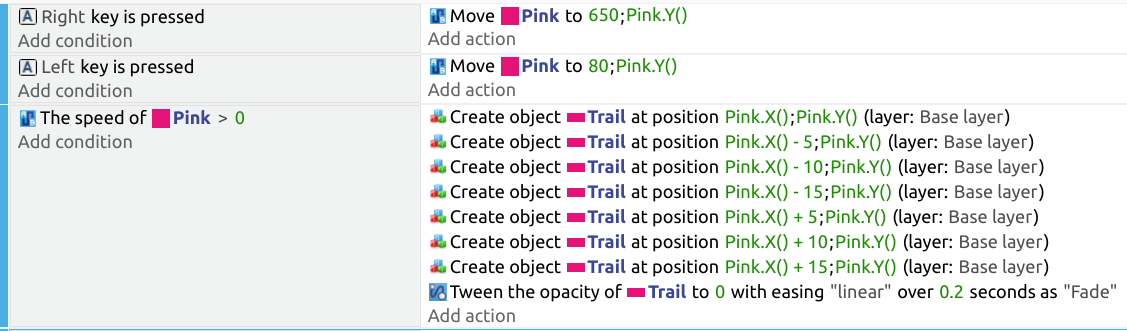
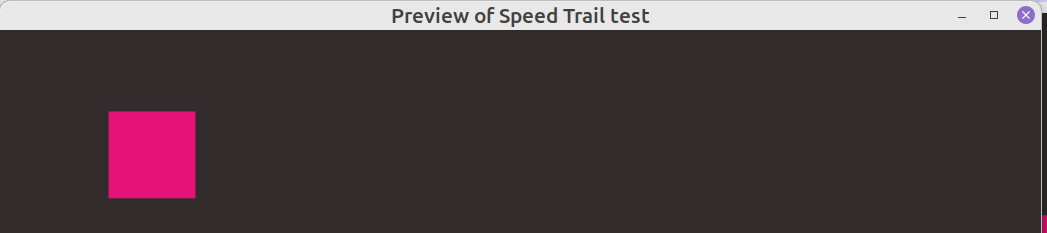
I control that pink square. When I press certain different keys, the square dashes to a different X-location very quickly using a pathfinding-behavior. I was hoping to add shadowClones or a trail behind it to highlight the speed and traveled distance, but it turns out to be surprisingly difficult.
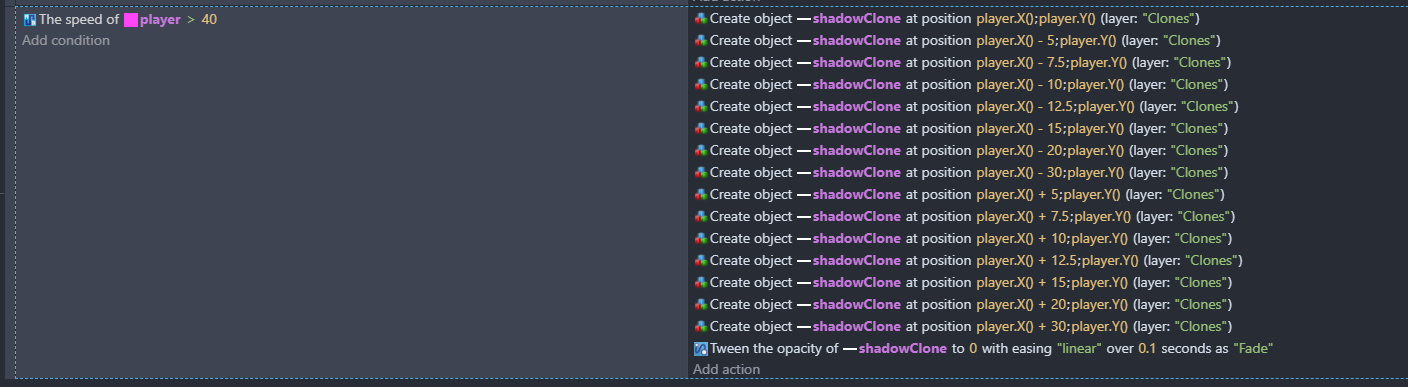
All tutorials I’ve seen add the shadowClones (in a trail like manner) by spawning disappearing copies of the object every frame. The problem is that my object moves to quickly that there are maybe only 5 frames of movement when jumping from far left pillar to the far right one. This leads to only 5 shadowClones that are very far from each other. It doesn’t look really good at all
Maybe some kind of thin white trail would work better, but I really don’t have currently any ideas for how to implement that. To avoid the same problem I faced with the shadowClones, the trail must be continuous. Here’s a description of an example. It describes the envisioned consequences of doing just one input - jumping from far left to far right.:
FRAME 1: the trail starts from the original player location (not visible since it’s under the player at this time). The key is pressed.
FRAME 2: the player is far from the frame 1 position. Trail expands from the frame 1 location to the current location of the player
FRAME 3: the player is far from the frame 2 position. Trail expands even more, connecting the original location and the current location with a continuous line.
FRAME 4: the player is far from the frame 3 position. Trail expands even more, connecting the original location and the current location with a continuous line. But it also lowers the opacity of the first part of the trail (which was born in between the first and second frame) so the old parts fade out.
FRAME 5: Same as frames 3 and 4 but this time it’s the second trail part which starts to fade out, while the opacity of the first part of the trail lowers even more.
Keep in mind that there is no reason to try to implement what I’m looking for this way, if easier solutions exists, so please share your suggestions! :> I wrote that example just to make it easier to understand what kind of visual effect I’m looking for! I’m not even sure if that kind of solution is possible in gDevelop.
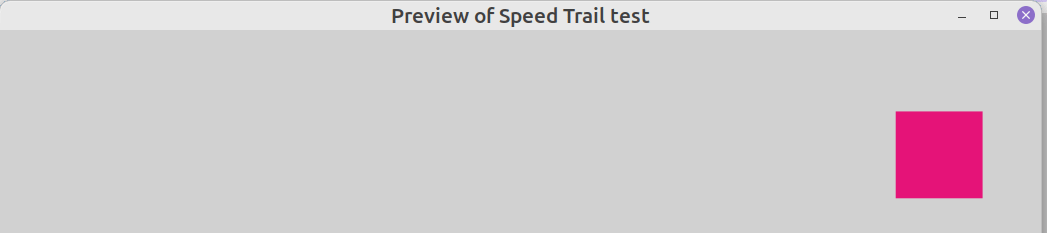
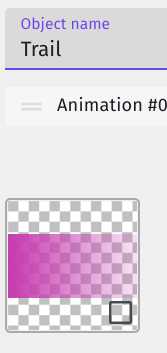
The actual result is a bit smoother than in the gif. I made a trail object twice the width of the pink object. When it was the same width there was too much spacing between the trails. You would have to experiment with the tween time based on the speed and distance travelled of your object.
Hi! Thanks for the idea. I think it’s better, but it’s still not ideal as it is. I tried it and here’s the result:
As you can see, the gaps between the shadows are still huge. From the gameplay perspective, I really can’t afford slowing the cube down.
I tried to make the trail 5 times wider than the block too. Even then the trail doesn’t stay connected the whole way! And at that point, it starts to be too long for the smaller jumps: it starts to “leak” outside the traveled area.
Also, it doesn’t really look nice how the “trail-parts” here sometimes overlap a little. The trail should get more and more faded as we approach the end the trail. Here however, there is sometimes a little overlap in the end of the trail and this leads to sudden higher opacity, which looks a little messy.
Hi Valo, yep tricky problem. You didn’t say what the speed of your object is. I’ve increased mine to 35000 px/s to try to get it similar to yours.
When it was that fast my method clearly didn’t look good. With the same double width speed trail I added some new create actions. I don’t like it but it does improve things. But yeah, a better/different solution would be good.
I get this little gap at the very end of the dash. Maybe I should try to create a trail-part right behind me for the first few frames after stopping to fill it. And this of course demands that I keep track which direction IS behind, ugh.
Also, small dashes seem to break because we add so much trail in front of the square in order for the trail to work in large dashes!! – –
– – Actually, now that I think about it, this problem probably could just as well happen with large dashes but on the large dashes the timing of the frames just happens to be so the last frame before stopping is so far from the eventual stopping location, that instead of going over, it’s not going far enough!
Very tricky but I’d assume this is the right path: create trail parts in multiple locations at once
Hey actually I have a little simpler idea that could look alright. I should test it tomorrow.
Maybe I can just give up on the idea that the END of the trail must fade before the rest of the trail. Maybe I should just create an object that stretches from the starting location to the middle of the square and fade out all of it right after stopping OR switching direction.
I’d imagine that this strategy won’t lead to any type of gaps.
Might lead to other problems or not look good enough, but it’s worth testing.
(thank you for your effort by the way, tremendous respect!!1!)
Nooooo. Haha, well if you have to. Or what if the trail object itself has a gradient from pink to transparent? But this would mean flipping it depending on which direction the moving object was going in.
Looking forward to your results, I’ll keep thinking too.
just a small little update. I said 2 days ago that I would test my idea tomorrow but I haven’t had time to do that. School deadlines surprised me. I do it when I’m able to
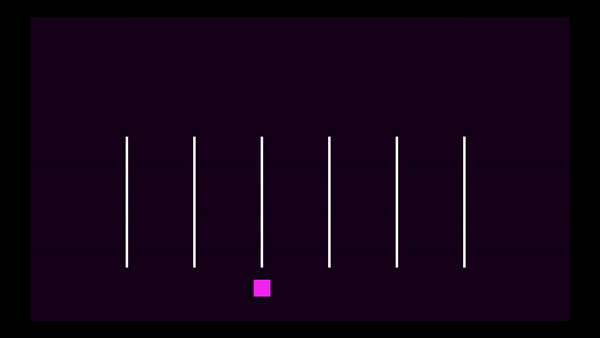
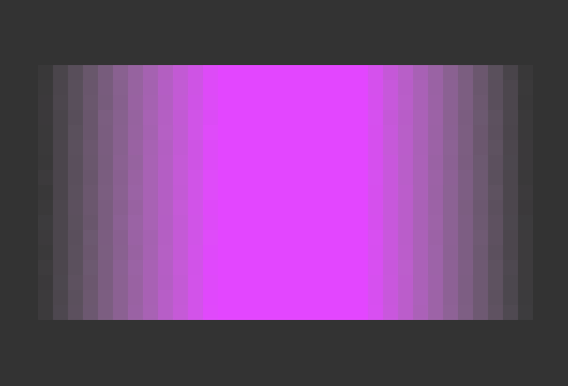
This is what I currently have. It actually looks very good in my opinion.
I think it could look even better if I do what you suggested: make the trail object itself transparent.
As you said, if I do this, I’ll require me to flip the sprite when I change direction.
I’m almost sure I’ll be able to do this but my first solution would include probably a lot of unnecessary events.
I just wanted to share my current solution for the future developers and ask if you have any simple, clever solutions for the flipping problem.
Hi VALO, thanks for the update. I had tried to do my own thing with it using some stuff about changing trail width with lerp from another post but I just didn’t understand what I was doing. I didn’t know about the Distance parameter you used. Nice.
I put your events in my test project but didn’t get great results because when I make the speed very fast to look like yours, the player goes far past the destination and then ‘bounces’ back to where it’s meant to be. And the trail is only long when it’s in the bounce back area, not the actual area from A to B. But the trail looks good though, just in the wrong area. What is your player speed and acceleration and did you do anything to avoid the shooting past the destination problem?
Also, if I disabled your first event, the effect looked the same.
I can see you’re using a lerp formula for the third event for trail position, very clever.
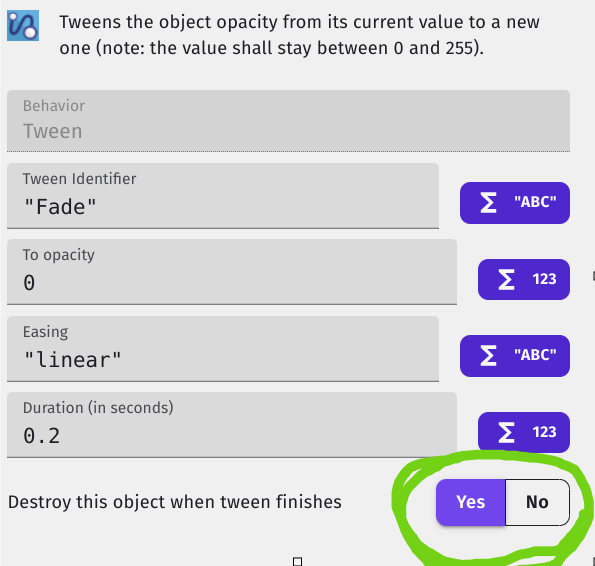
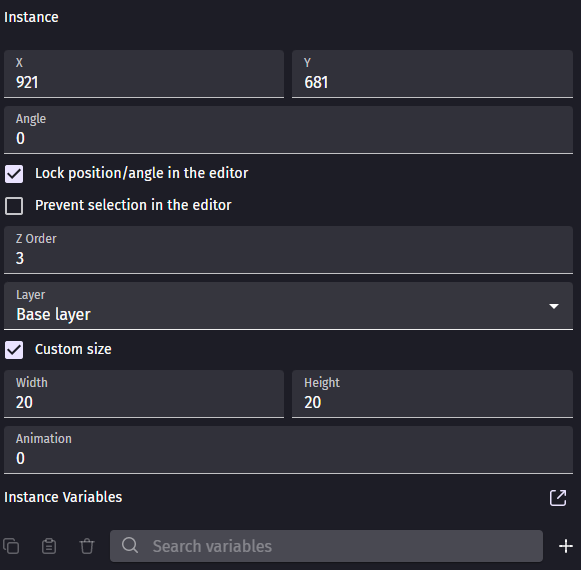
LASTLY remember to edit the points in the object properties! The player and the trail both have points in the middle of them (not in the upper left corner, where the points are set by default)
If I’m not forgetting something here, then this should be more than enough for you to replicate my results
Btw, I didn’t figure out the “formula” by myself. A dear friend of mine (who doesn’t understand code but understands math) helped me.
Thank you very much VALO for sharing all the how to pics. I copied it and still had the problem of the player shooting past the target when it was a long distance. But there was one thing I hadn’t changed, the pathfinding virtual grid cell width and height. When I changed that to zero it worked like yours. Yayyyy. By the way, I had the same pink player as you but made the trail pale pink rather than white and it looked very ‘traily’. Thank you again.
It’s my pleasure! Let me know if you come across a clever way to keep track of the facing direction. We could then make the trail transparent or triangle shaped◀️ and flip it accordingly
Yeah, there would be easy enough ways to detect direction change like flip trail if left key is pressed etc. But I experimented and made a double sided transparent trail with no flipping. It looked a bit better than a plain color and the fact that it was transparent on both sides wasn’t noticeable at that size and speed. I made it 32 pixels wide so that the main solid color is about 16 wide.
That’s a bit small to see, here’s what it looks like zoomed in on a black background.